GCash KYC Full Verification: How to GCash Verify Account Online
Look no further as we will guide you on how to get your GCash account verified.
What is KYC process in GCash?
Let us first define what is KYC?
KYC stands for Know Your Customer. It is a verification step required by the Banko Sentral ng Pilipinas to ensure that customer information are accurate and serves as a protection to both the service provider and the customers.
Since GCash is a financial institution, it is necessary to implement this requirement from BSP.
Fortunately, they provided various ways in other to fulfill the verification process.
You just have to choose which one is convenient for you.
If you haven’t register for a GCash account, check out our blog post on How to Register in Gcash via Text (Access Code *143#)
But if you prefer to register via the GCash app, let me guide you on how to do it in the next section from registration up to full GCash KYC verification.
For those of you that already have a GCash account, you can do the GCash KYC verification through:
- GCash App (Check out our step by step guide in this section)
- Facebook Messenger (We also have a separate section for this)
GCash Register and KYC Full Verification via GCash App
If you are new to GCash, you have come to the right place.
Let me show you how to register in GCash and to have your GCash fully verified afterwards through the GCash app.
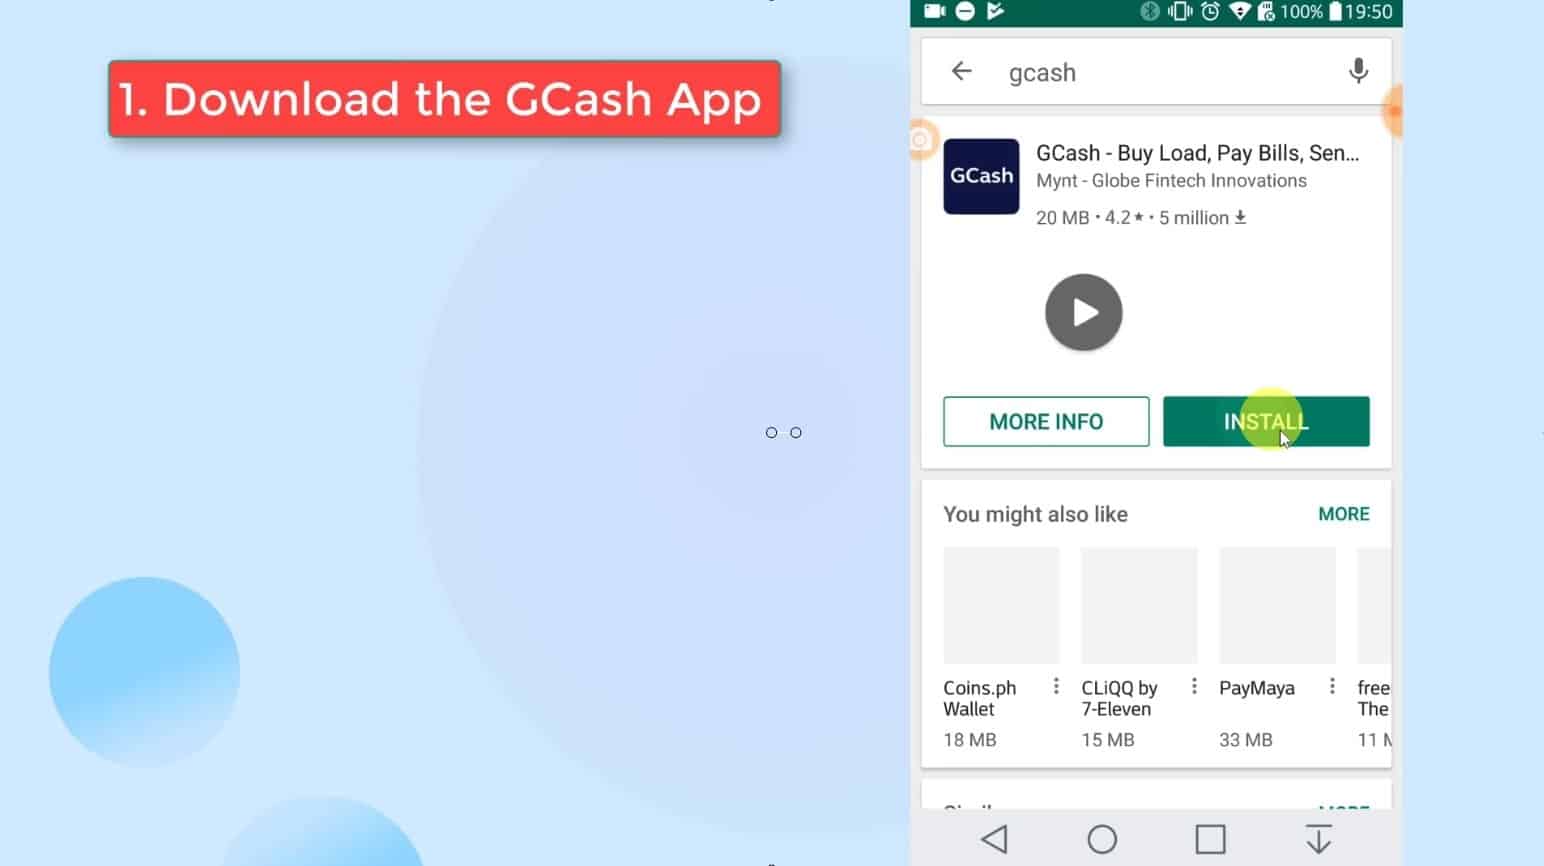
Step 1: Download the GCash App.
The GCash app is available free for download in Google Play Store and iOS App Store.
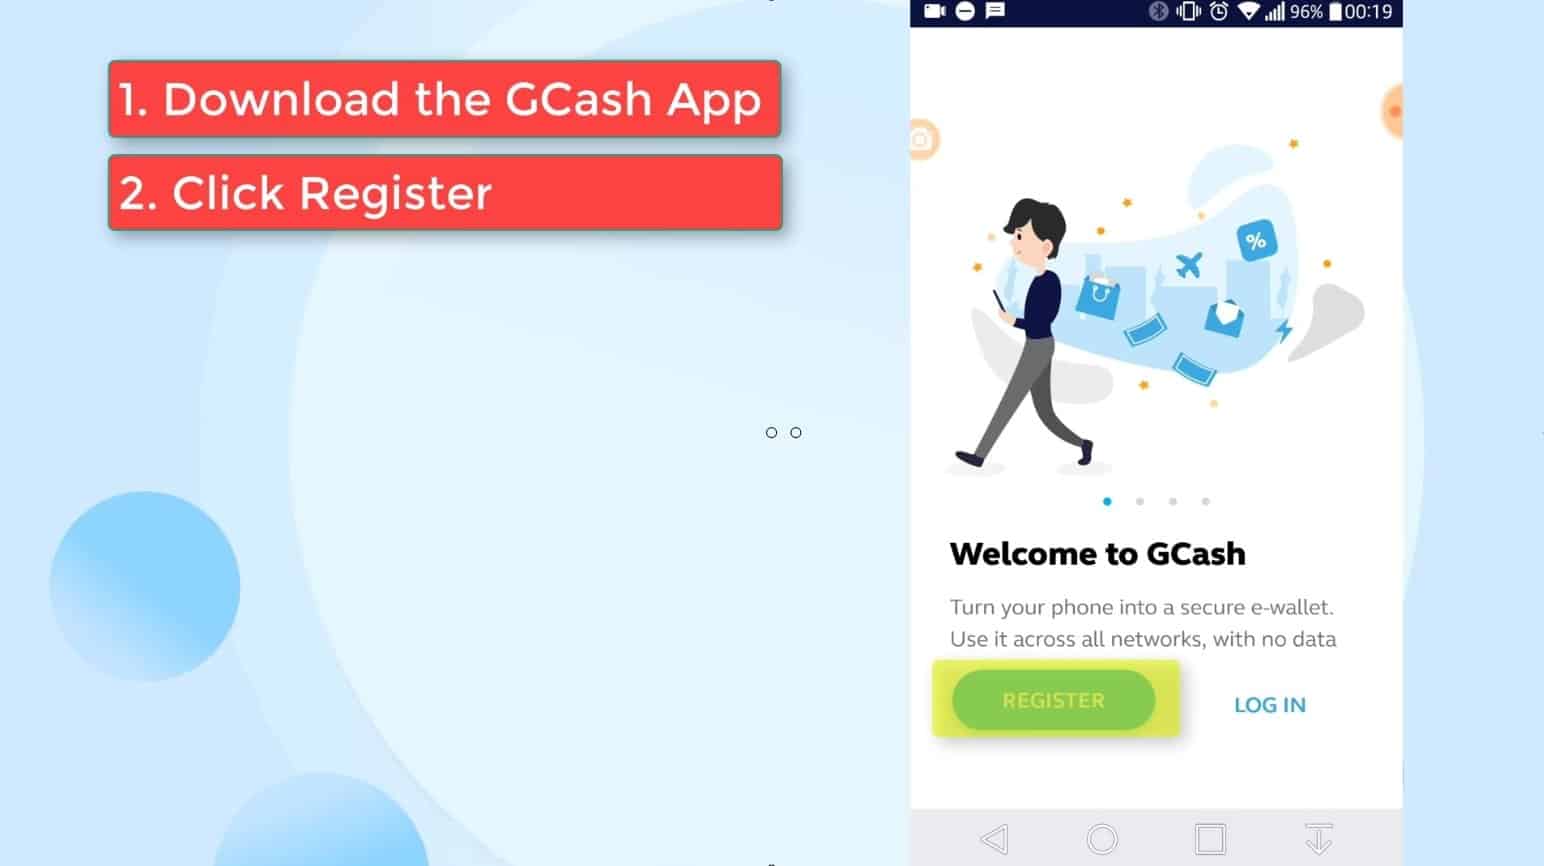
Step 2: Open the GCash app and click on the register button.
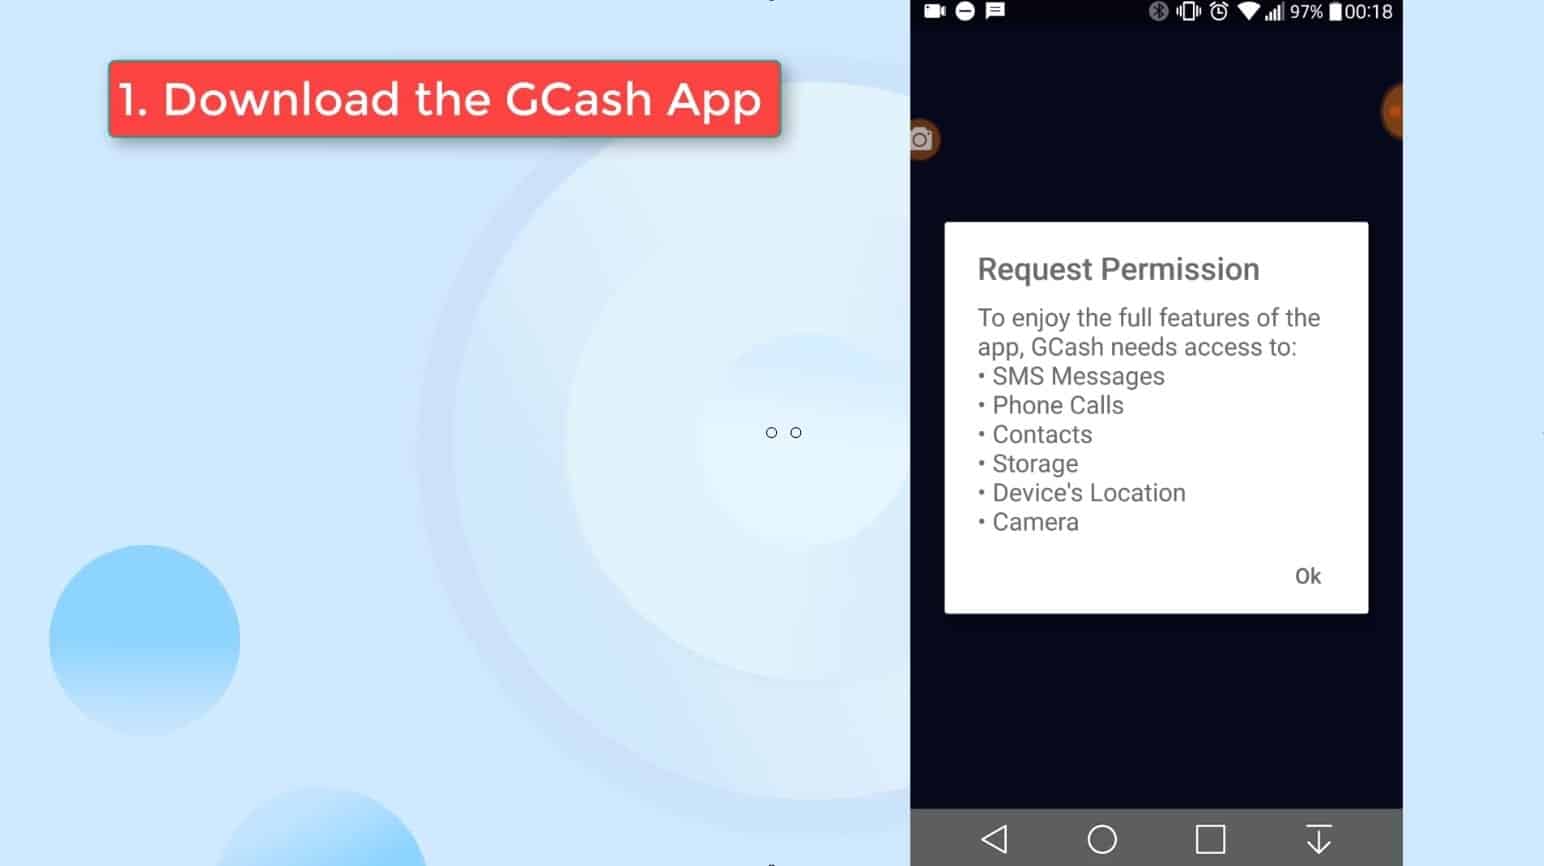
After installing the GCash App, it will ask for several phone permissions.
You would need to allow the access permission requests in order to fully use the GCash App features.
Some of the access permissions that it need to have are as follows:
- SMS messages
- Phone calls
- Contacts
- Storage
- Device’s location
- Camera
Since we do not have a GCash account yet, click on the Register button to continue.
Step 3: Enter your mobile phone number.
You can already use any phone number.
The GCash app is not anymore exclusive to Globe users.
In our example, we actually used a Smart SIM.
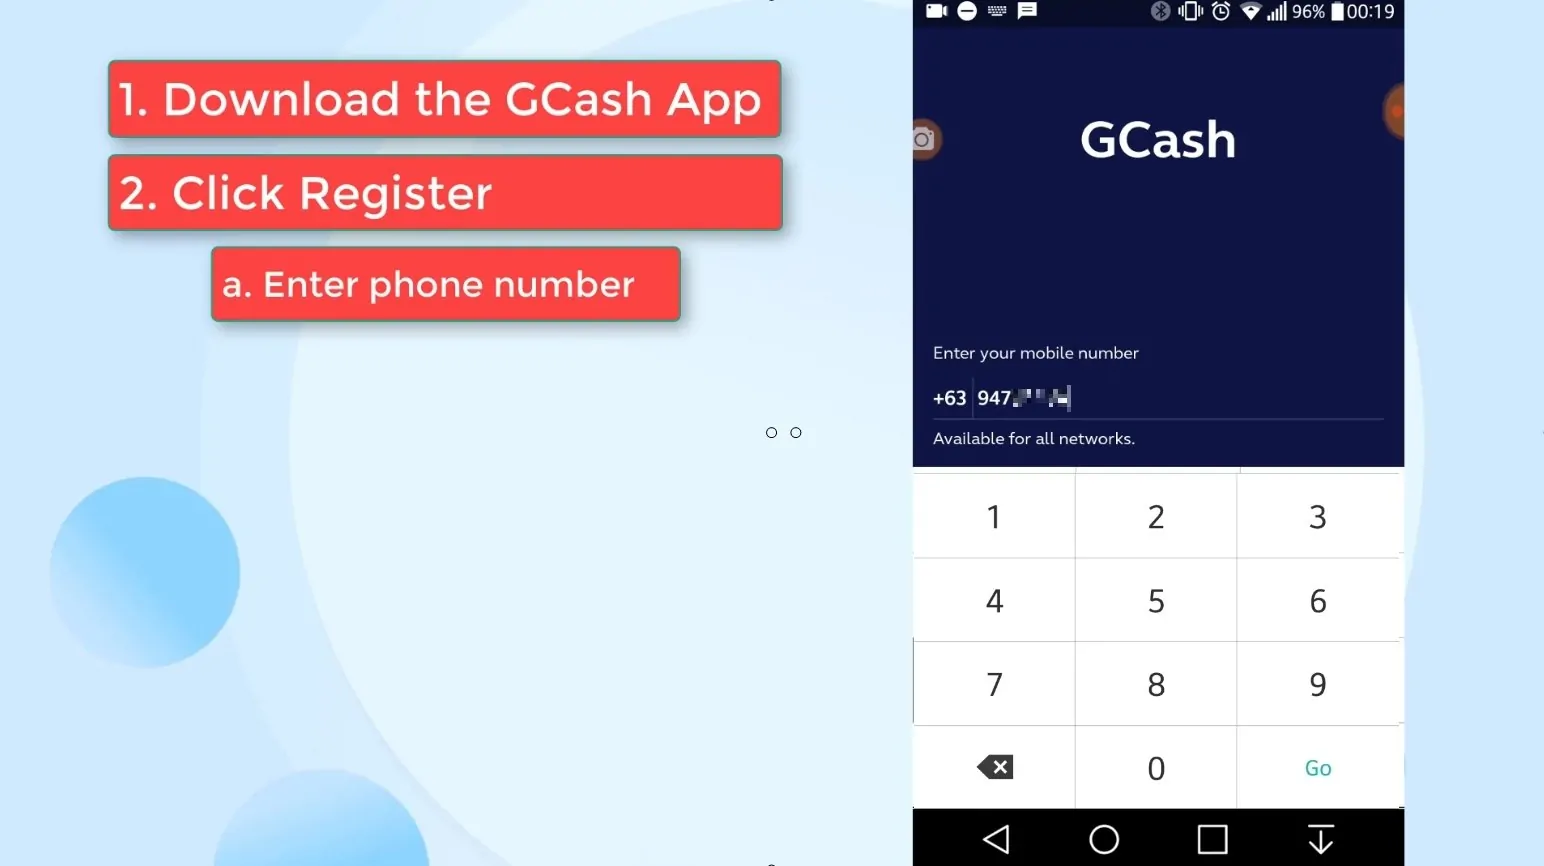
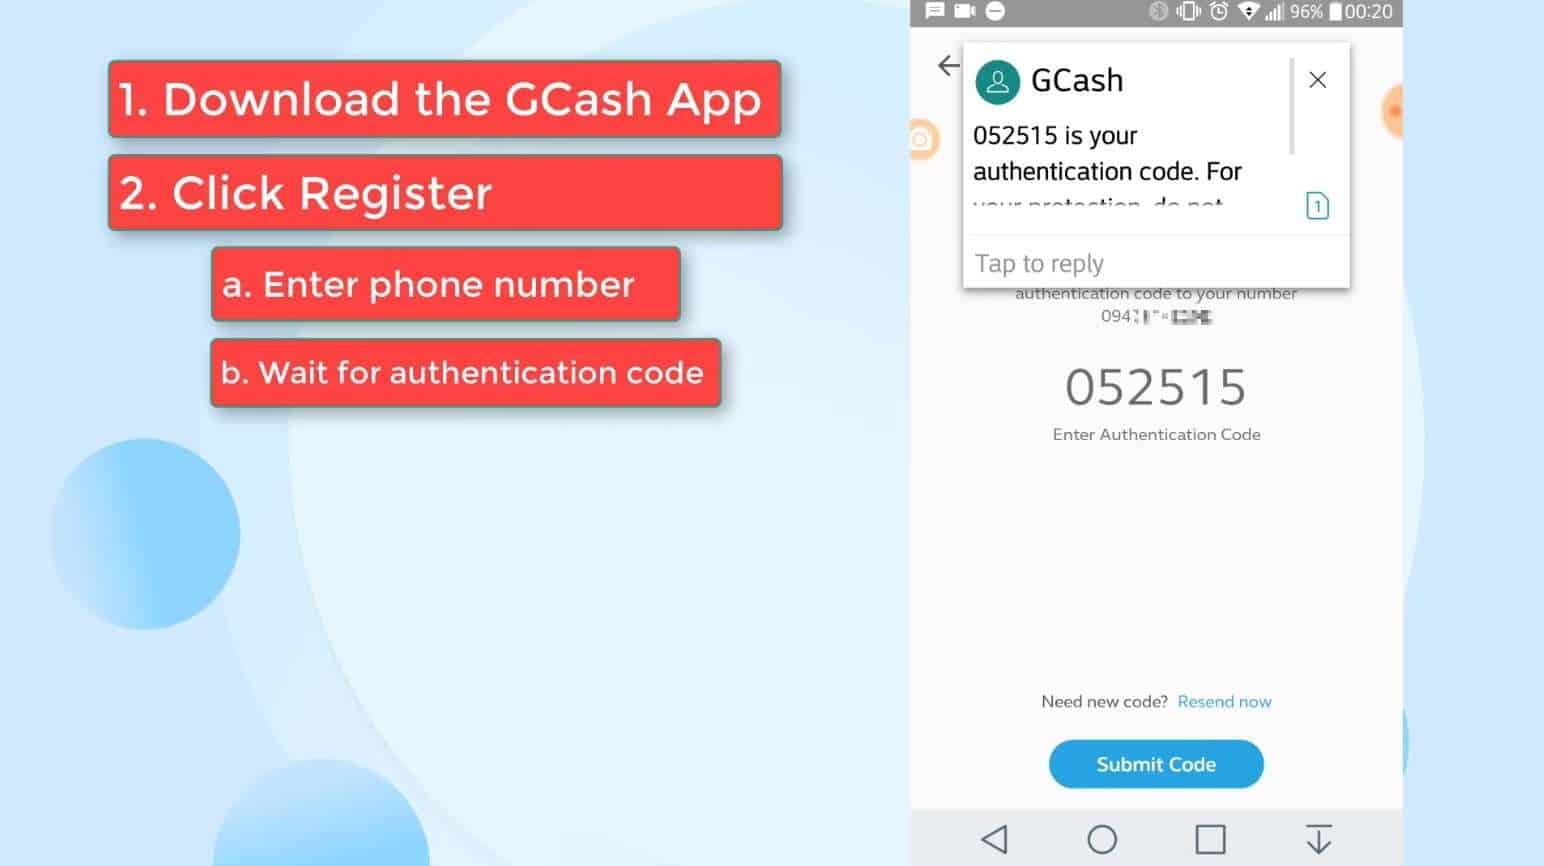
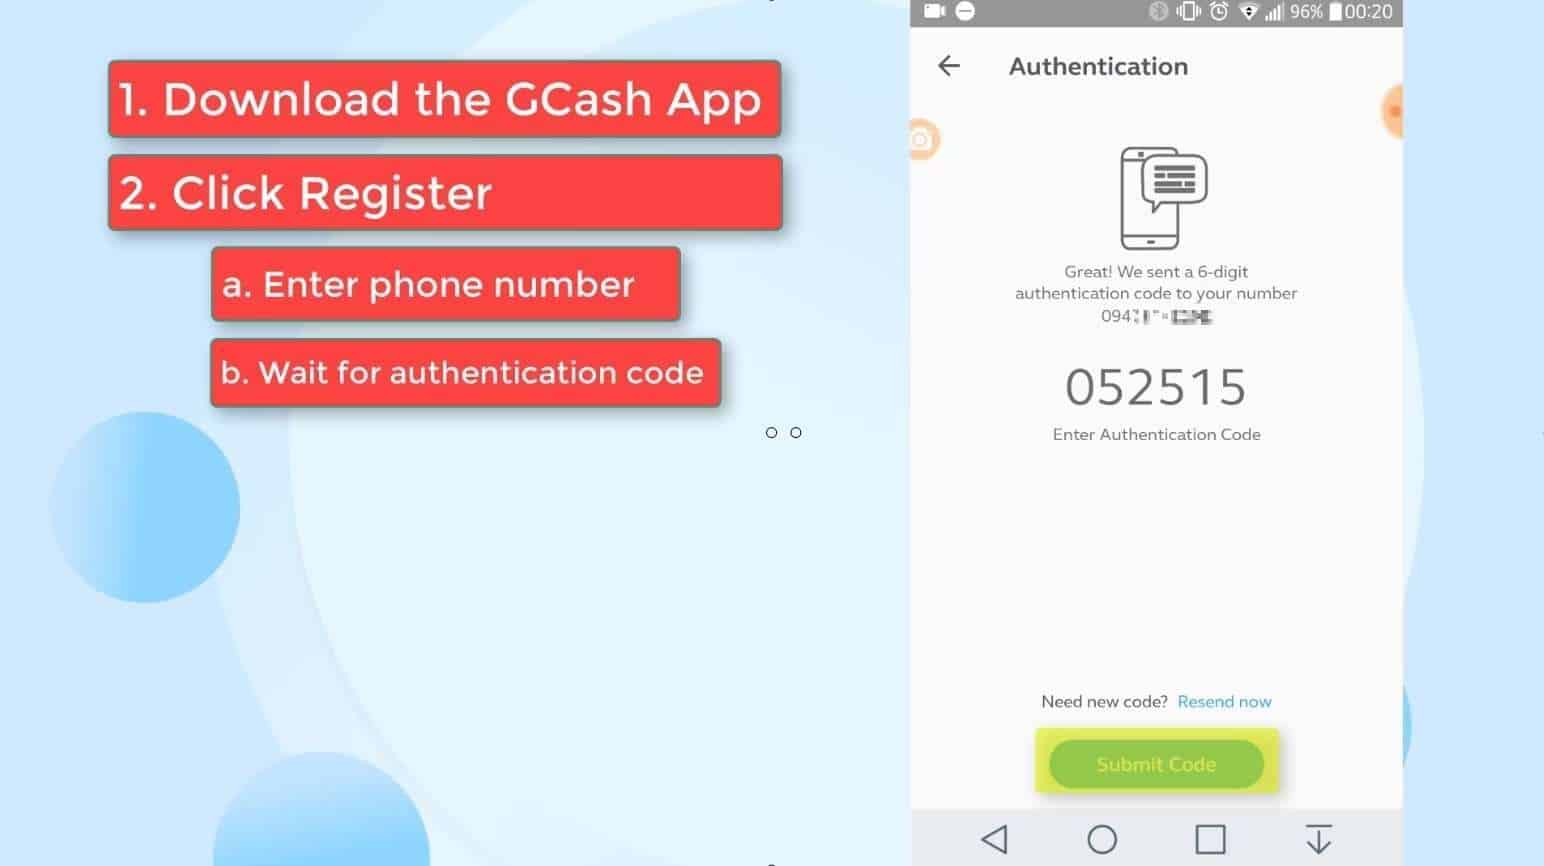
If it does not automatically populate upon receiving the sms message, you have to manually enter it in the space provided.
If in the event that you did not receive a code, you can click on the Resend now link to have it regenerated.
Click on the Submit Code button to proceed.
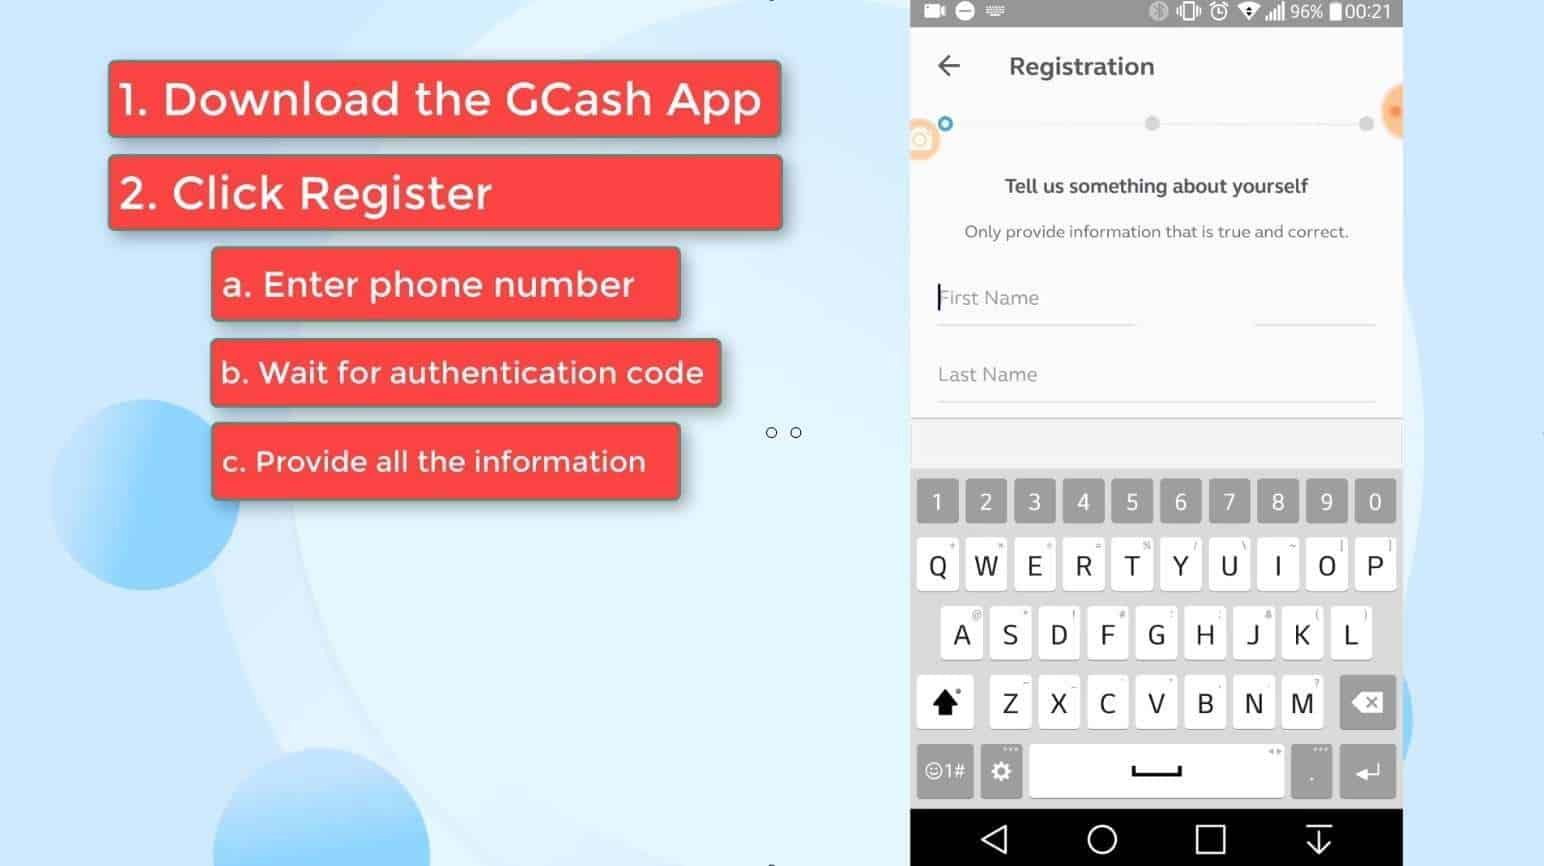
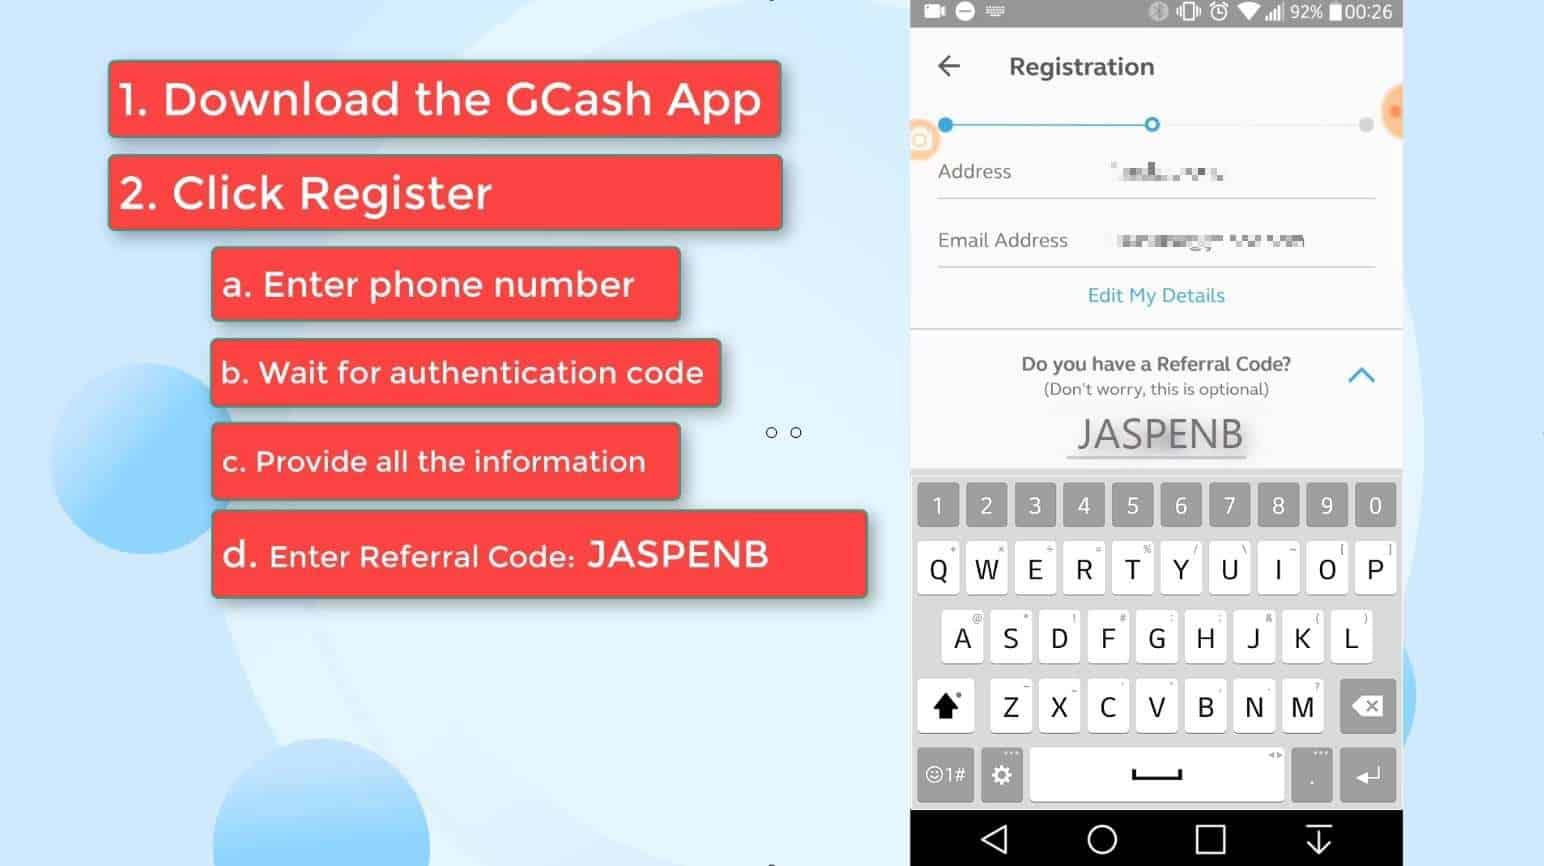
Step 4: Provide all the information required.
You will be asked for several personal information such as:
- First name
- Last name
- Full name
- Birthdate
- Address
- Email address
- Referral code
You can use our referral code below so that you can have 50 pesos for free! ?
Referral code: JASPENB

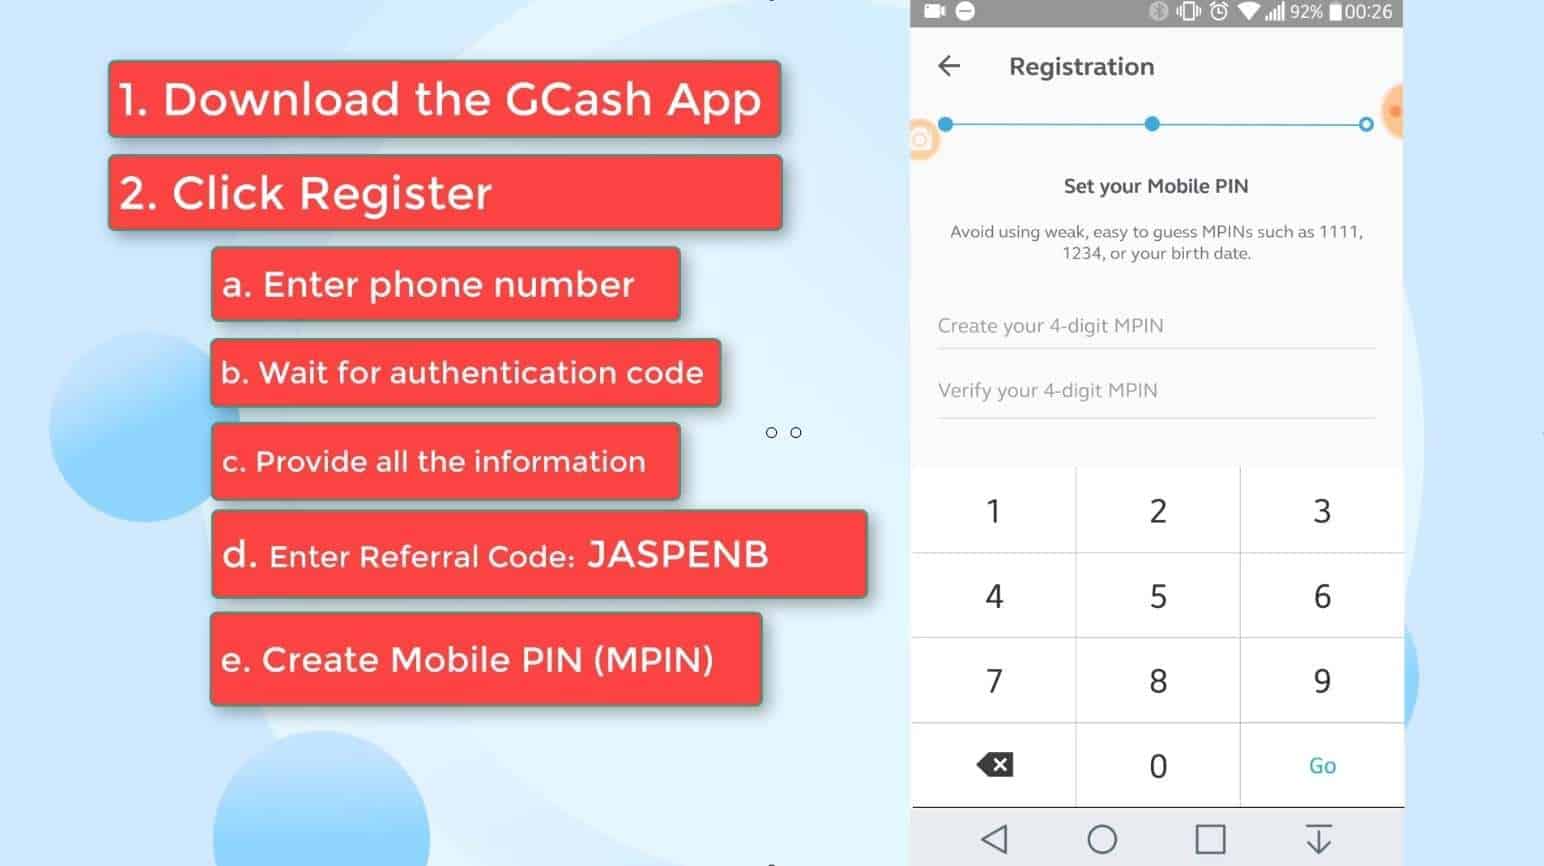
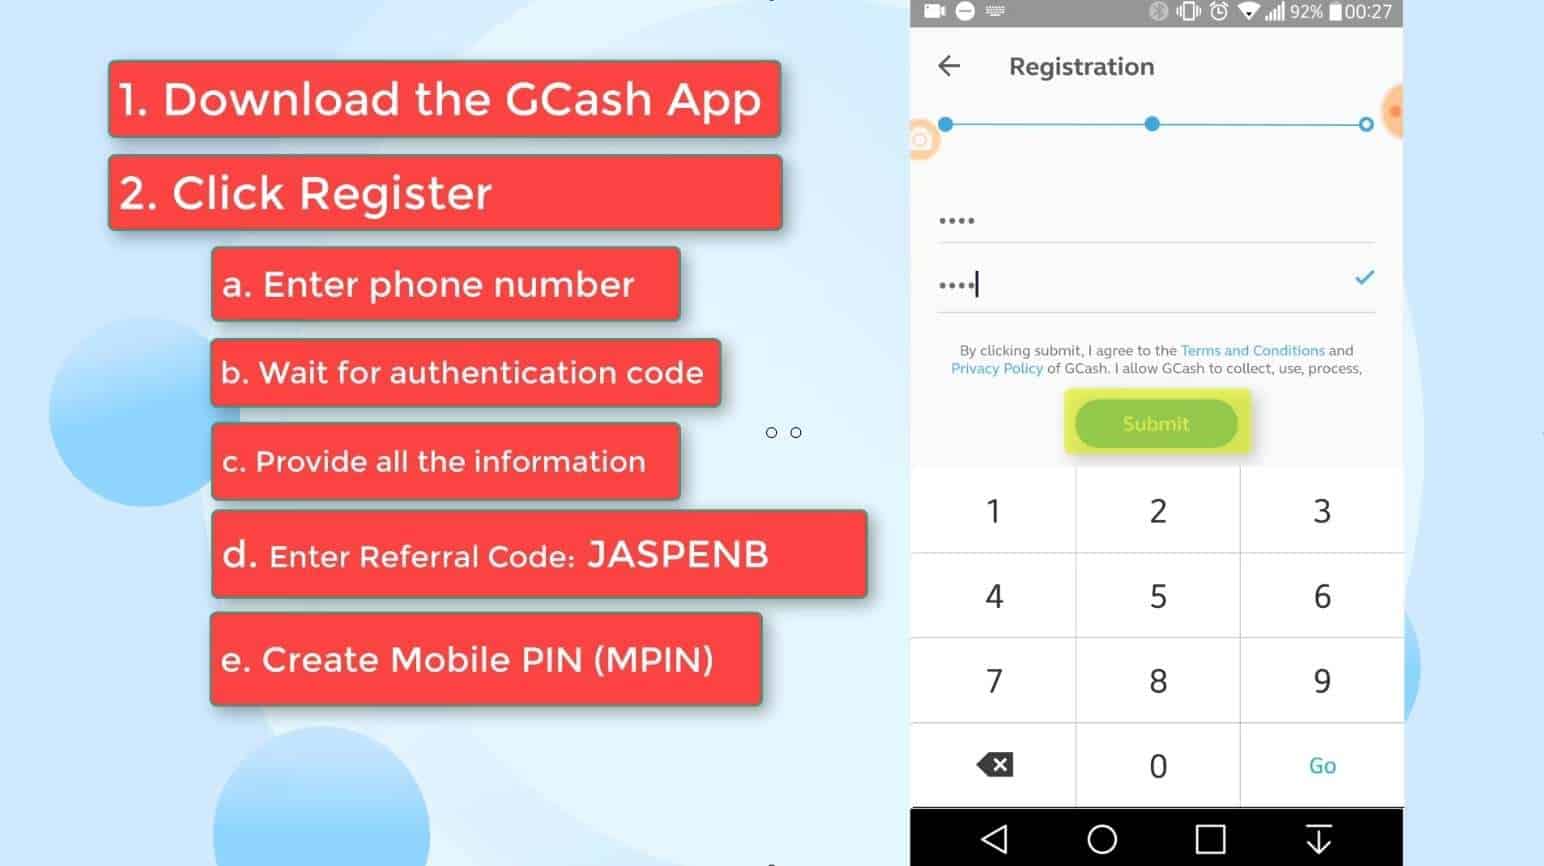
Step 5: Set your mobile pin (MPIN).
This is an important step in the GCash account creation / registration process.
You have to create and setup your MPIN for added security.
Avoid using easy to guess password or your birthdate.
Then, click on the Submit button when done.
Click on the Proceed to Login link to continue.
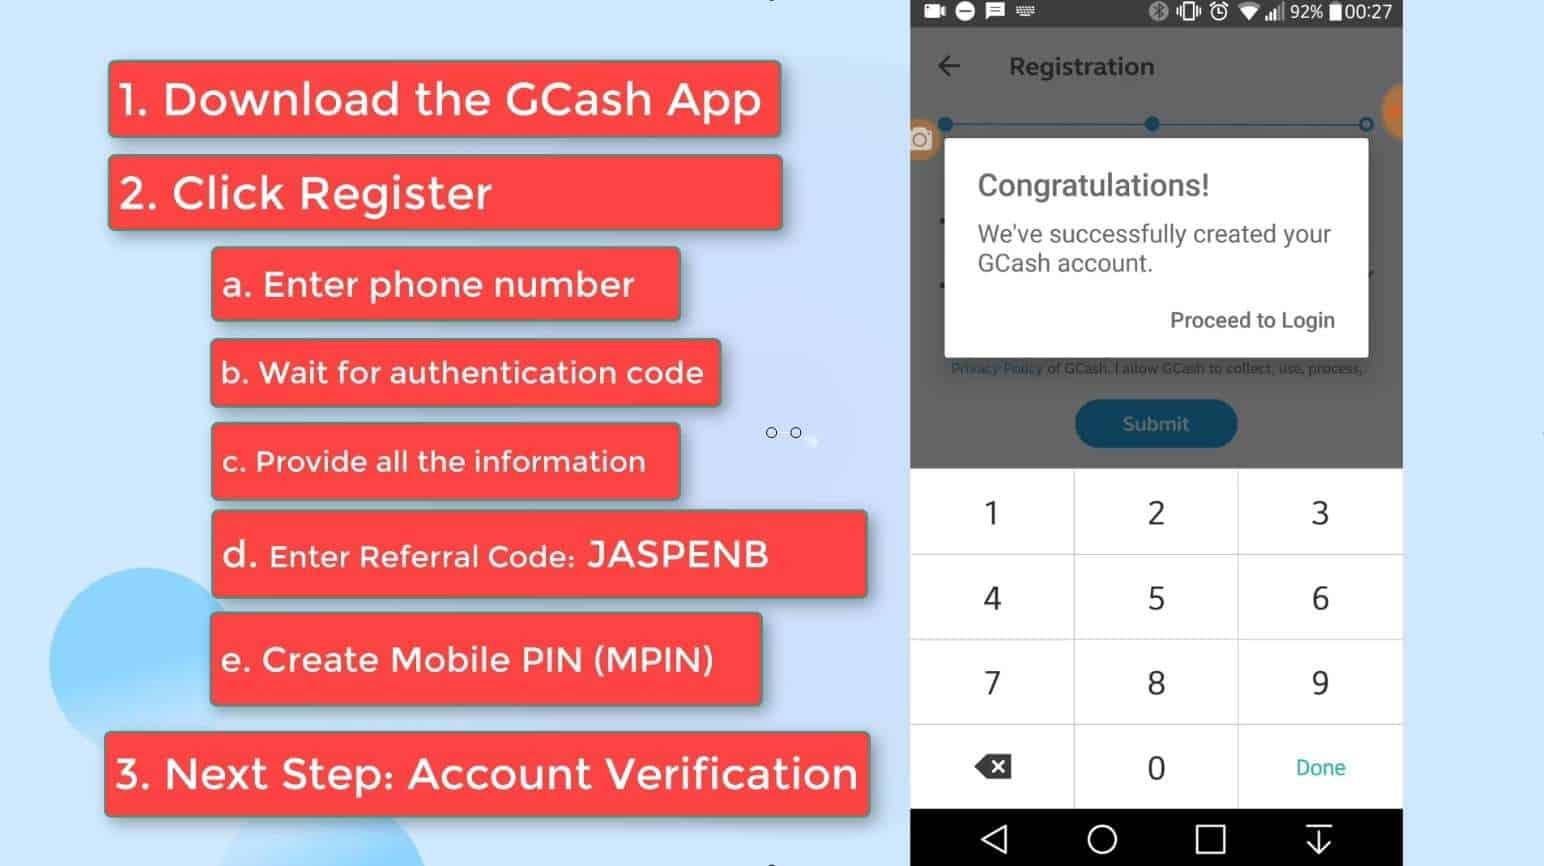
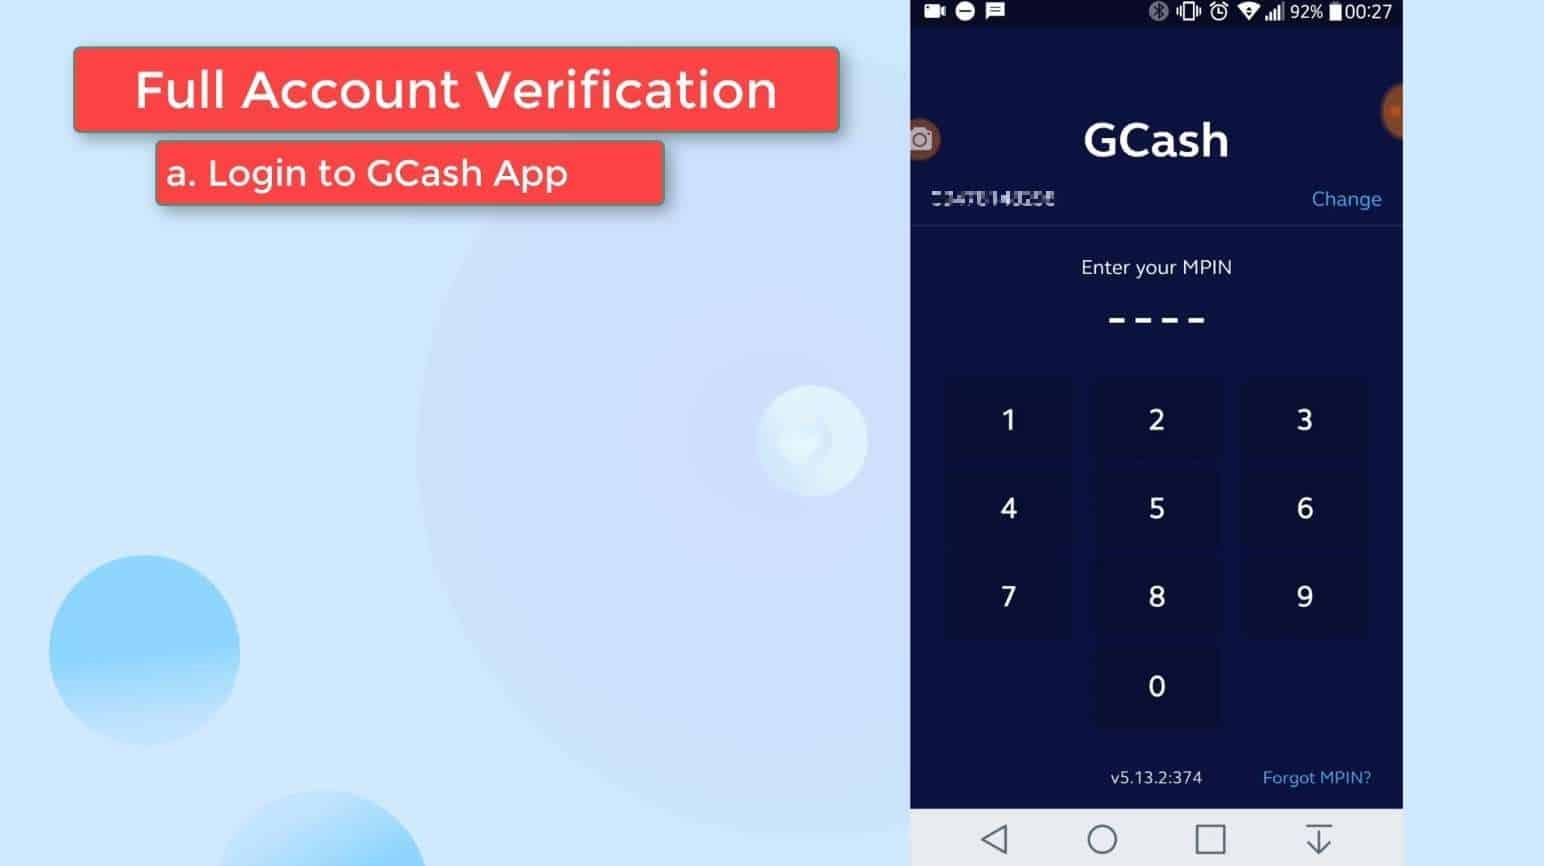
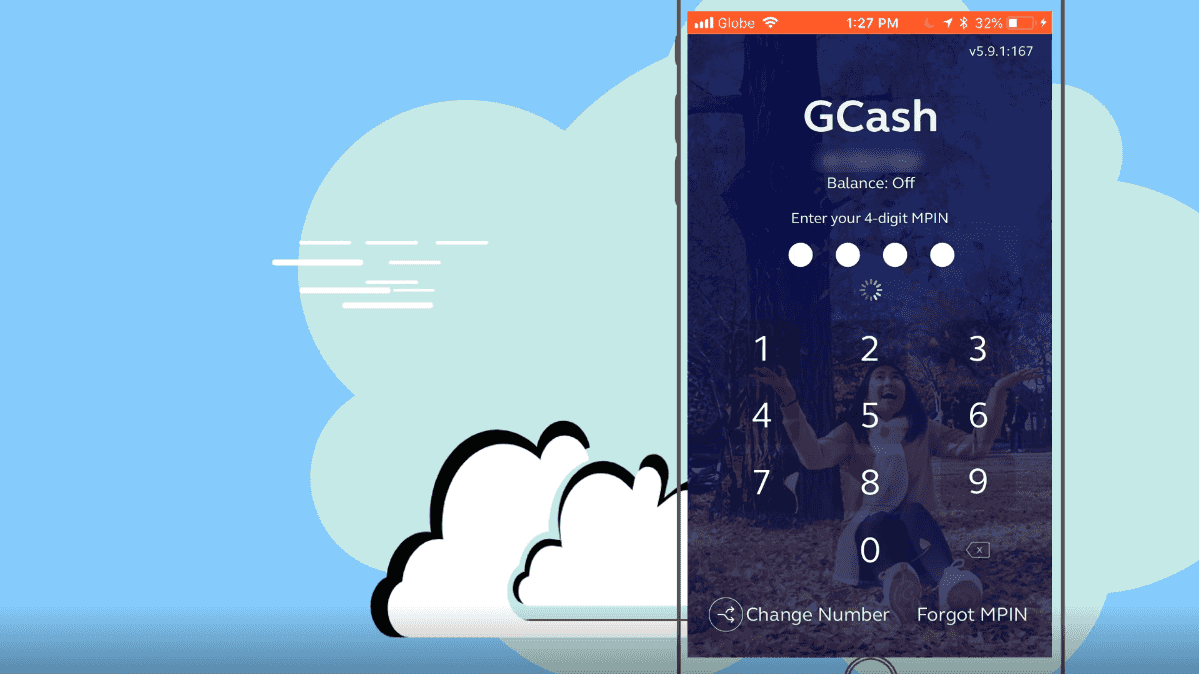
Step 6: Login to your GCash app by entering your MPIN.
Now we move on to the GCash KYC full verification process.
Enter your MPIN to login.
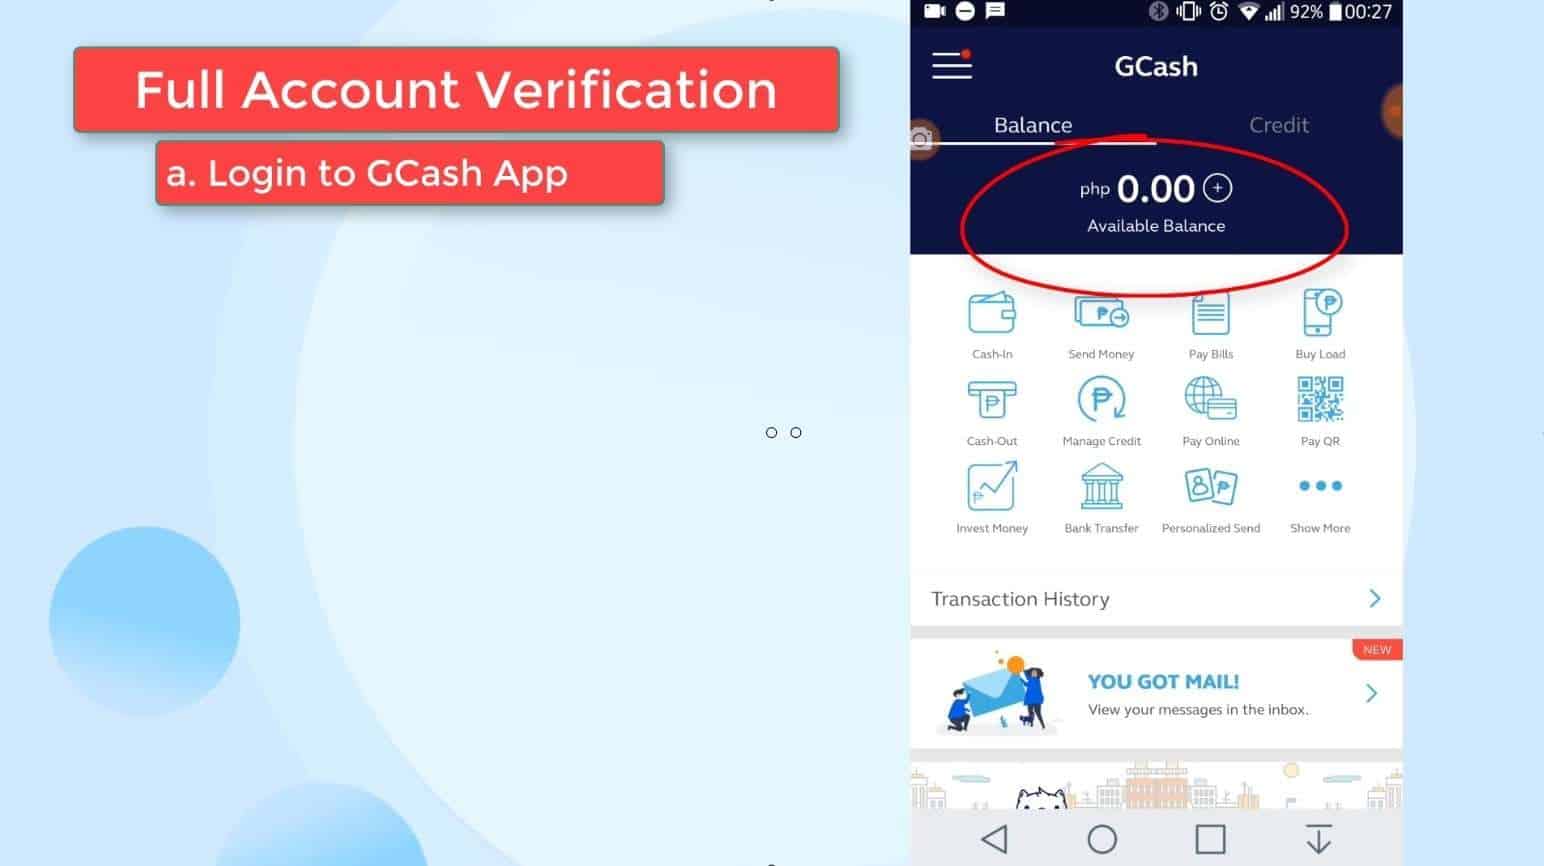
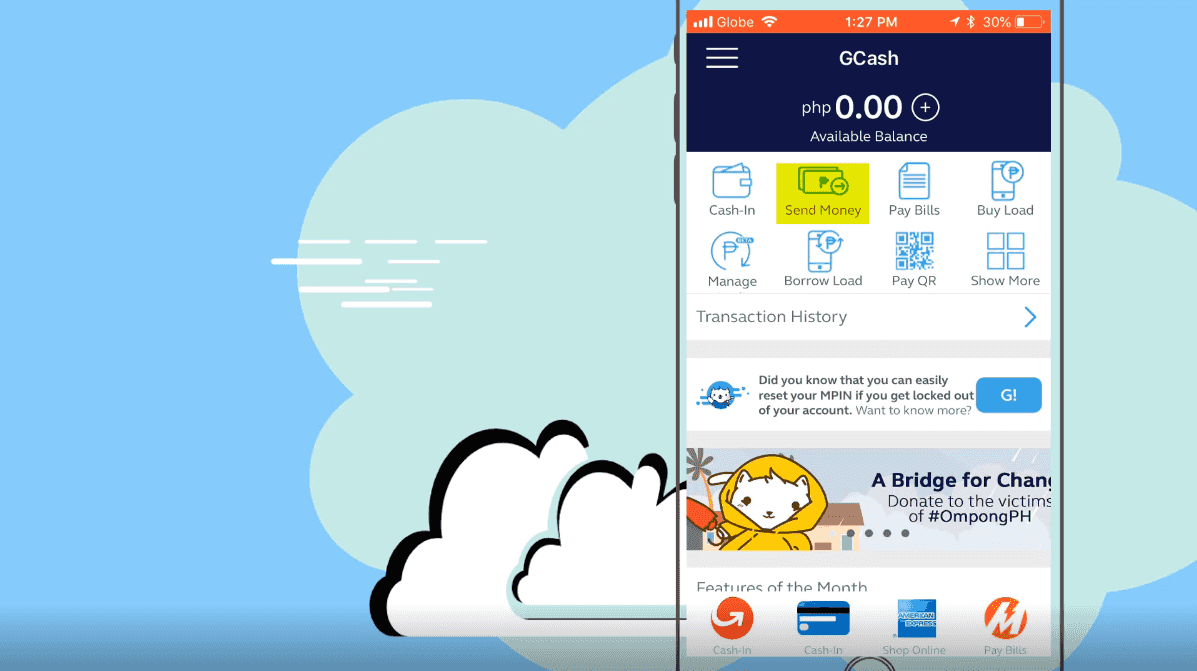
As you can see, you’ll be able to easily see your available balance.
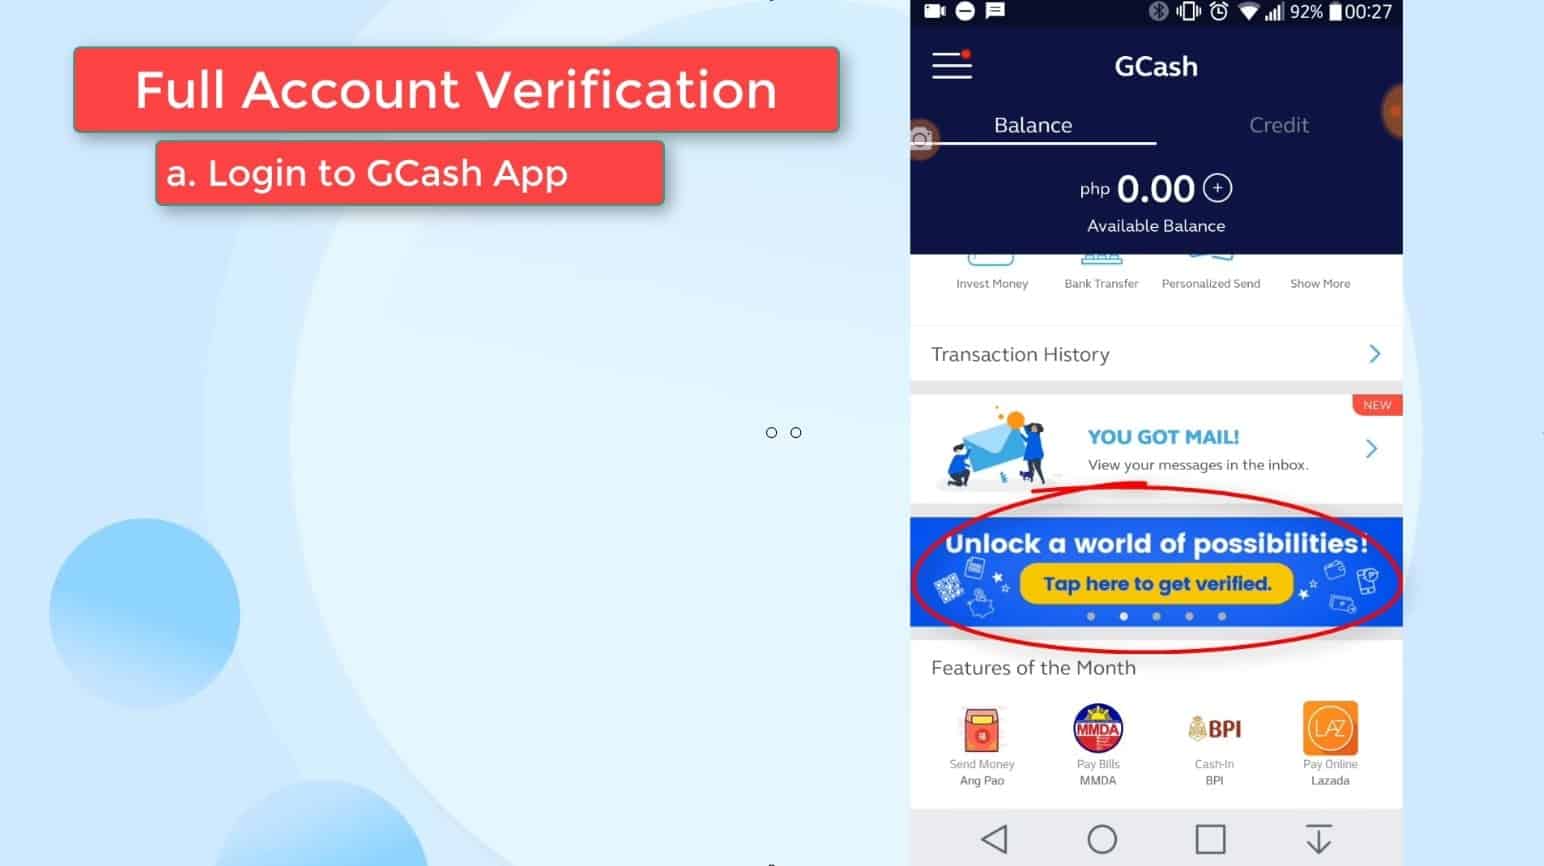
There is also a banner section where promos and announcements are being shown.
Be sure to regularly check those banners.

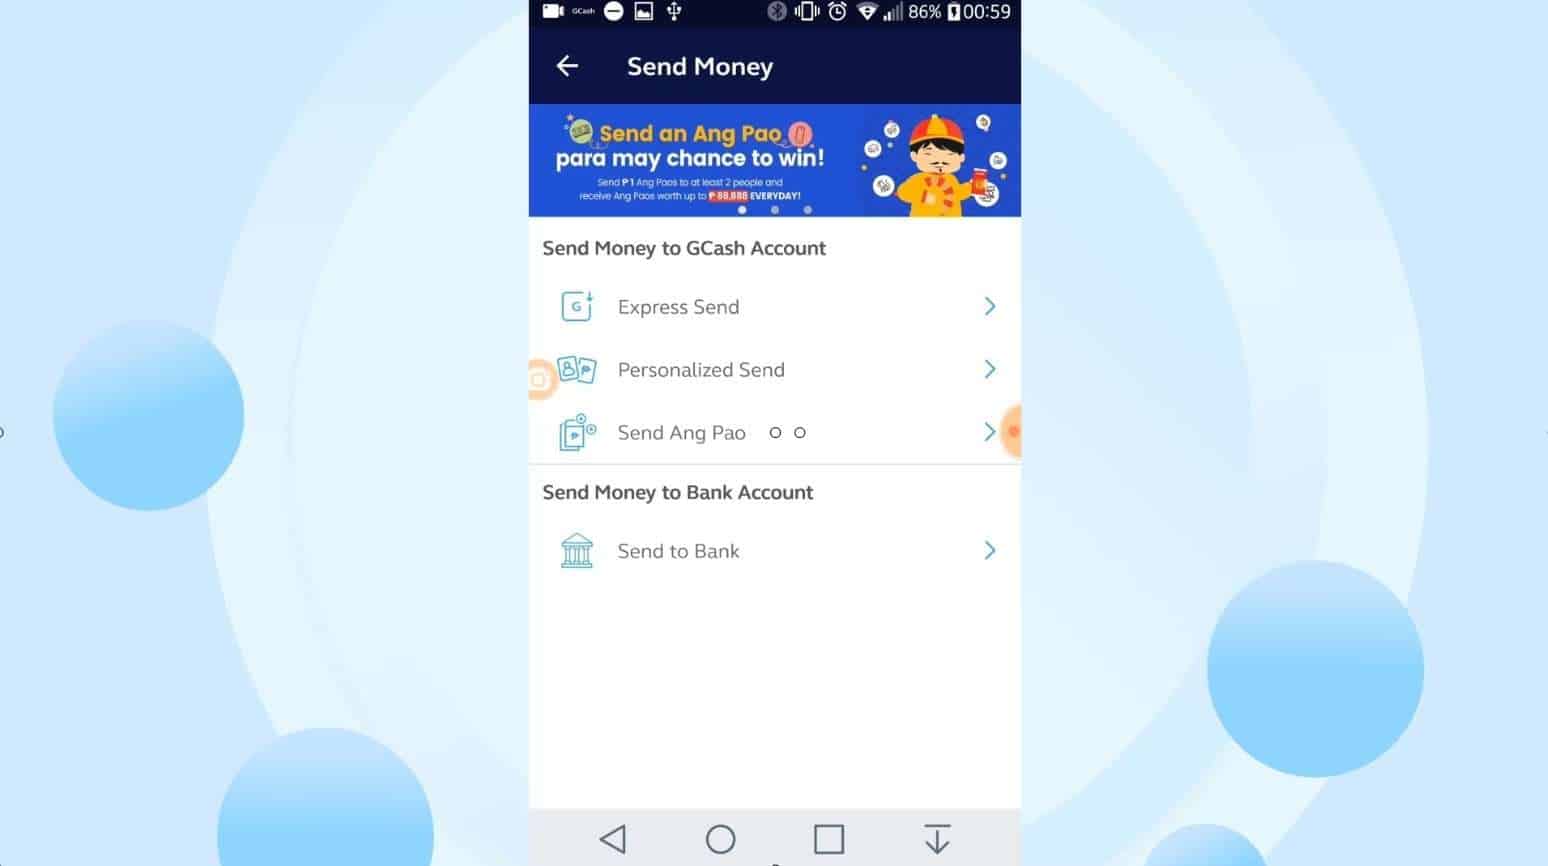
Step 7: Click on the Send Money option and choose the Get Verified button.
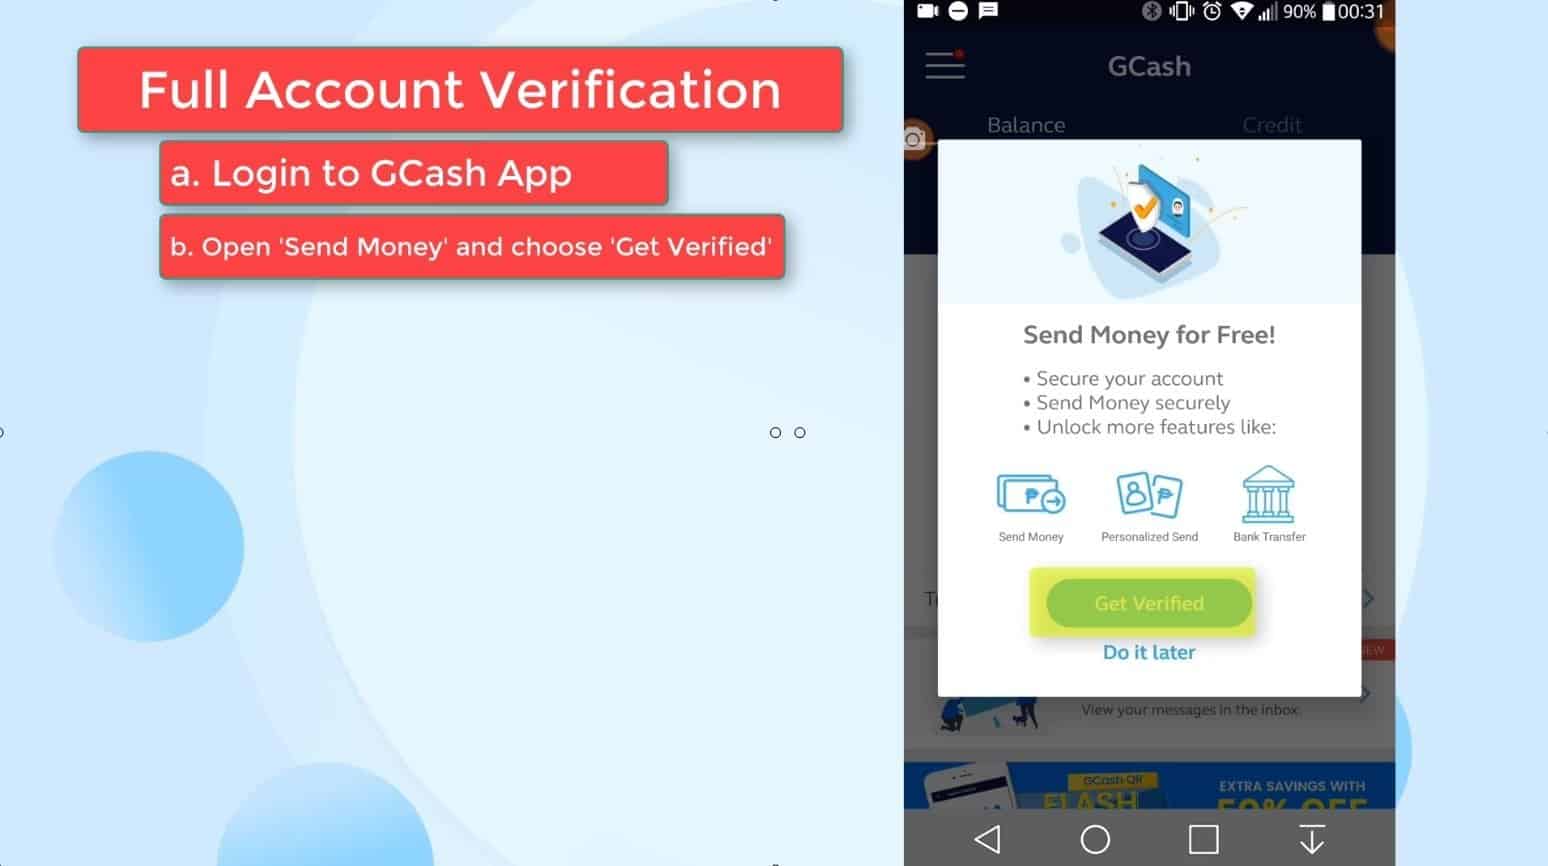
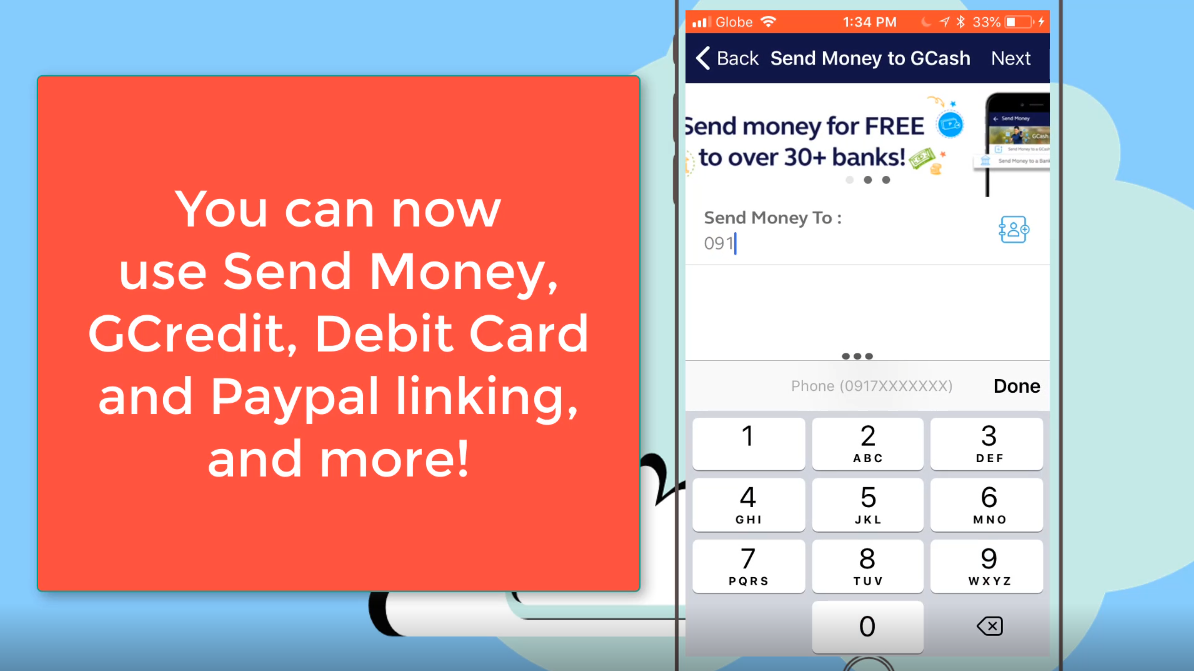
You need to have your GCash account converted into a fully verified account to unlock more GCash features such as:
- Send Money
- GCredit
- Invest Money
- Bank Transfer
- And many more
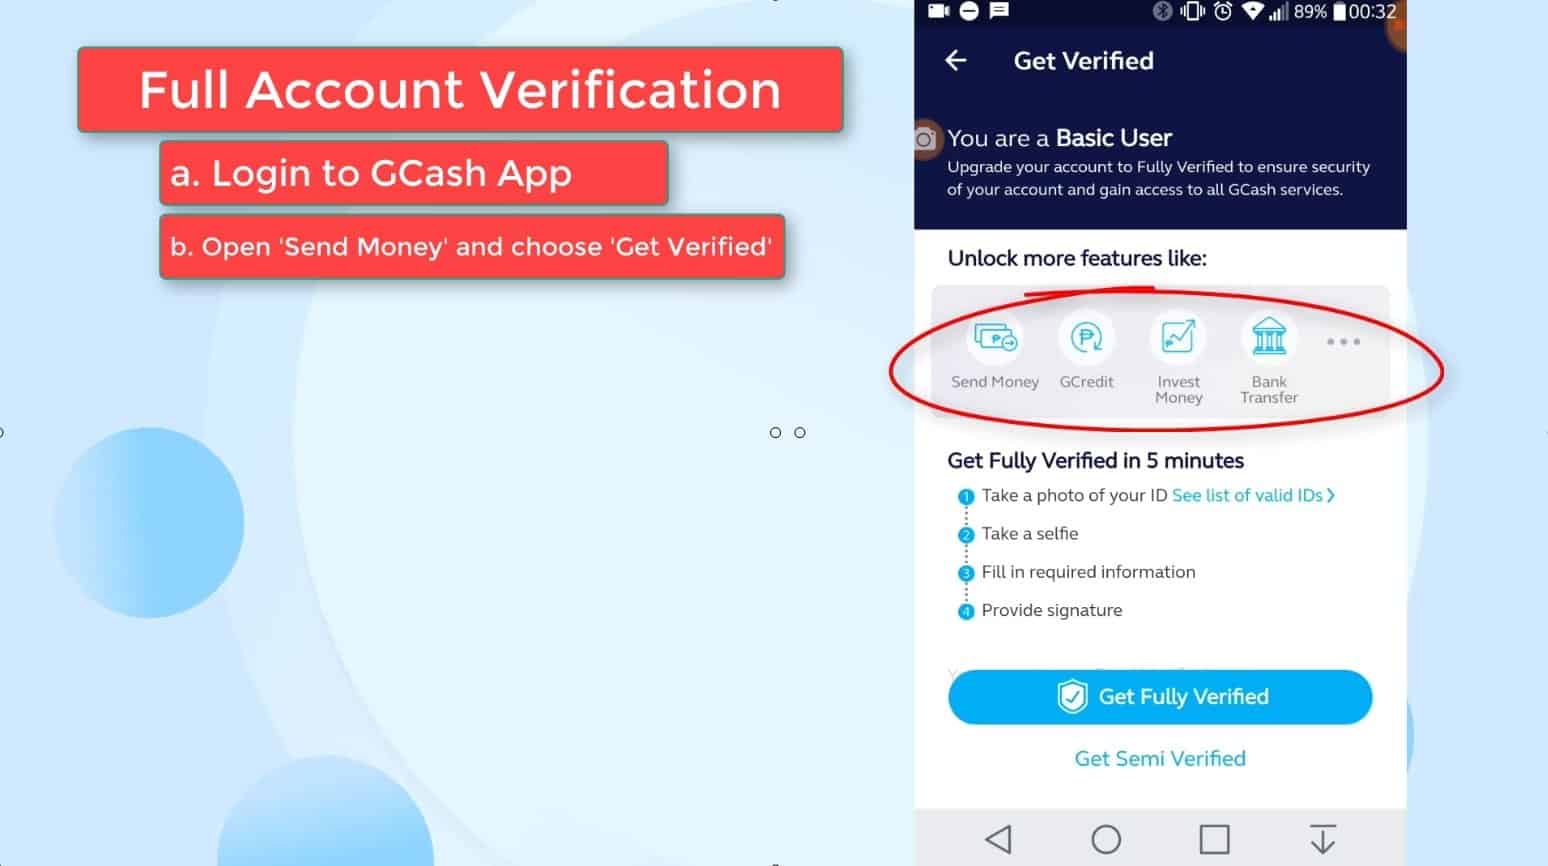
- Take a photo of your ID
- Take a selfie
- Fill in the required information
- Provide signature
Don’t worry, we will guide you on how to do a GCash KYC full verification step by step.
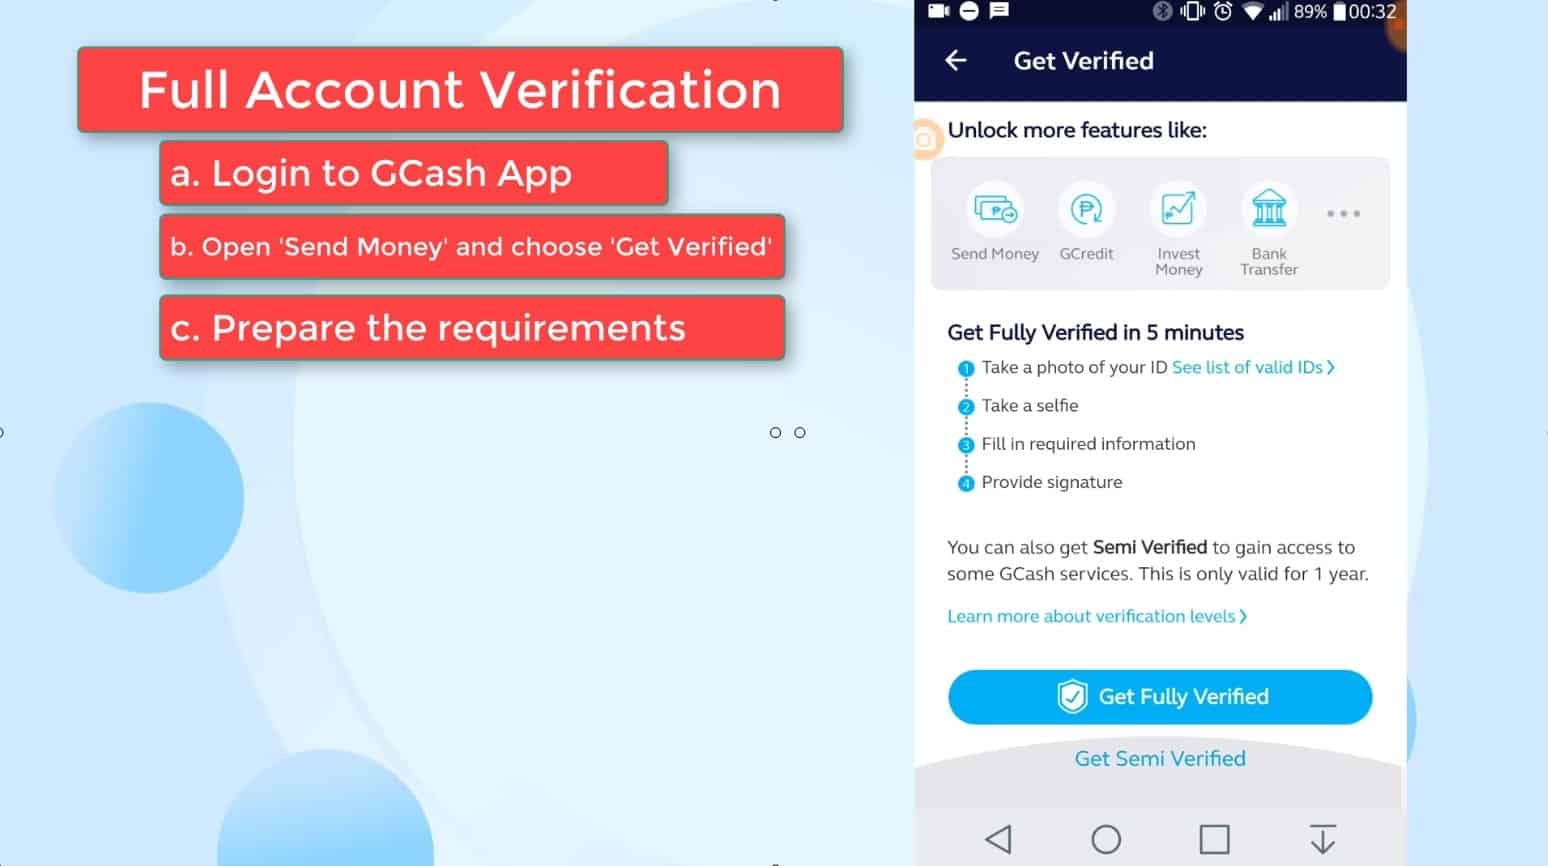
Being Semi Verified will gain you access to several of GCash features but it is only valid for one year or until you reach the 100,000 pesos incoming limit.
If those limits are reached, your account will return to Basic status.

If you prefer to be Semi Verified, you just need to do the following:
- Take selfie
- Fill in the required information
- Provide signature
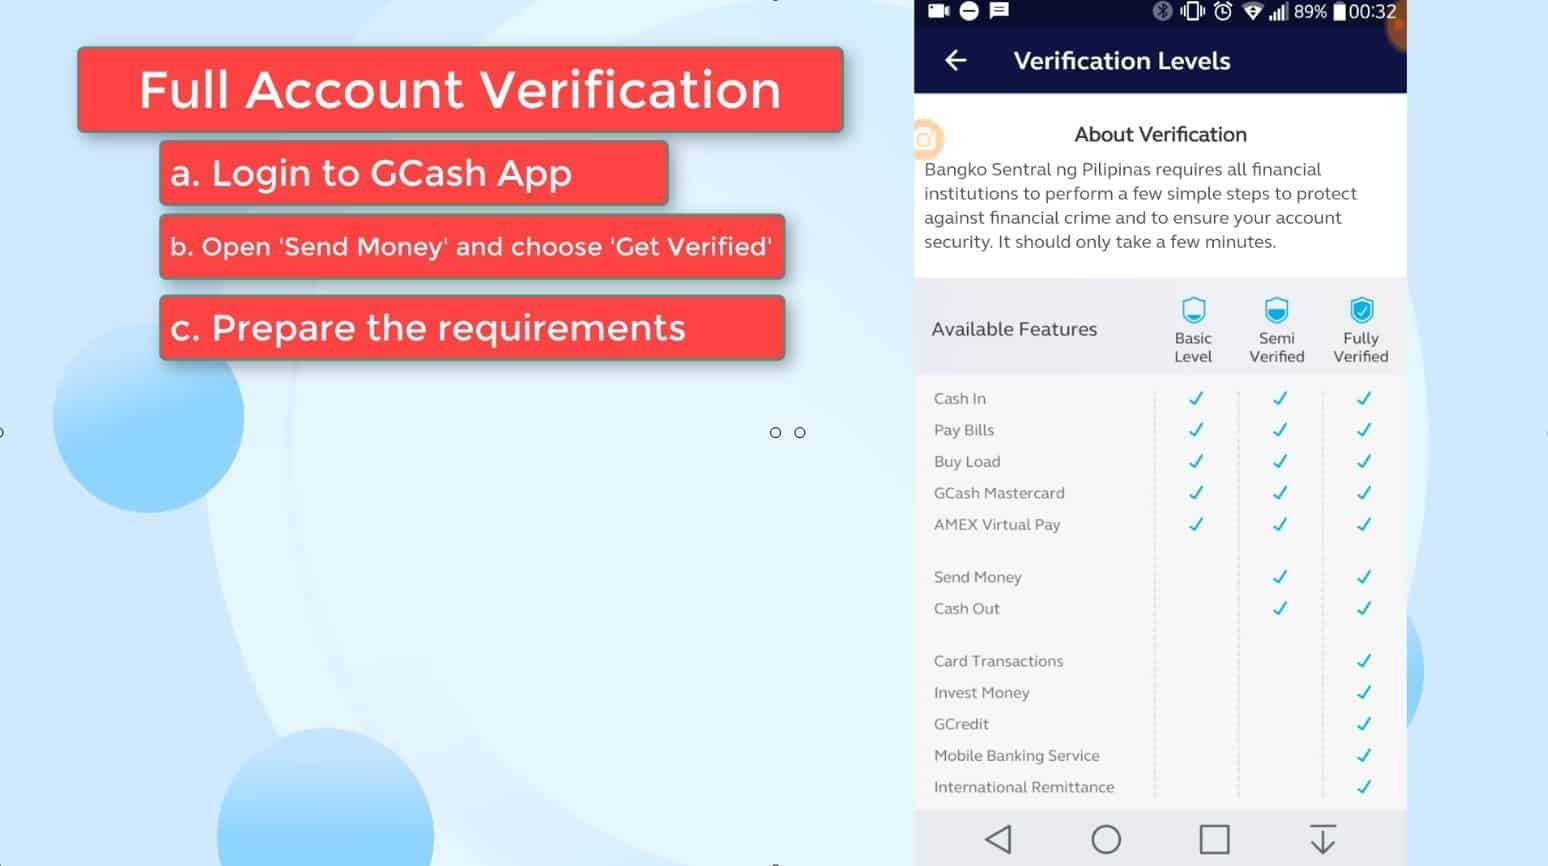
Check out this images to know more about the verification levels.

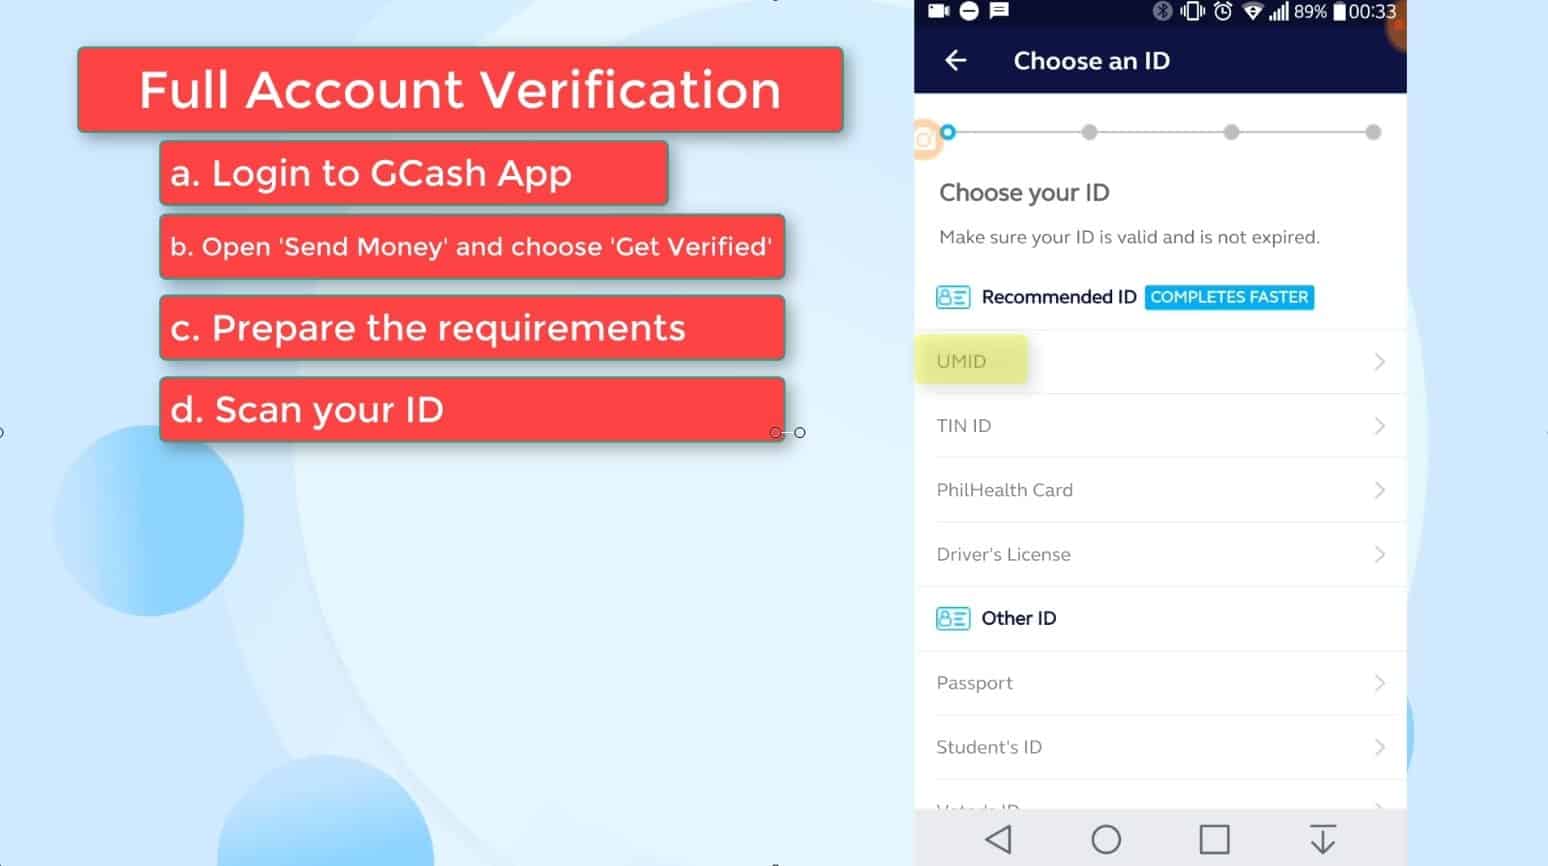
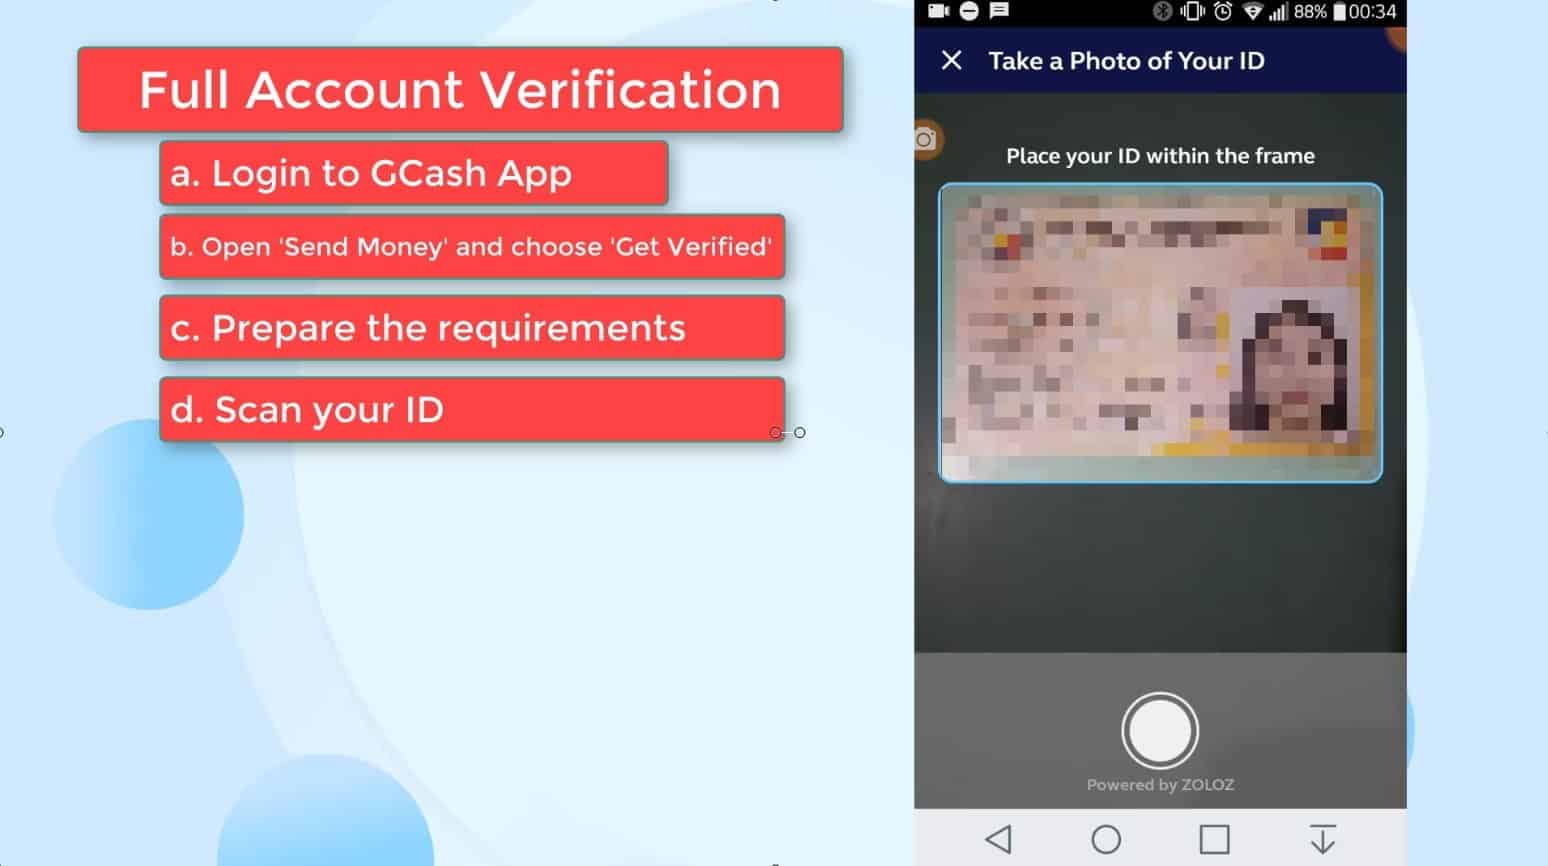
Step 8: Take a photo and submit your valid ID.
The first requirement is your valid ID.
Make sure that the ID is not expired.
There are several recommended IDs which will help fasten the verification:
- UMID
- TIN ID
- PhilHealth Card
- Driver’s License
You can also submit other IDs but they might take a while in verifying it.
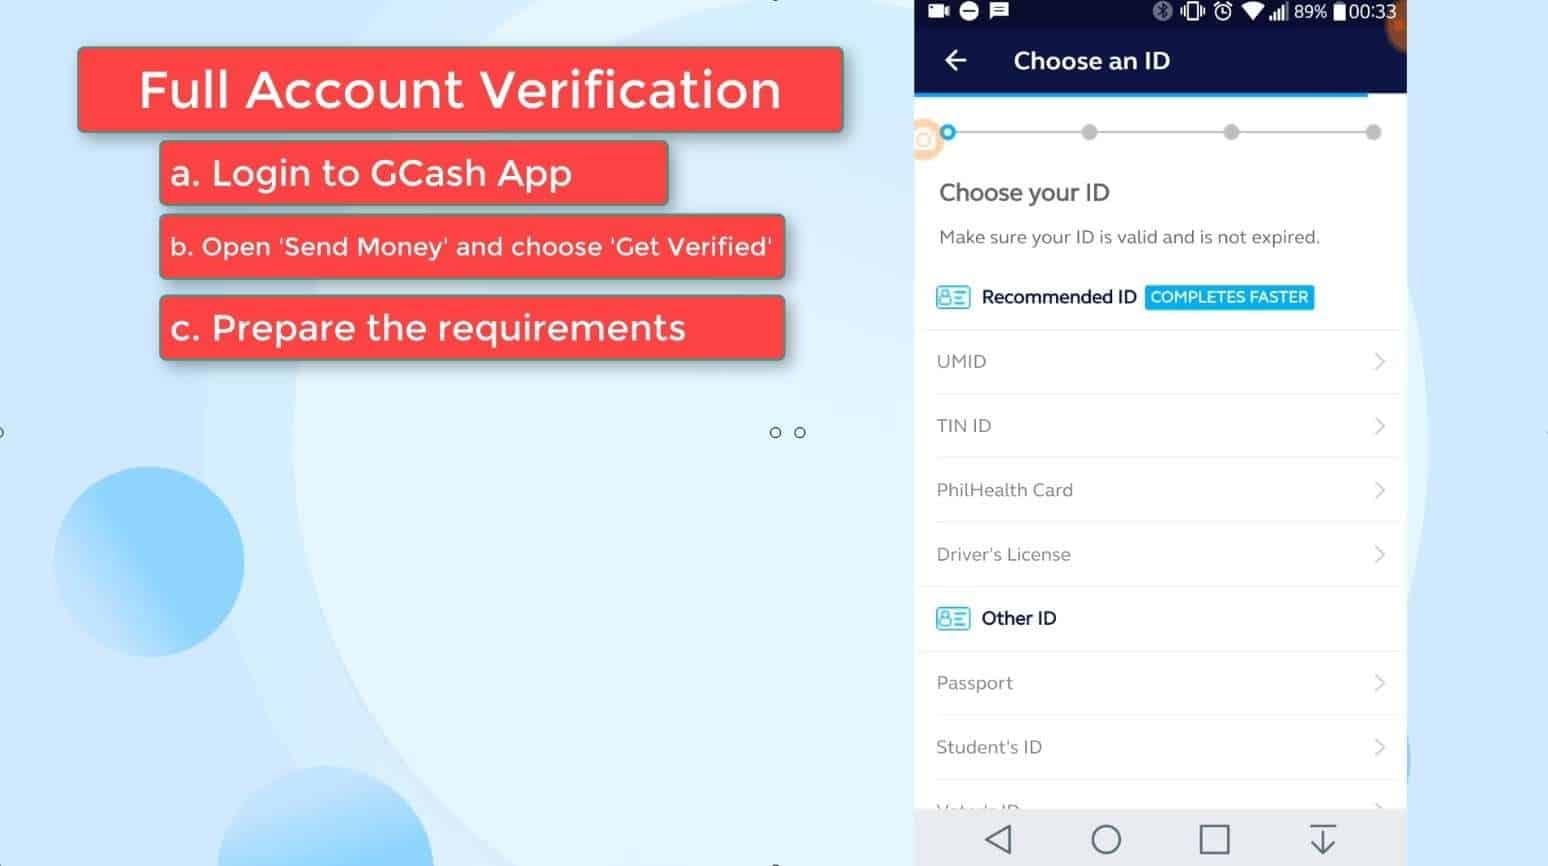
Click on the selection.
Carefully place the ID within the frame provided.
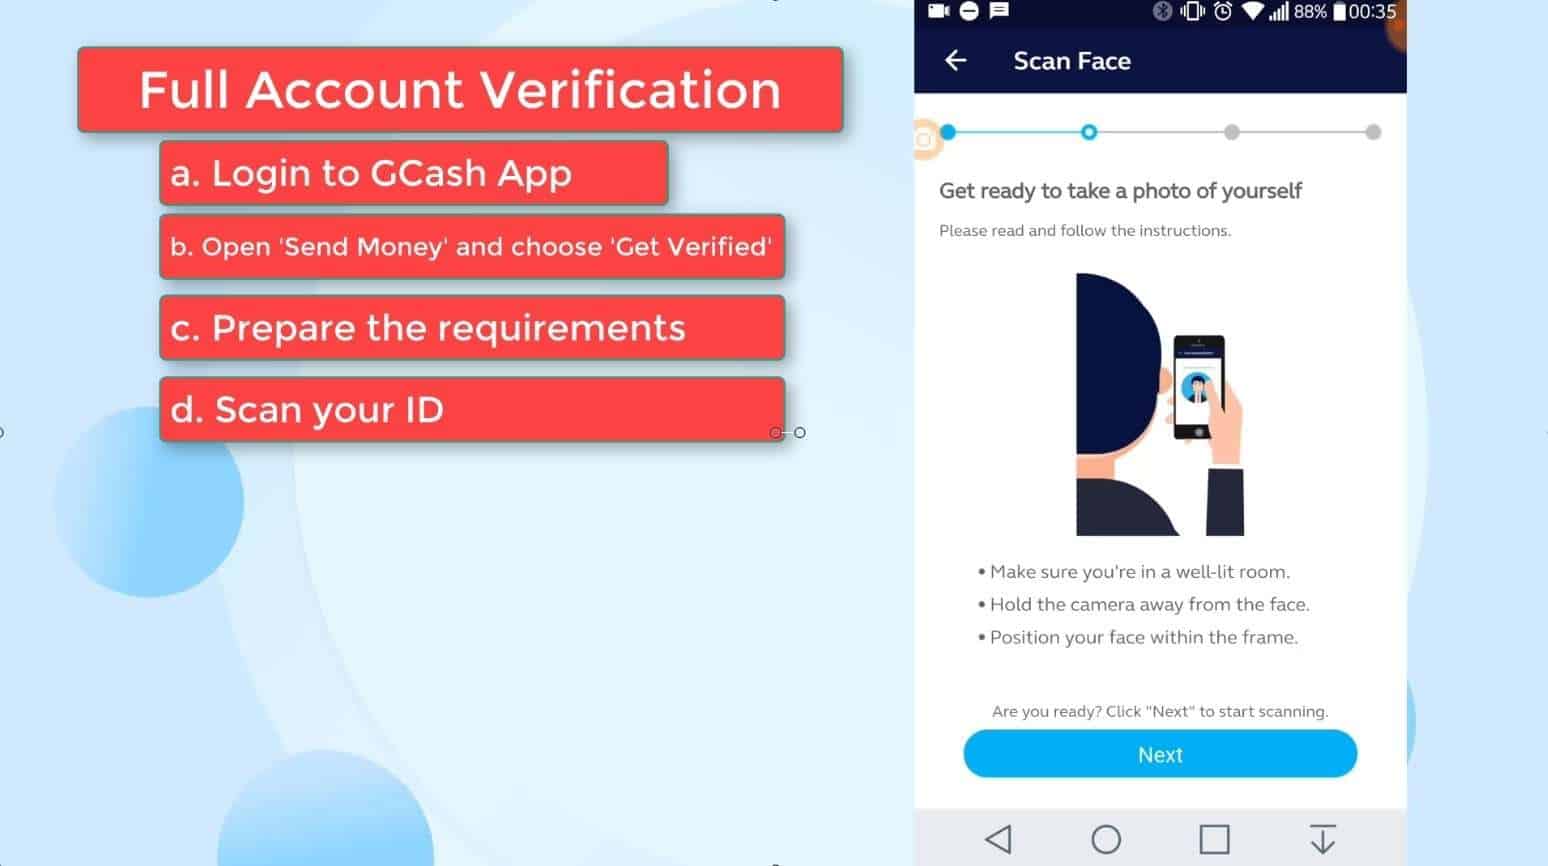
Step 9: Take a photo of yourself.
You now need to take a photo of yourself.
Make sure that you are in a well lit room.
You also need to position your face within the frame.
Click on the Next button to proceed with the scan.
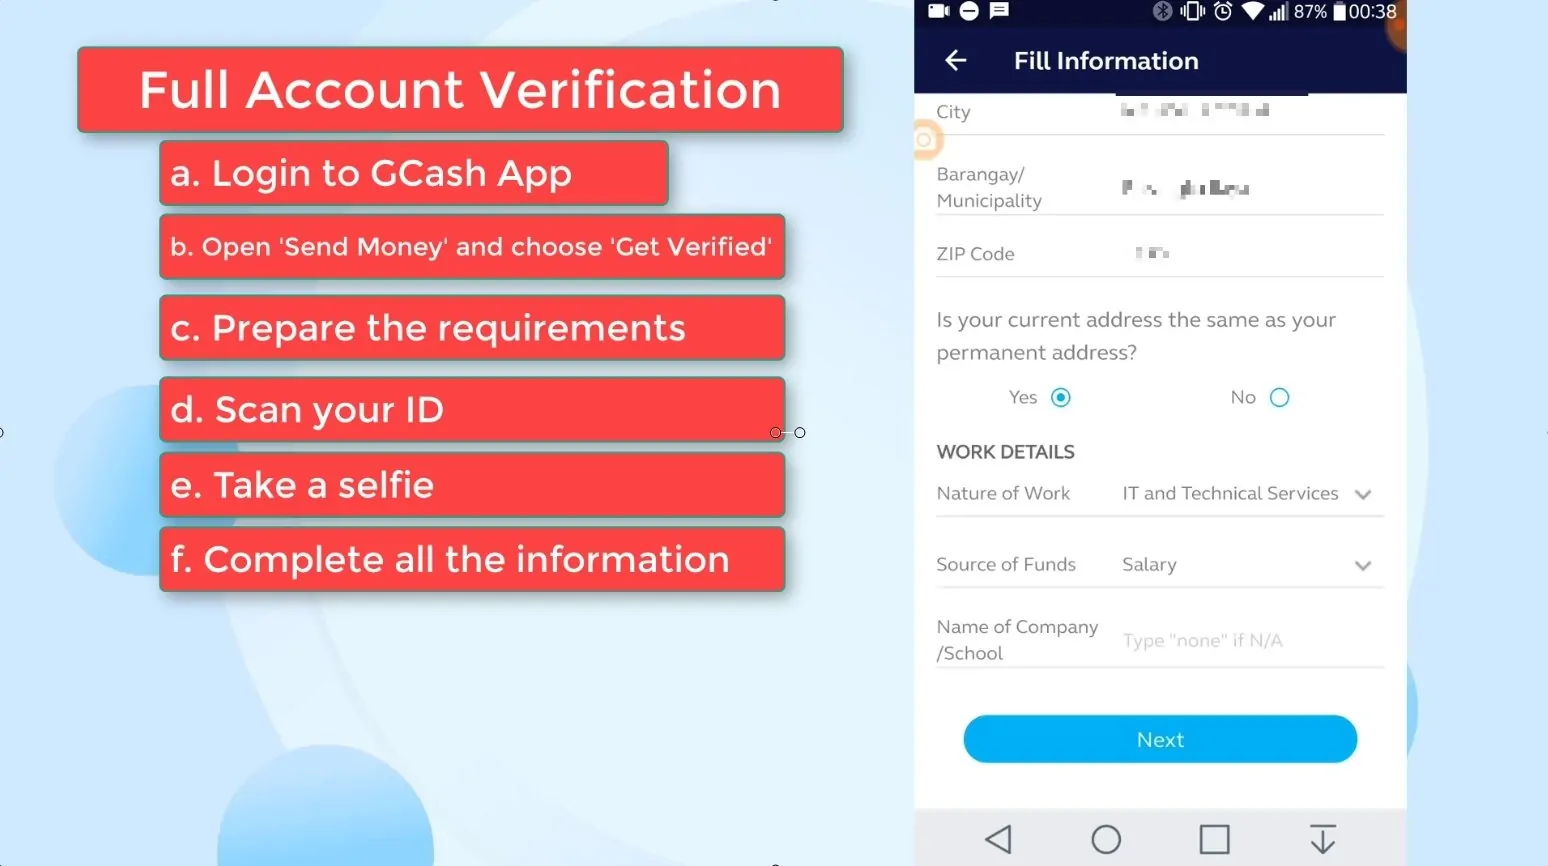
Step 10: Complete the remaining required information.
You will then be ask to complete all the remaining required information such as your address and work details.
Click on the Next button to continue.
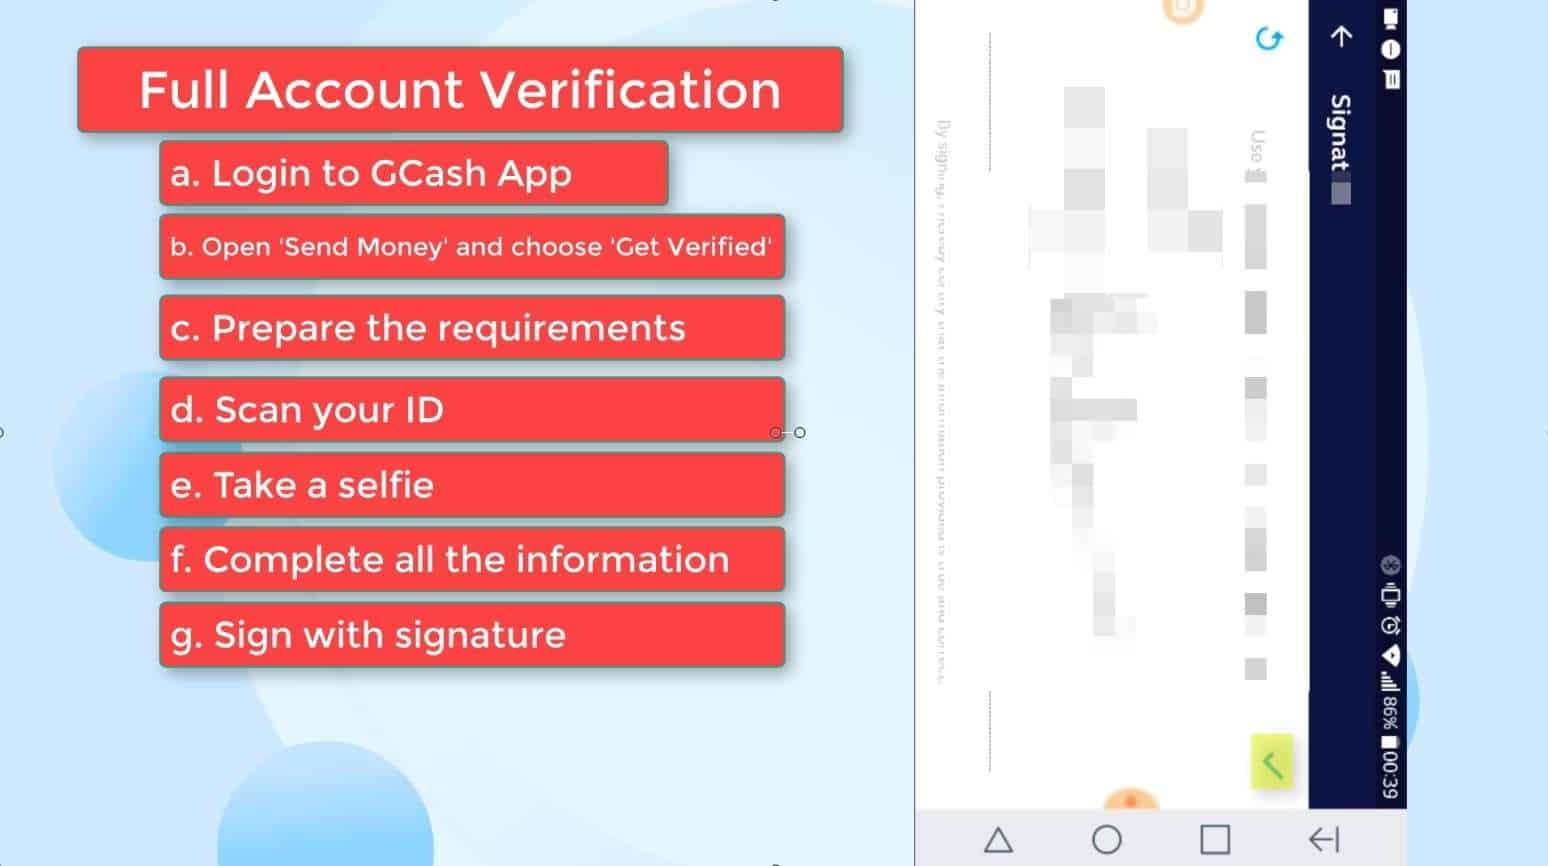
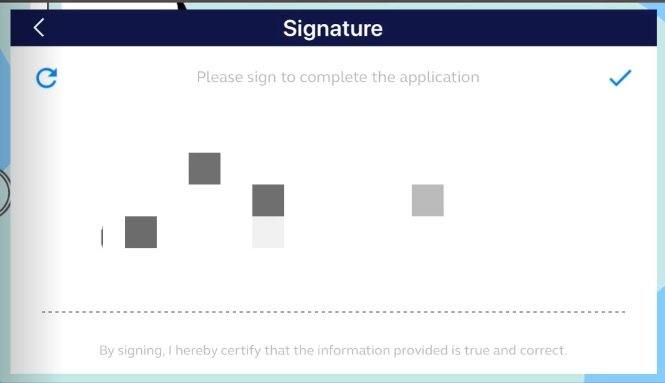
Step 11: Submit your signature.
Lastly, you need to provide them your signature.
Carefully input your signature on the space provided.
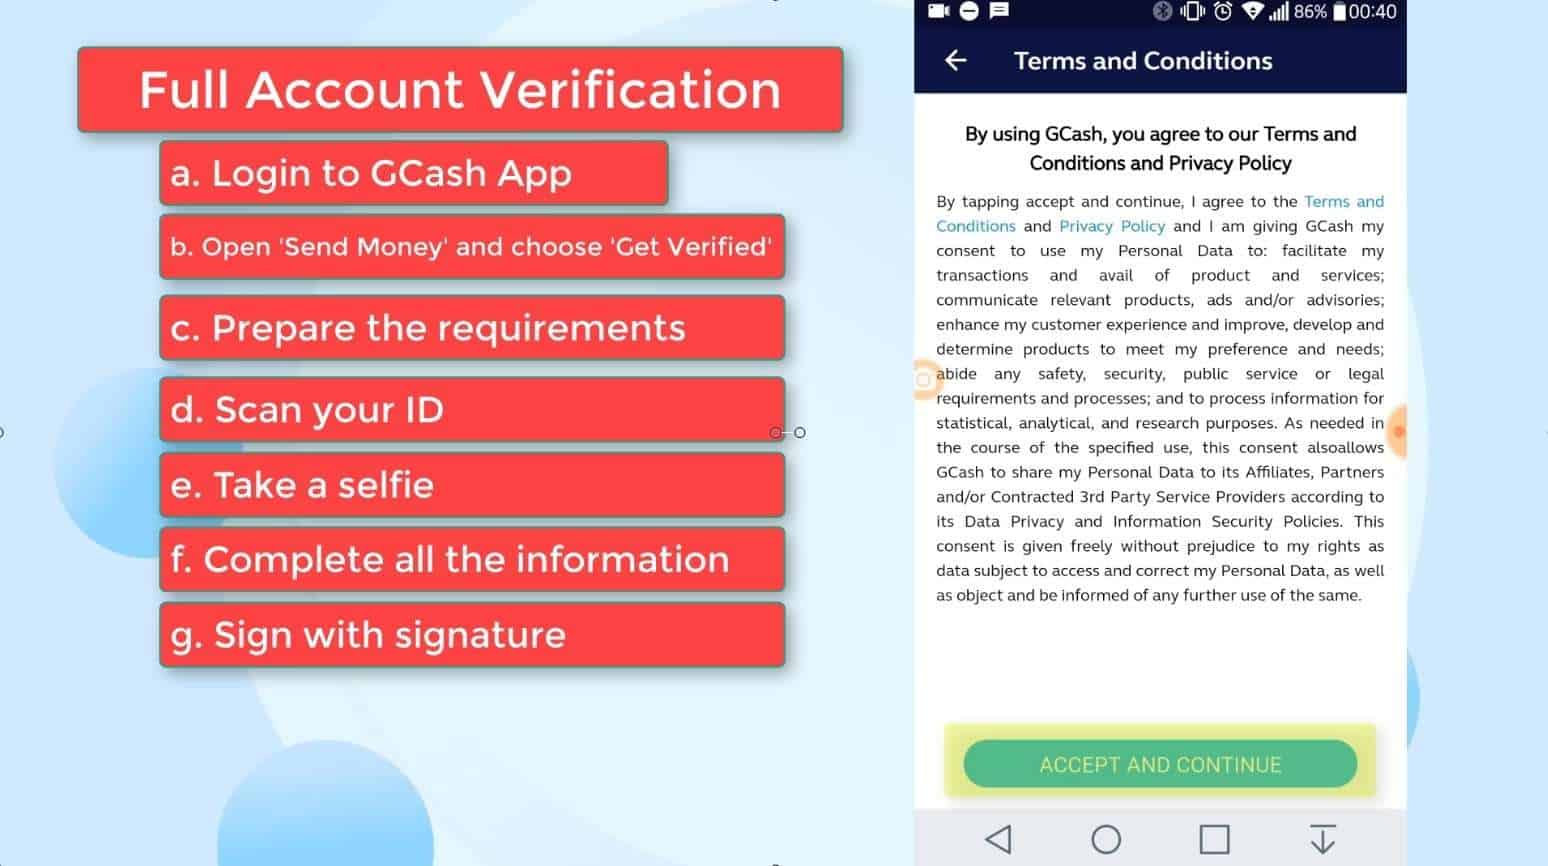
Step 12: Accept the Terms and Conditions.
You are almost done!
On the next screen, just click on the Accept and Continue button if you agree to their terms and conditions.
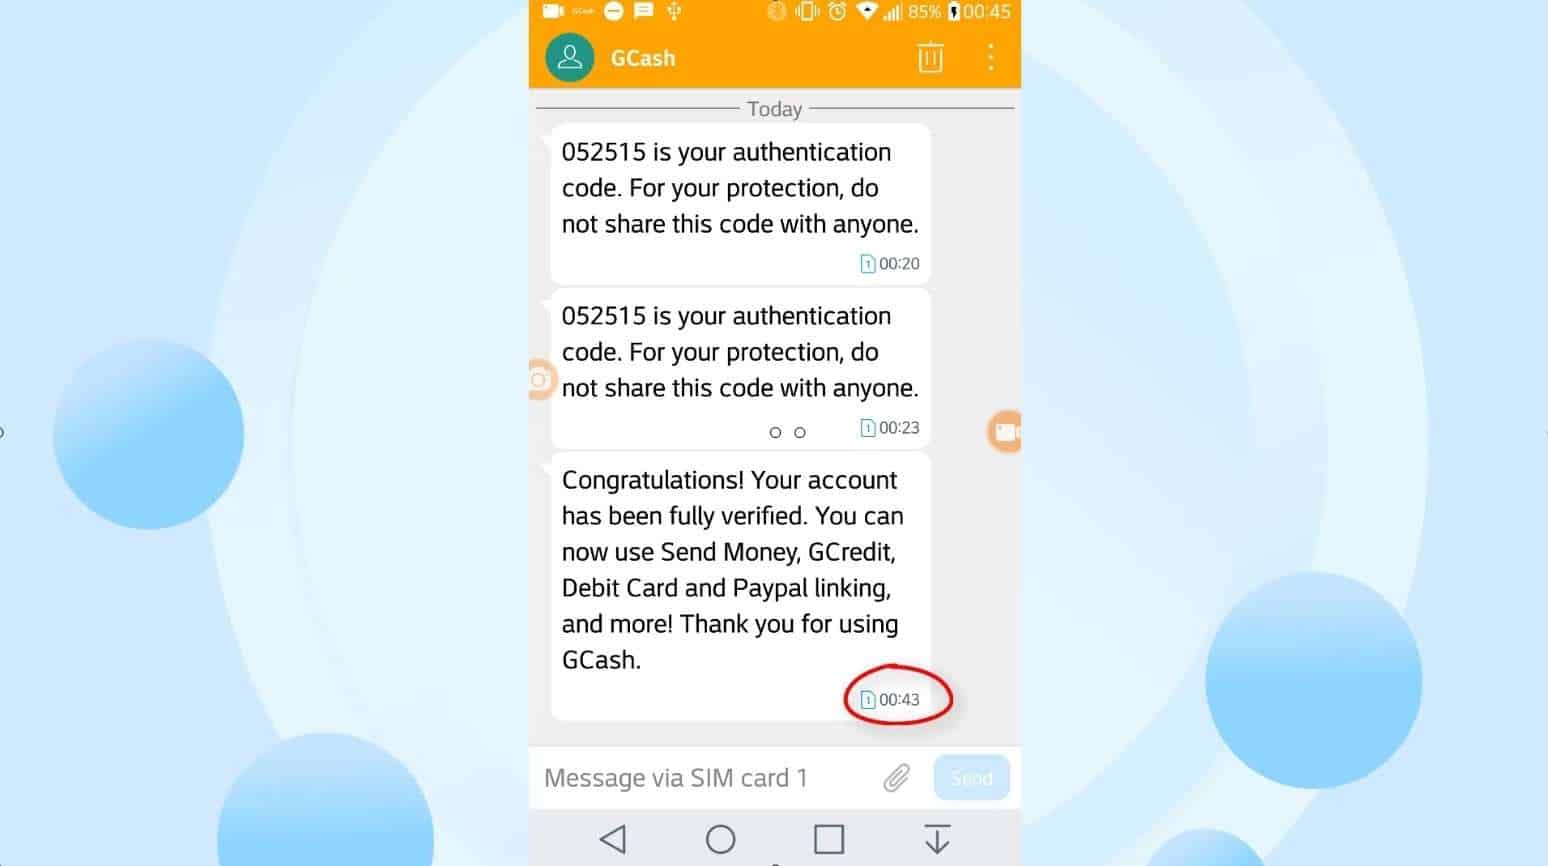
Step 13: Wait for their confirmation.
Your application is submitted at this point.
Give GCash officers around 30 minutes to review your application.
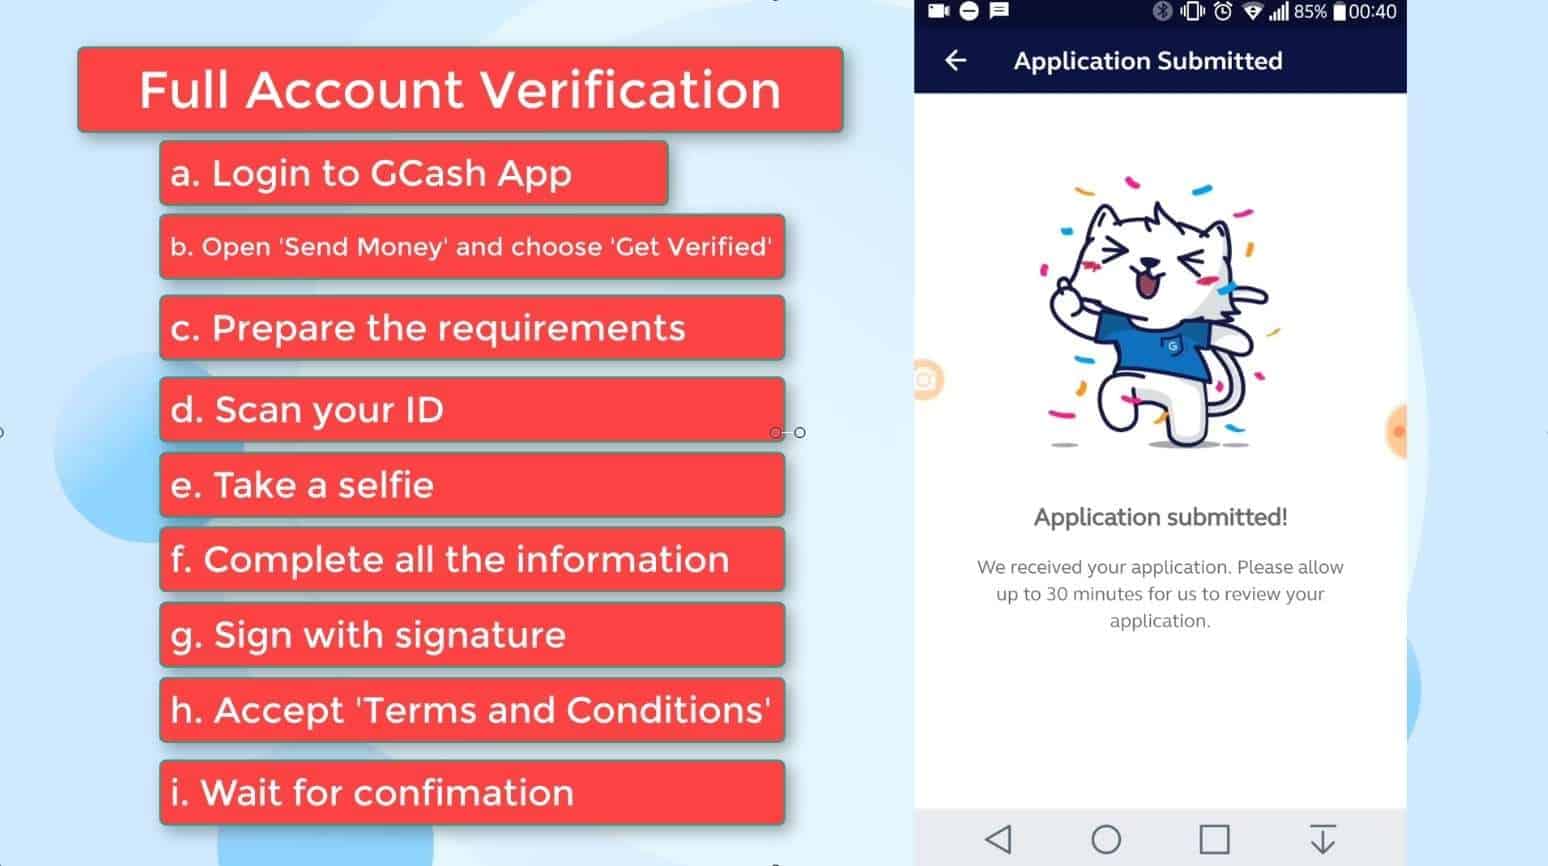
We received an SMS about it.
GCash KYC: How to Verify your GCash Account Online after Registration via GCash App?
In this section I will show you how to go through the GCash KYC verification process via GCash app if you already have an account.
Step 1: Login to the GCash App.
If you haven’t downloaded it yet, you can install it to your phone for free both for Android and iOS devices.
Step 2: Click on the Send Money icon.
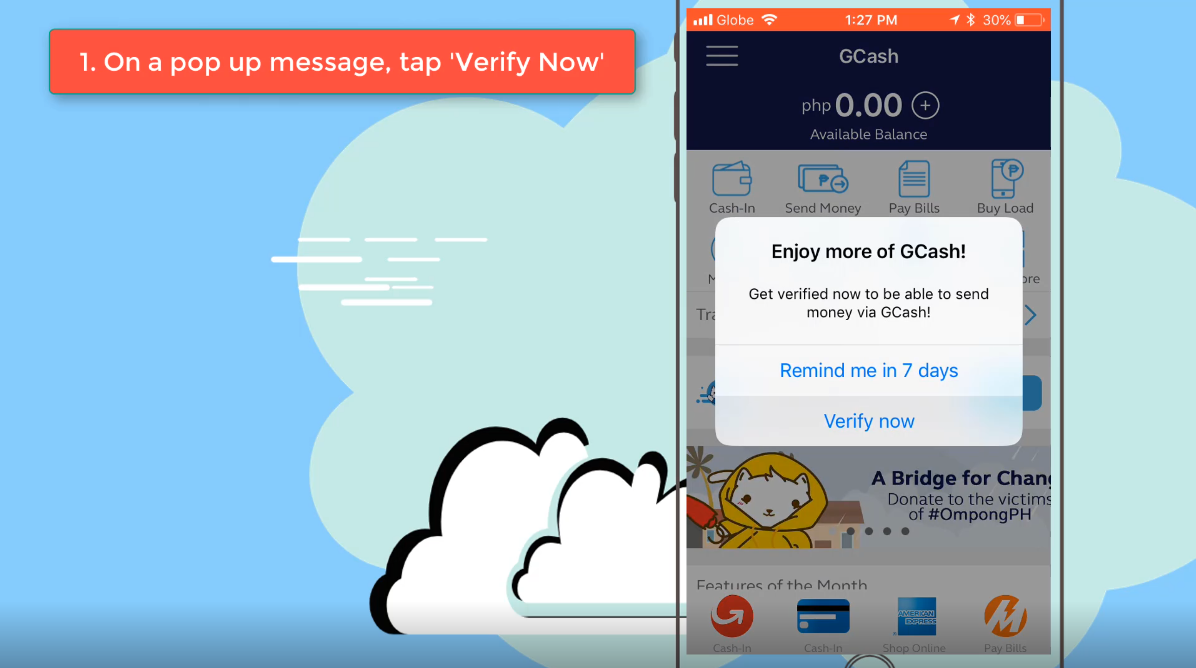
Step 3: Tap on the Verify Now option.
A prompt will show up with two options: Remind me in 7 days or Verify now.
Since we are verifying the GCash account now, tap on the Verify now button.
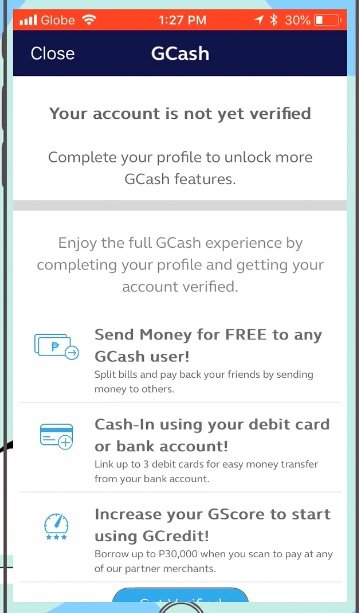
Some of them are:
- Send Money for free to any GCash user
- Cash-in using your debit card or bank account
- Increase your GScore to start using GCredit
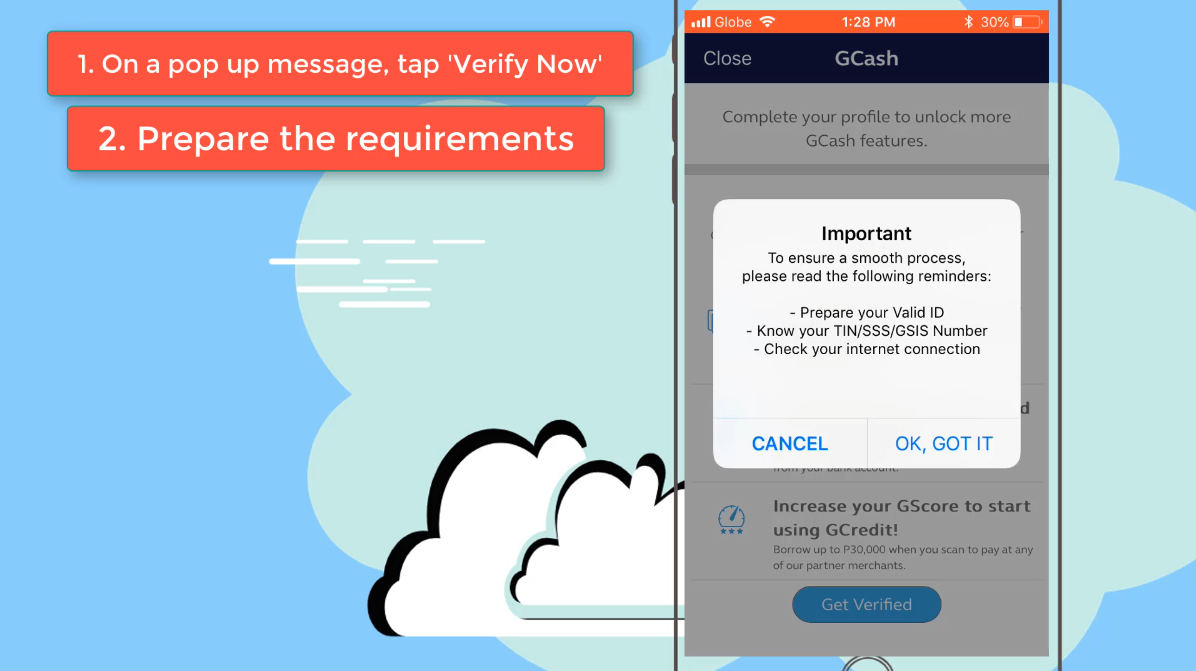
Step 4: Prepare the requirements.
There are three things that you need to ensure before you continue with the verification:
- Prepare your valid ID
- Have your TIN/SSS/GSIS Number ready
- Ensure that you have a stable internet connection
For your valid ID, you can select from the list below.
Although, I would recommend using a government issued ID for faster approval.
- Passport
- Driver’s License
- PRC ID
- NBI Clearance
- Police Clearance
- Postal ID
- Voter’s ID
- Barangay Certification
- GSIS e-Card
- SSS Card
- Senior Citizen Card
- OWWA ID
- OFW ID
- Seaman’s Book
- Alien Certification of Registration/Immigrant Certificate of Registration
- GOCC ID (e.g., Armed Forces of the Philippines (AFP) ID)
- HDMF ID
- Certification from the National Council for the Welfare of Disabled Persons (NCWDP)
- DSWD Certification
- Integrated Bar of the Philippines ID
- MARINA ID
- Company IDs issued by private entities or institutions registered with or supervised or regulated either by Bangko Sentral ng Pilipinas (BSP), Securities and Exchange Commission (SEC) or Insurance Commission (IC)
- School ID with photo (for students who are beneficiaries of remittances/Cash-In or phone-to-phone (P2P) transactions who are not yet of legal age)
After you have prepared all the needed requirements, click on the “OK, GOT IT” button.
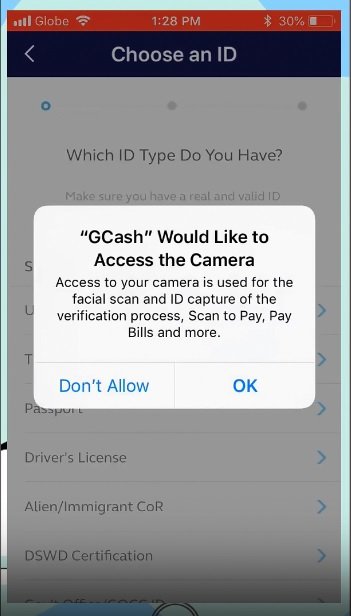
Step 5: Click on OK to allow GCash access to your camera.
A prompt will show up again.
This time, it will ask you to allow the GCash app to access your camera.
This is needed as you will have to take a photo of your valid ID and of yourself.
GCash also needs the access for some of its services such as Scan to Pay, Pay Bills, etc.
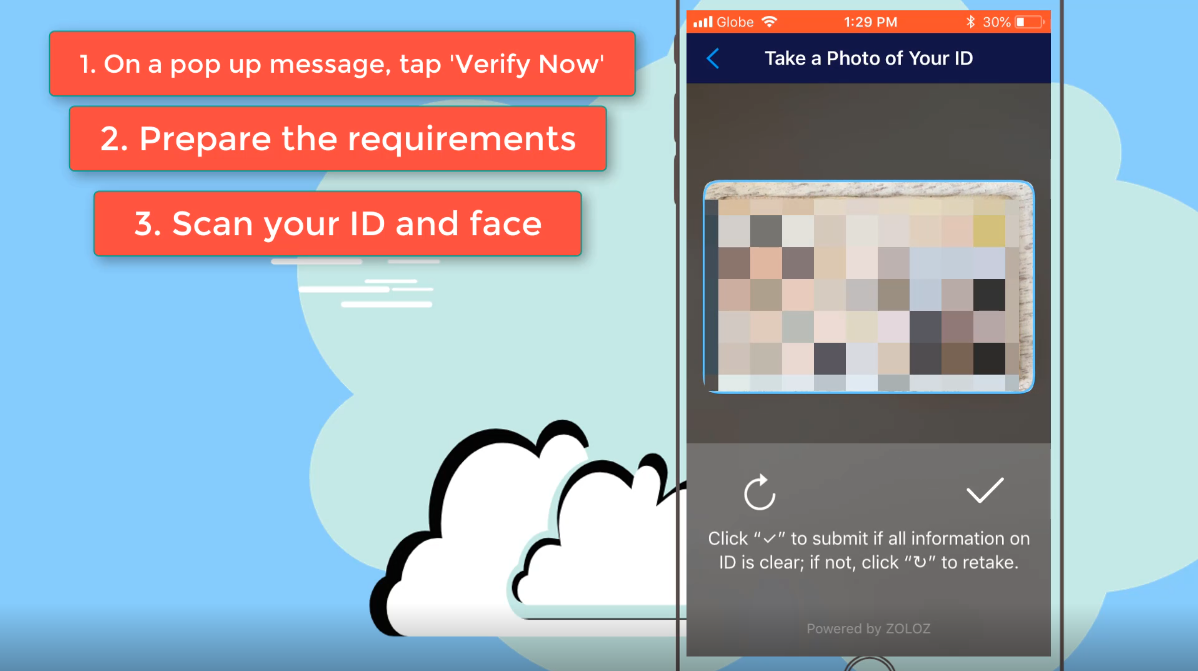
Step 6: Scan your valid ID.
Be sure that the information on the ID is clear.
You have the retake option if needed.
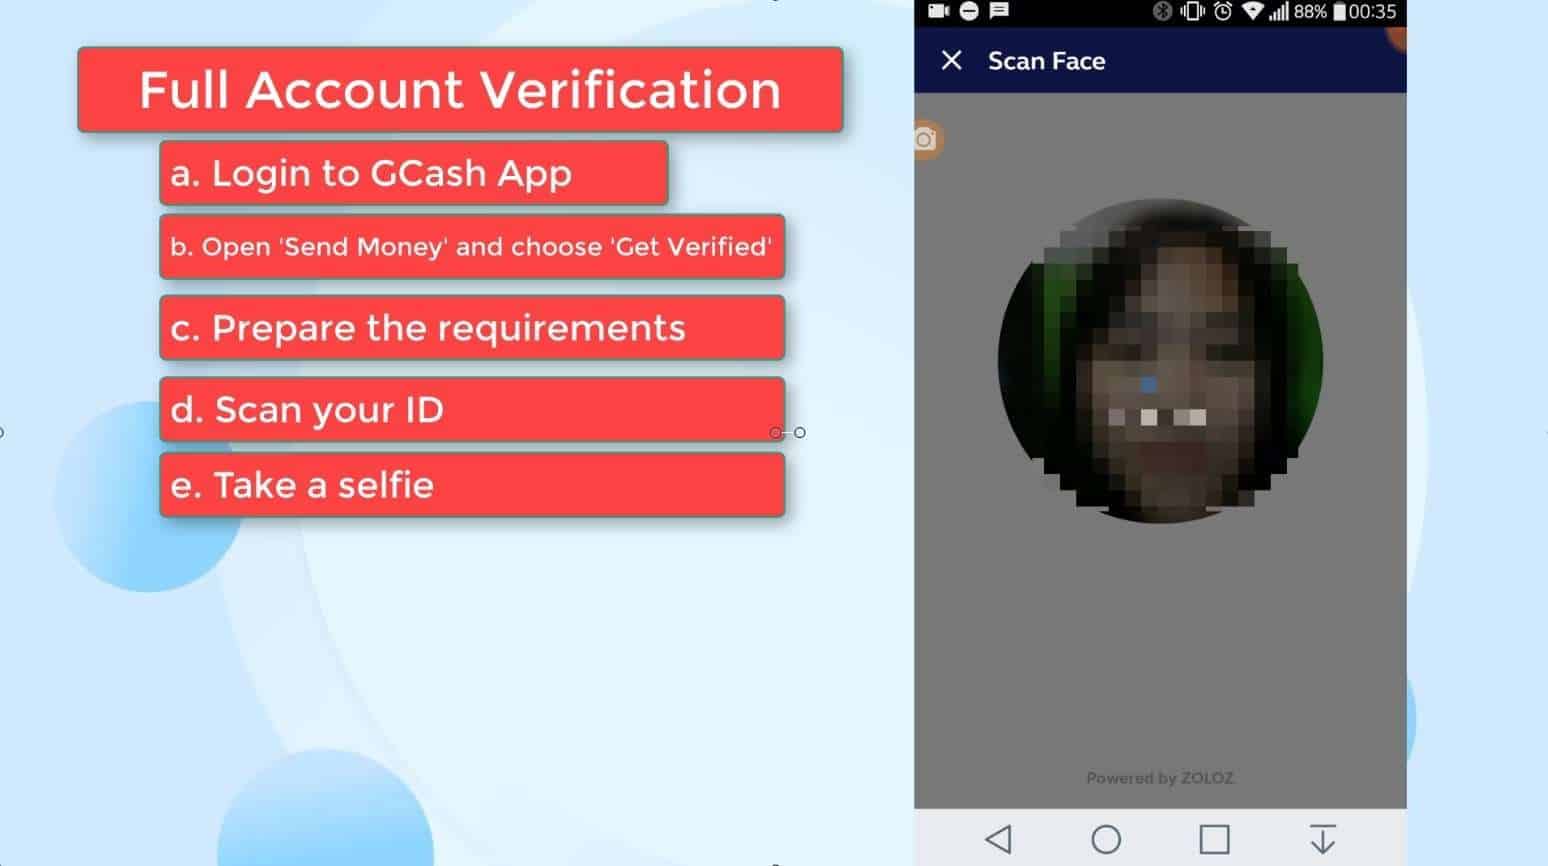
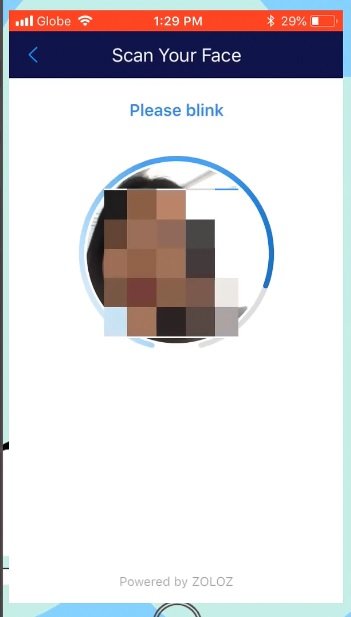
Step 7: Prepare to Scan your Face.
After the valid ID, you will be required to take a photo of face.
Make sure that you are not in a dark place so that your face will be shown clearly.
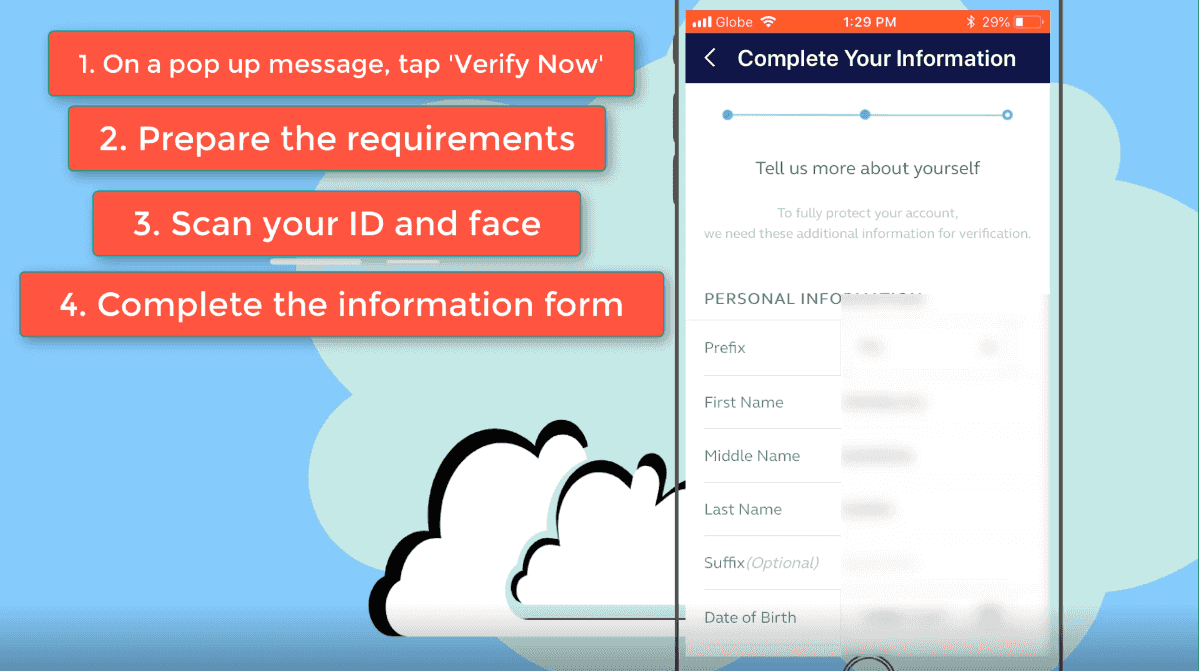
Step 8: Add your information to the form.
GCash will now ask for your personal information such as full name, birthday, place of birth, nationality, address, email address, contact number, UMID number, etc
After completing the form, it will prompt you to verify if all details are correct.
If it is, click on the Proceed button.
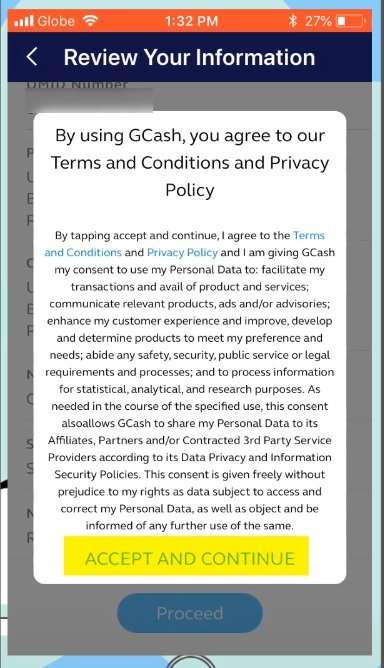
Step 9: Agree to the Terms and Conditions and Privacy Policy by tapping “Accept and Continue.”
Step 10: Provide your signature.
Step 11: Wait for your Confirmation SMS message.
Per note on the GCash app, it can possibly take up to 48 business hours to review the application.
Your confirmation SMS would look like this:

Step 12: Test your GCash account.
Check if you are still being prompted to verify your account by clicking the Send Money icon similar to Step 2 and 3.
If the prompt is gone, congratulations your GCash account is now verified! 🙂
GCash KYC Full GCash Verification Online via Facebook Messenger
Did you know that you can do KYC Full GCash Verification Online via Facebook Messsenger?
Let me show you how!
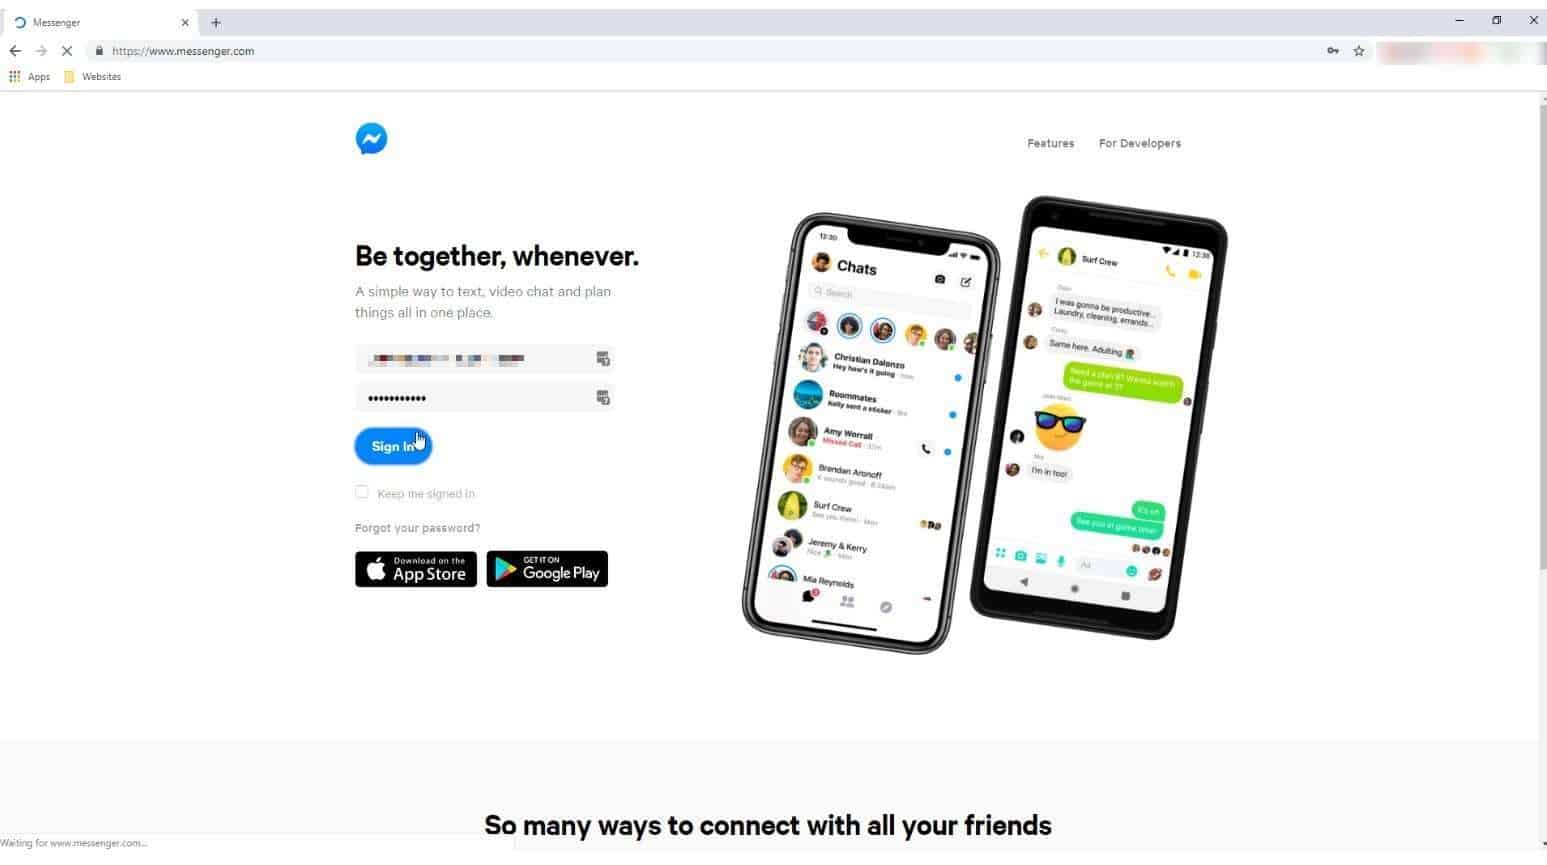
Step 1: Login to your Facebook messenger.
Of course, you first need to have an existing facebook messenger account.
Sign in to your messenger.
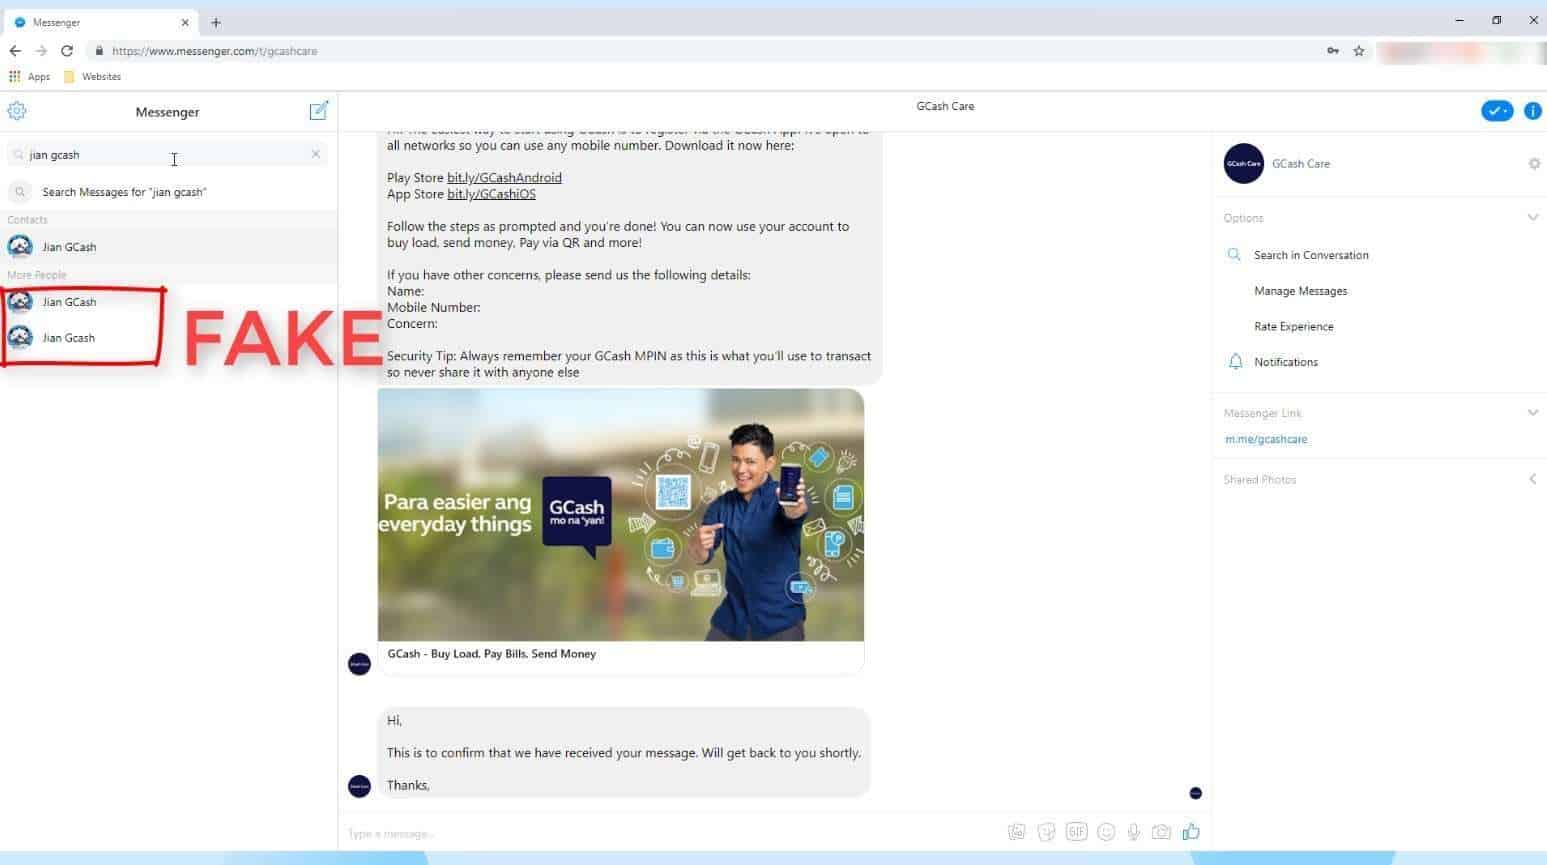
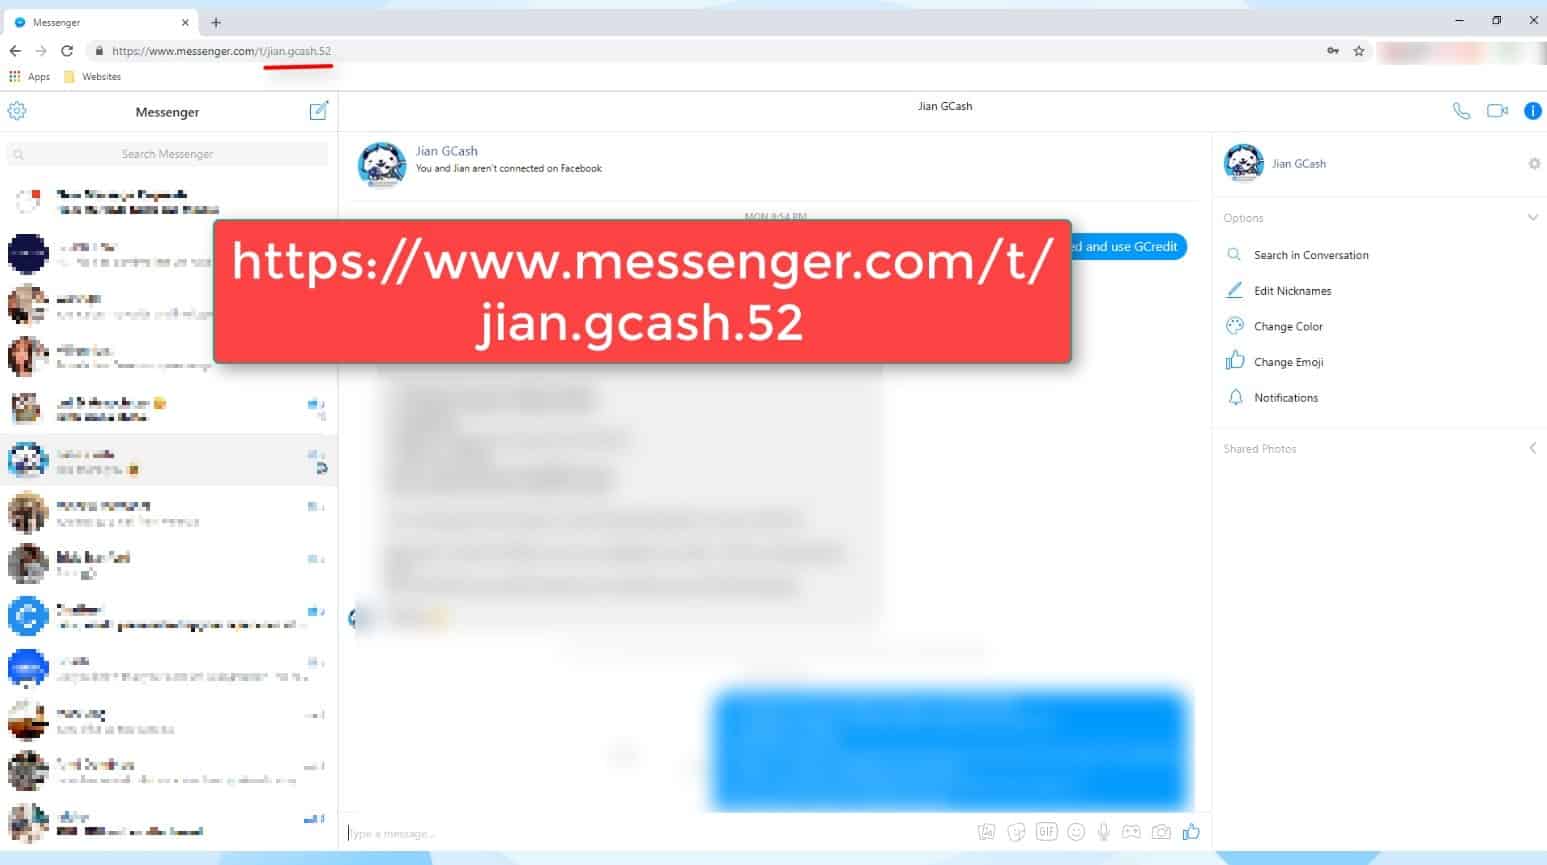
Step 2: Send a message to the GCash facebook messenger account.
Jian GCash is the current what GCash is using for their KYC verification.
If you will be manually searching for the account, be very careful as there are a lot of scammers out there.
When doing a manual search via web browser, I saw two other Jian GCash accounts which are fake accounts.
UPDATE as of August 2019: The Jian GCash account may no longer provide assistance in GCash KYC Verification.
There is a new GCash messenger account for this purpose.
It is Vless GCash 9.
Click this link to redirected to the correct account: https://www.messenger.com/t/vless.gcash.9
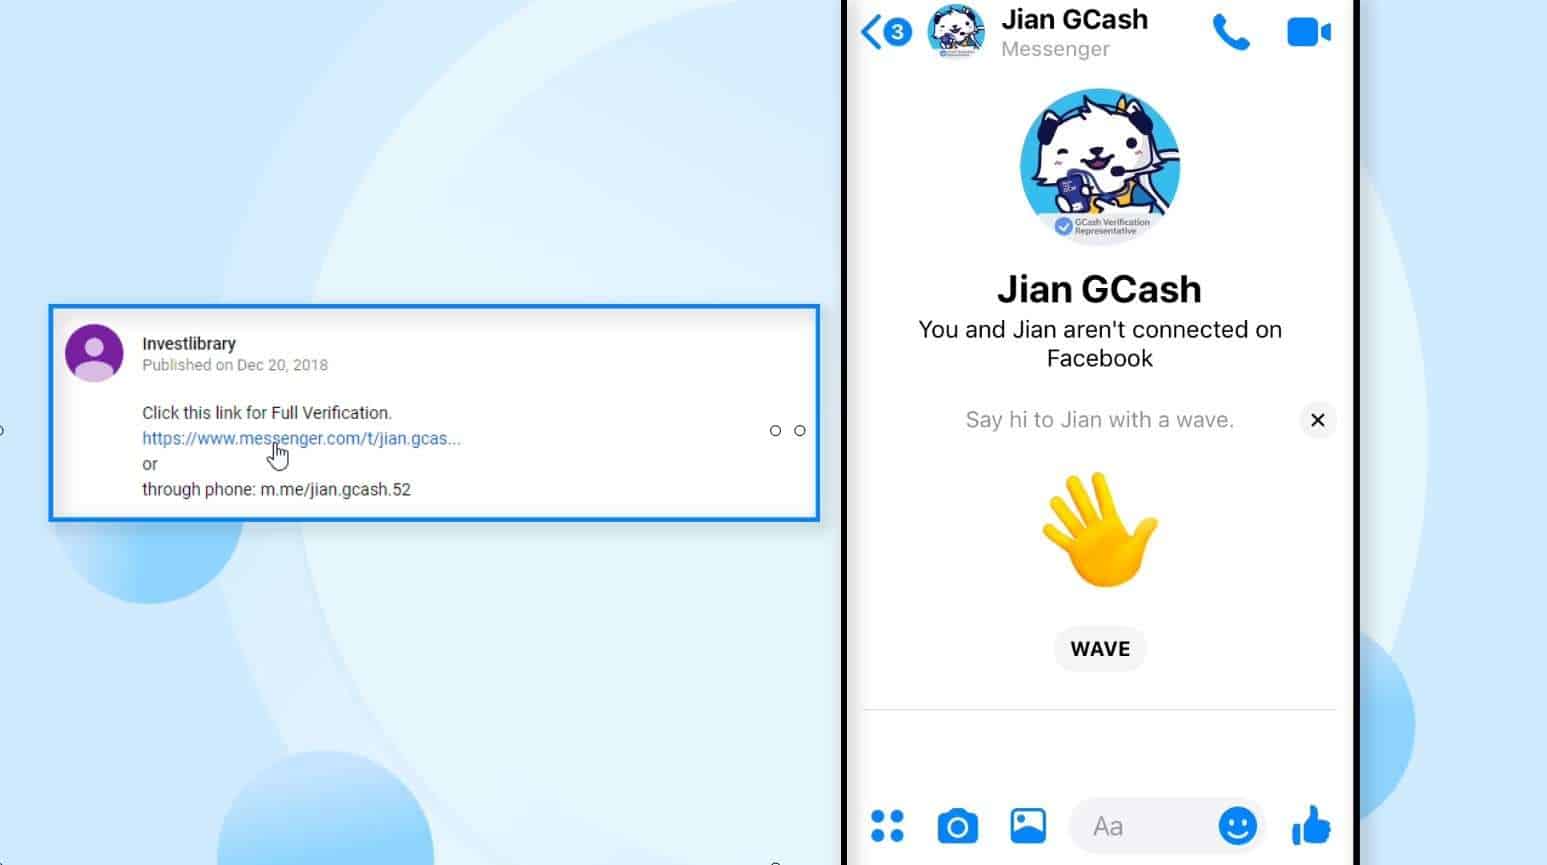
On mobile, those two fake accounts are also there. Take note!
UPDATE: In this photo, we are showing Jian GCash fake accounts which may also happen in the new account Vless GCash. Beware!

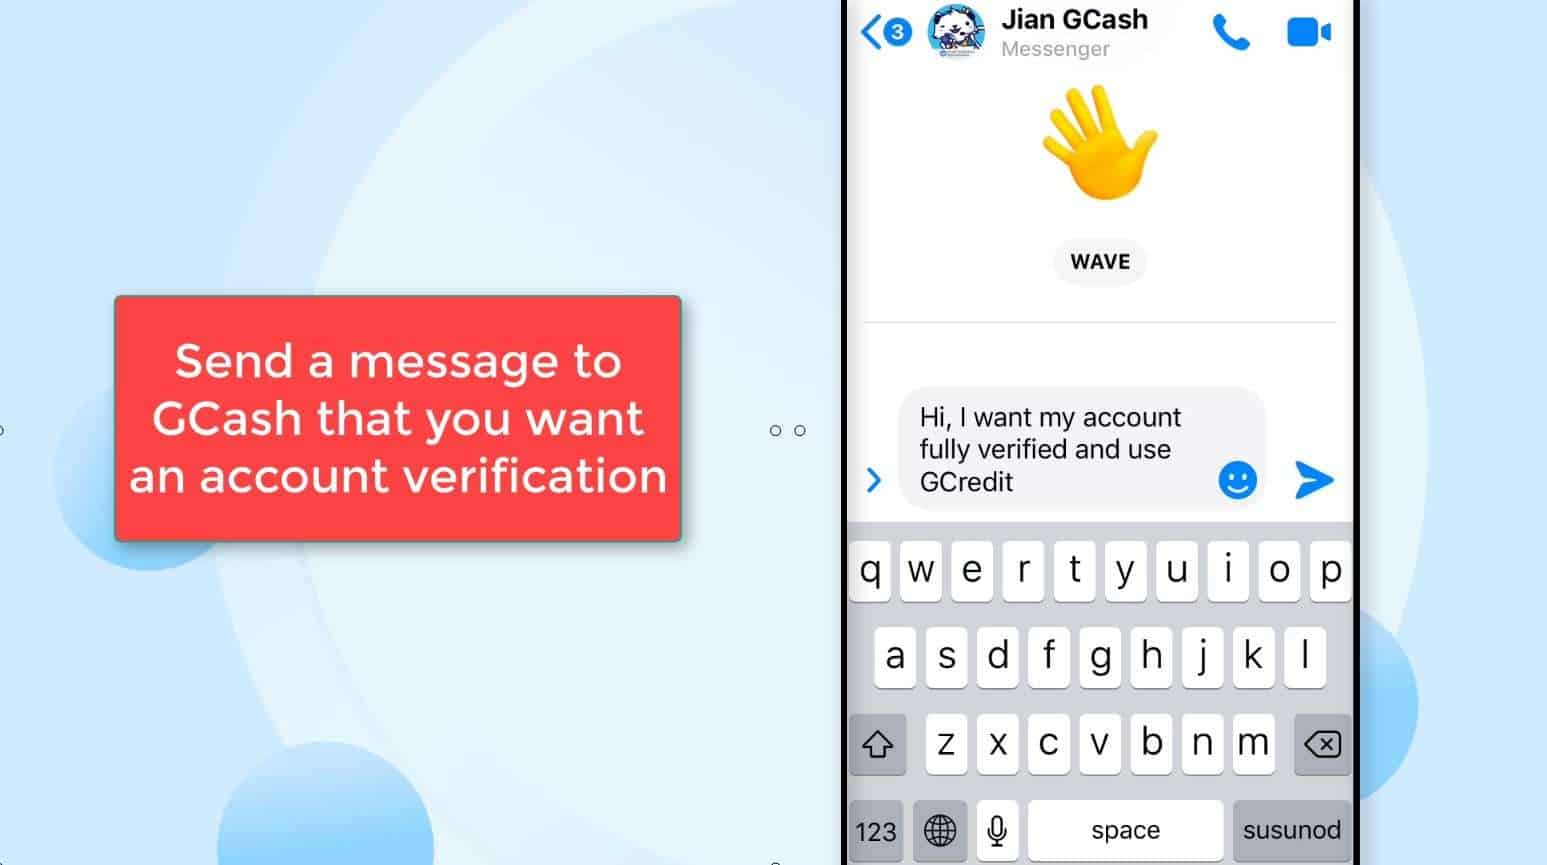
Inform Jian GCash that you want your account fully verified.
UPDATE: Since there is a new account, inform Vless GCash that you want your account fully veried.
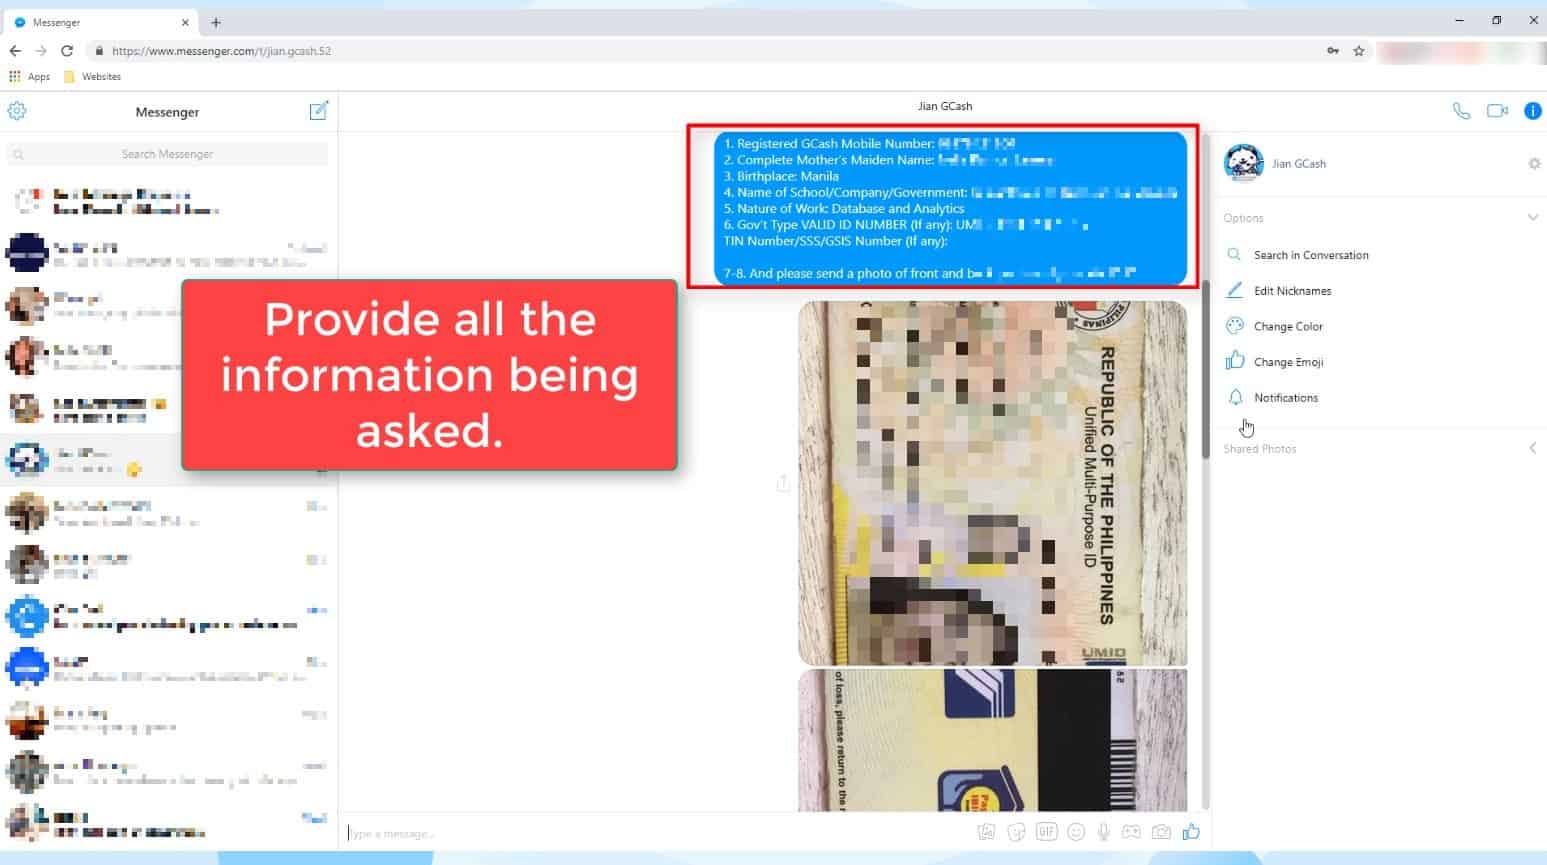
Step 3: Completely provide all the information needed.
GCash will ask you to provide several information such as:
- Registered GCash mobile number
- Complete Mother’s Maiden Name
- Birthplace
- Name of school / company / government
- Nature of work
- Government type valid ID number
- Tin / SSS / GSIS number
- Front and back photo of your valid ID
Here is a list of valid IDs Accepted in GCash KYC Verification:
- Passport
- Driver’s License
- PRC ID
- NBI Clearance
- Police Clearance
- Postal ID
- Voter’s ID
- Barangay Certification
- GSIS e-Card
- SSS Card
- Senior Citizen Card
- OWWA ID
- OFW ID
- Seaman’s Book
- Alien Certification of Registration/Immigrant Certificate of Registration
- GOCC ID (e.g., Armed Forces of the Philippines (AFP) ID)
- HDMF ID
- Certification from the National Council for the Welfare of Disabled Persons (NCWDP)
- DSWD Certification
- Integrated Bar of the Philippines ID
- MARINA ID
- Company IDs issued by private entities or institutions registered with or supervised or regulated either by Bangko Sentral ng Pilipinas (BSP), Securities and Exchange Commission (SEC) or Insurance Commission (IC)
- School ID with photo (for students who are beneficiaries of remittances/Cash-In or phone-to-phone (P2P) transactions who are not yet of legal age)
IMPORTANT!
GCash will never ask for your MPIN via facebook messenger.
If the GCash Facebook account asked for your MPIN, you are talking to a fake / scammer GCash Facebook account.
Again.. Never give your MPIN!

Step 4: A GCash Videocall officer will contact you for the interview.
Expect a video call from them as part of the verification process.
Take note that GCash Videocall officers are only available from 9am to 6pm business hours.
In my case, the video call interview only lasted for 5 minutes.
Basically they will just confirm the details that you have provided to them in the previous steps such as your full name, your address, employer if applicable, among others.
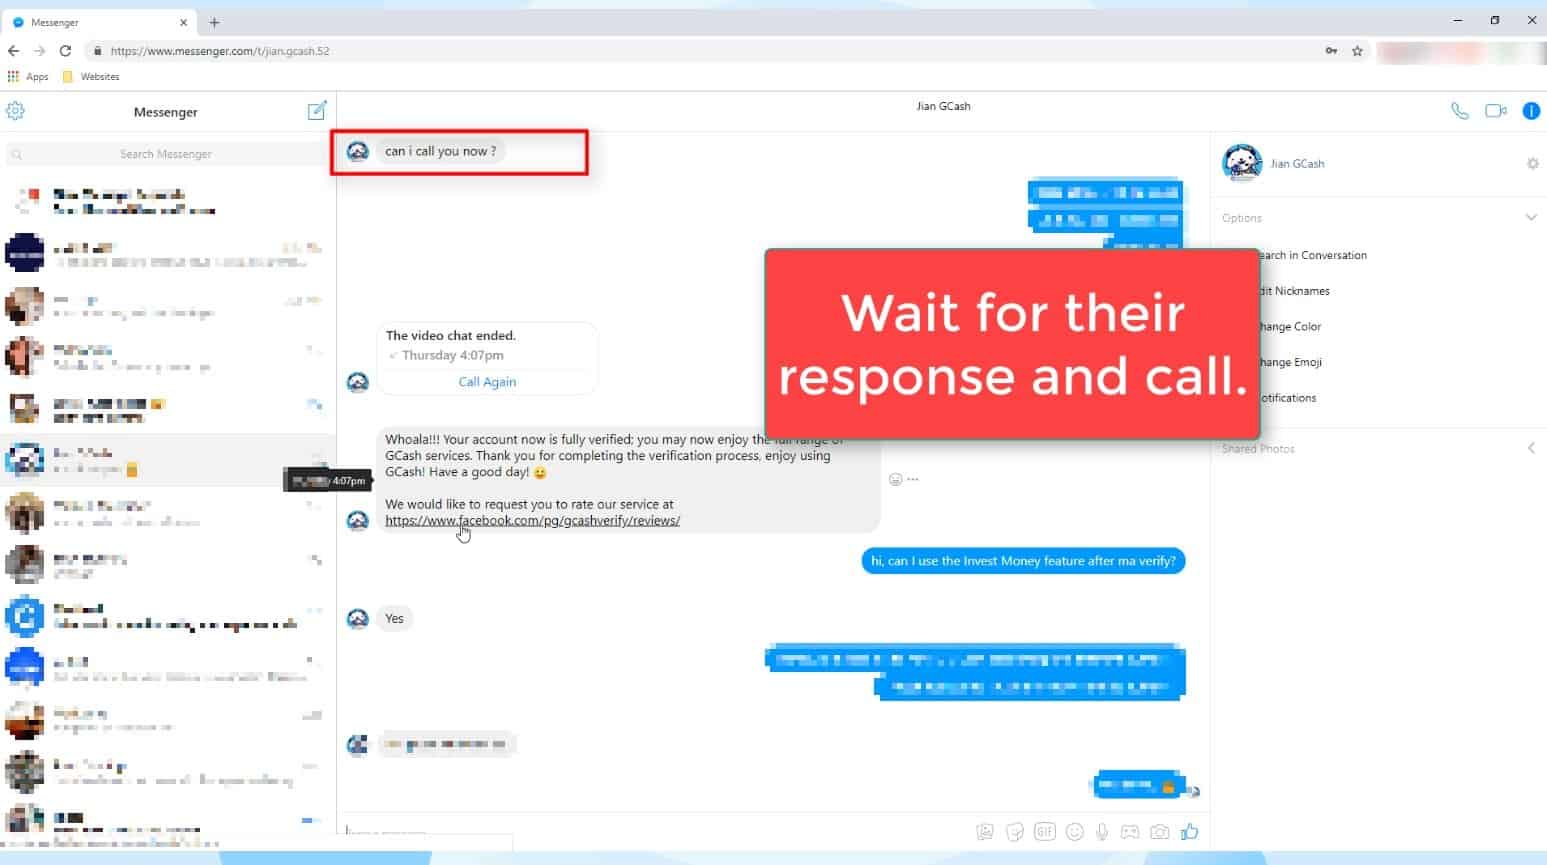
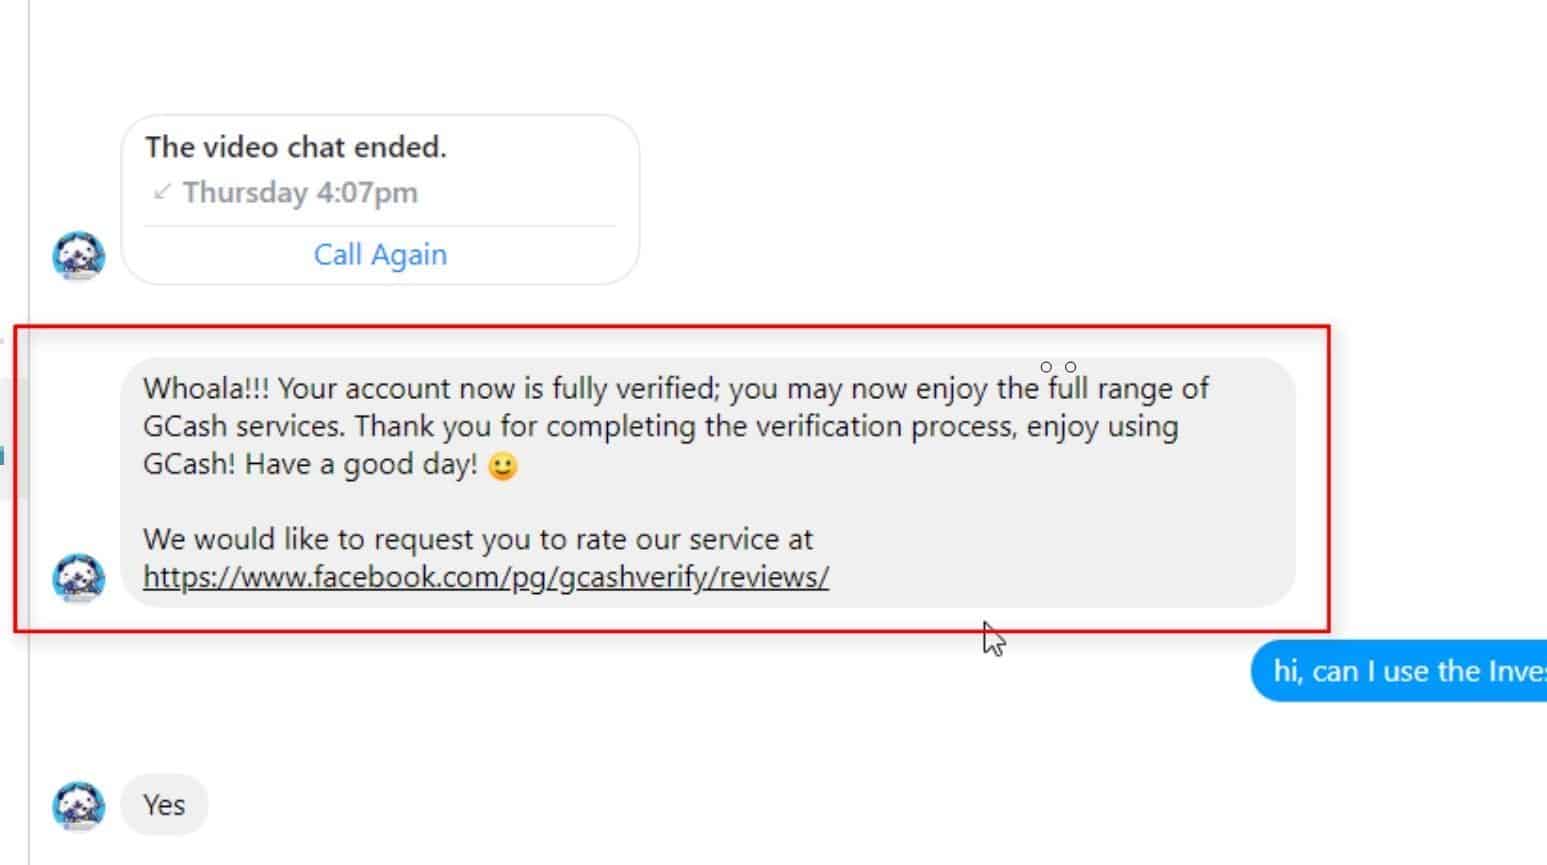
Step 5: Wait for their confirmation that your account is now fully verified.
After the video call and everything went well, you will receive a confirmation message in your FB messenger that your account is fully verified.
Even though you have already received a message from GCash that your account is fully verified, it might take a while before it would reflect on your phone.
Give it ample time for the replication to happen.
You might also need to restart your GCash app or restart your phone just in case your account has not updated to fully GCash verified status.
Financial Transactions Made Easy!
More on our Youtube Channel.
Subscribe Now!
Did you encounter any issues with GCash KYC verification process? Share your experience in the comments below! 🙂
Is Vless Gcash legit on Facebook?
Hi Karen, honestly hindi ako sure since di ko sya na try. Ito lang yung na try ko https://www.messenger.com/t/jian.gcash.52
Hi Karen,
I checked this with GCash and yes, vless is legit GCash messenger account. Here’s the correct link: m.me/vless.gcash.9
Laging plss try again kapag pnipindot ko ung fully verified
Hi Cherrie,
Kung nahihirapan ka mag verify through the app, pwede ka magpa verify through Messenger. You may check this guide: https://www.youtube.com/watch?v=IdyO19GgHF4
I filled up the form but it still uppgrade in process on my Gcash account.. I badly need the money where my friend cash in in my gcash account which is na fully verefied.. puregold iriga.. 7 eleven and other outlets do not process cashout
ano po yung need na exact need nyo? may error ba sa pag upgrade and do you want to cash out?
loveholy2617, server
Pano po ba talaga iposition ang school ID? Yung samin kasi portrait siya, kso may ibang articles sabi nila dapat landscape. Thanks.
Hi Elisha, I can’t find official statement from GCash kung may preference sila sa pag upload ng ID. I think best to say na dapat good quality yung pagkaka upload ng ID, no blurs and not pixelated para madali mareview ng GCash support when reviewing your account.
I hope nakatulong 🙂