PLDT Online Payment BDO: How to Enroll and Pay PLDT Bills in BDO Online Banking
You have come to the right place.
Let us show you how.
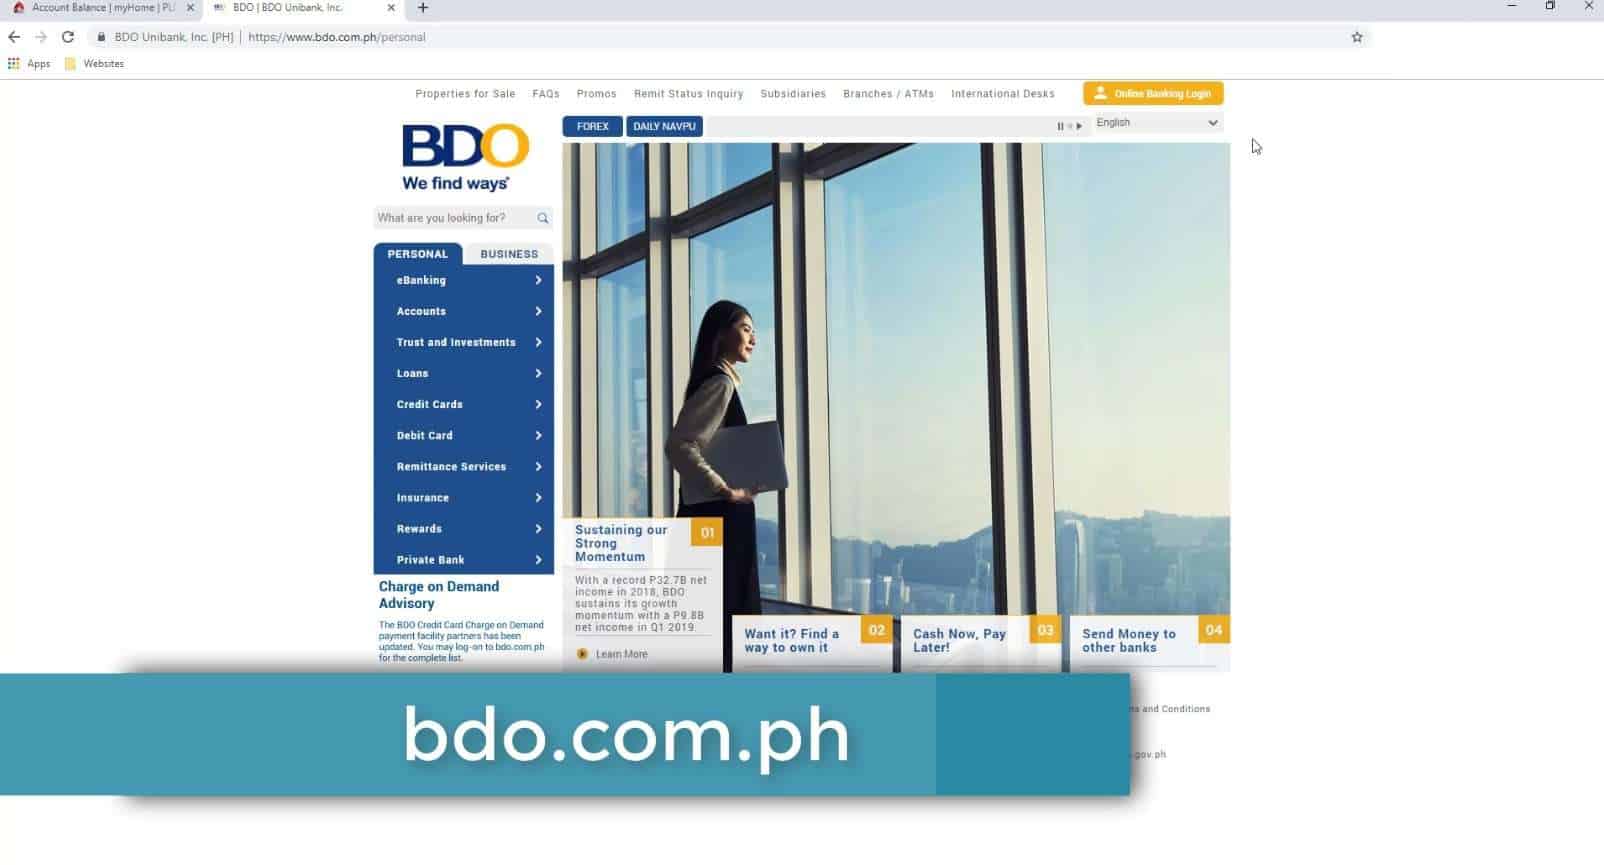
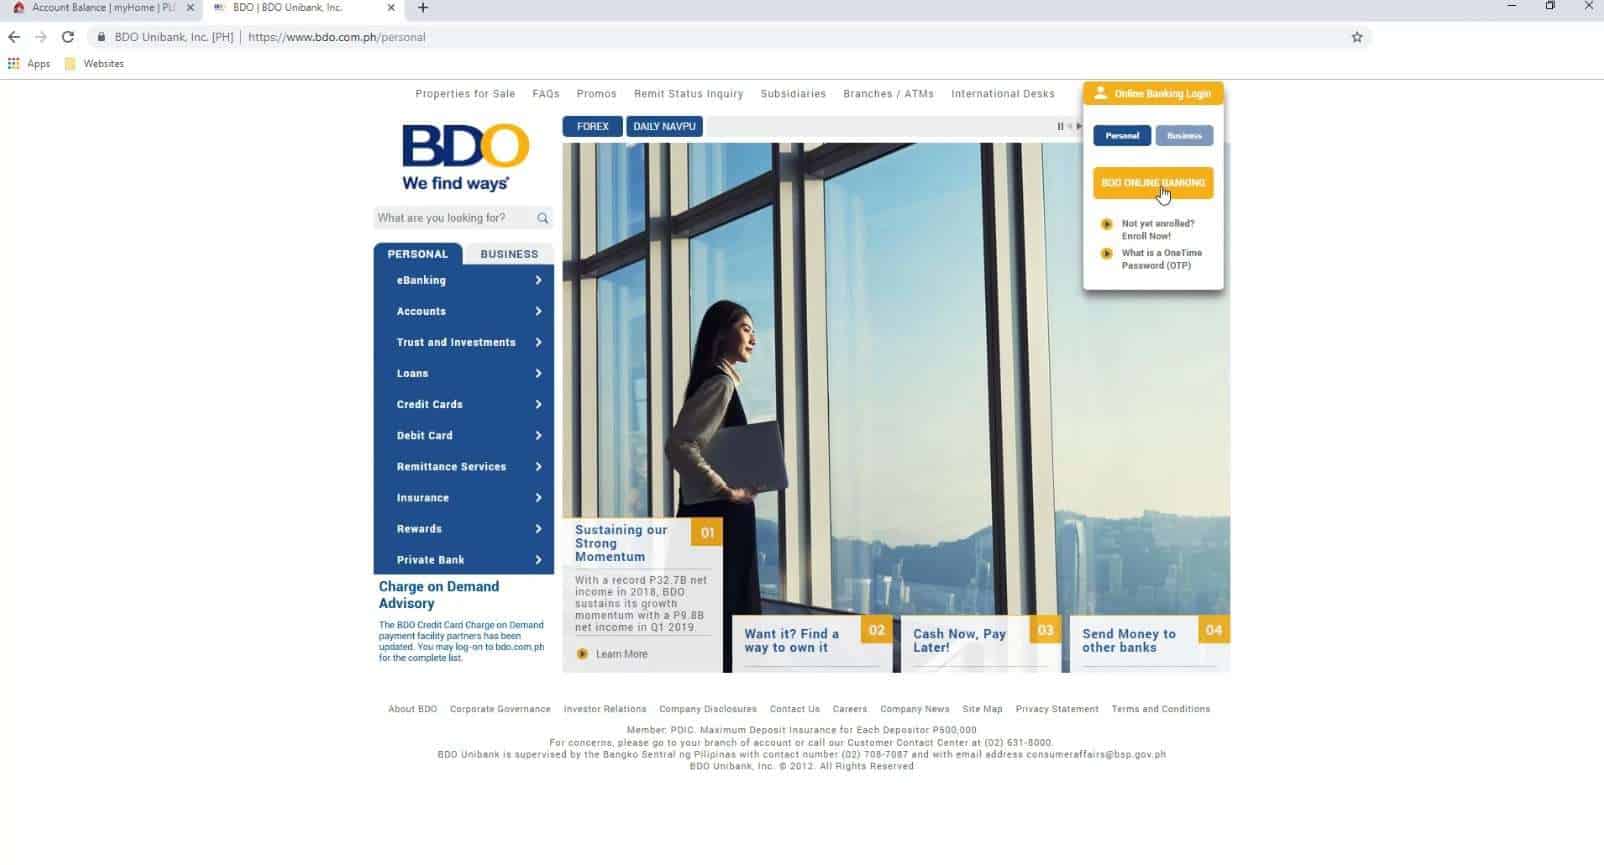
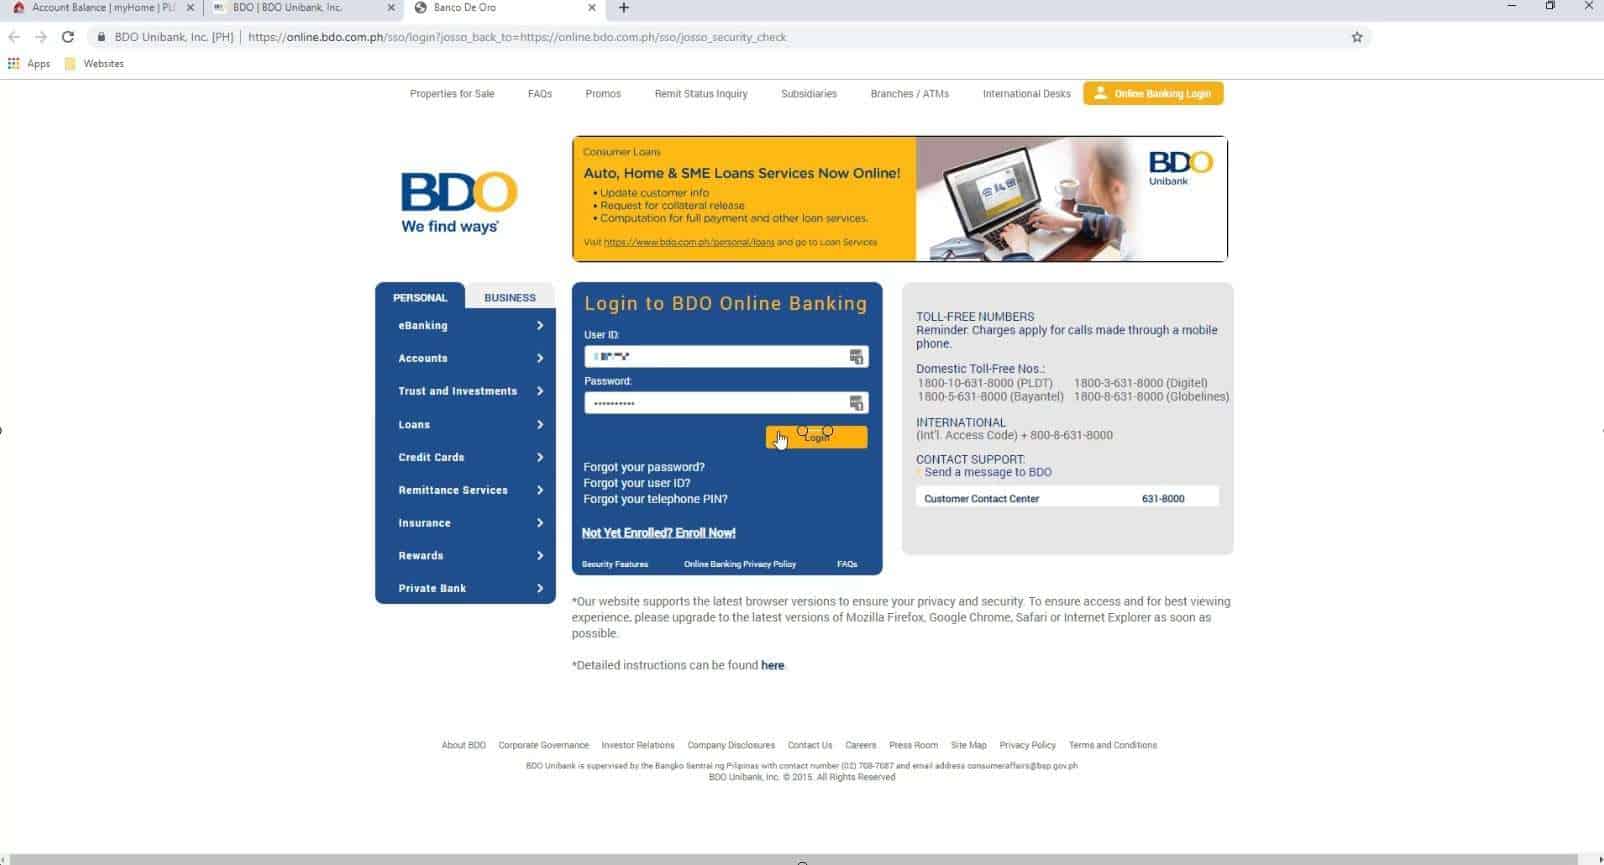
Step 1: Login to the BDO Online website.
Go to the BDO website by typing this in your browser: bdo.com.ph
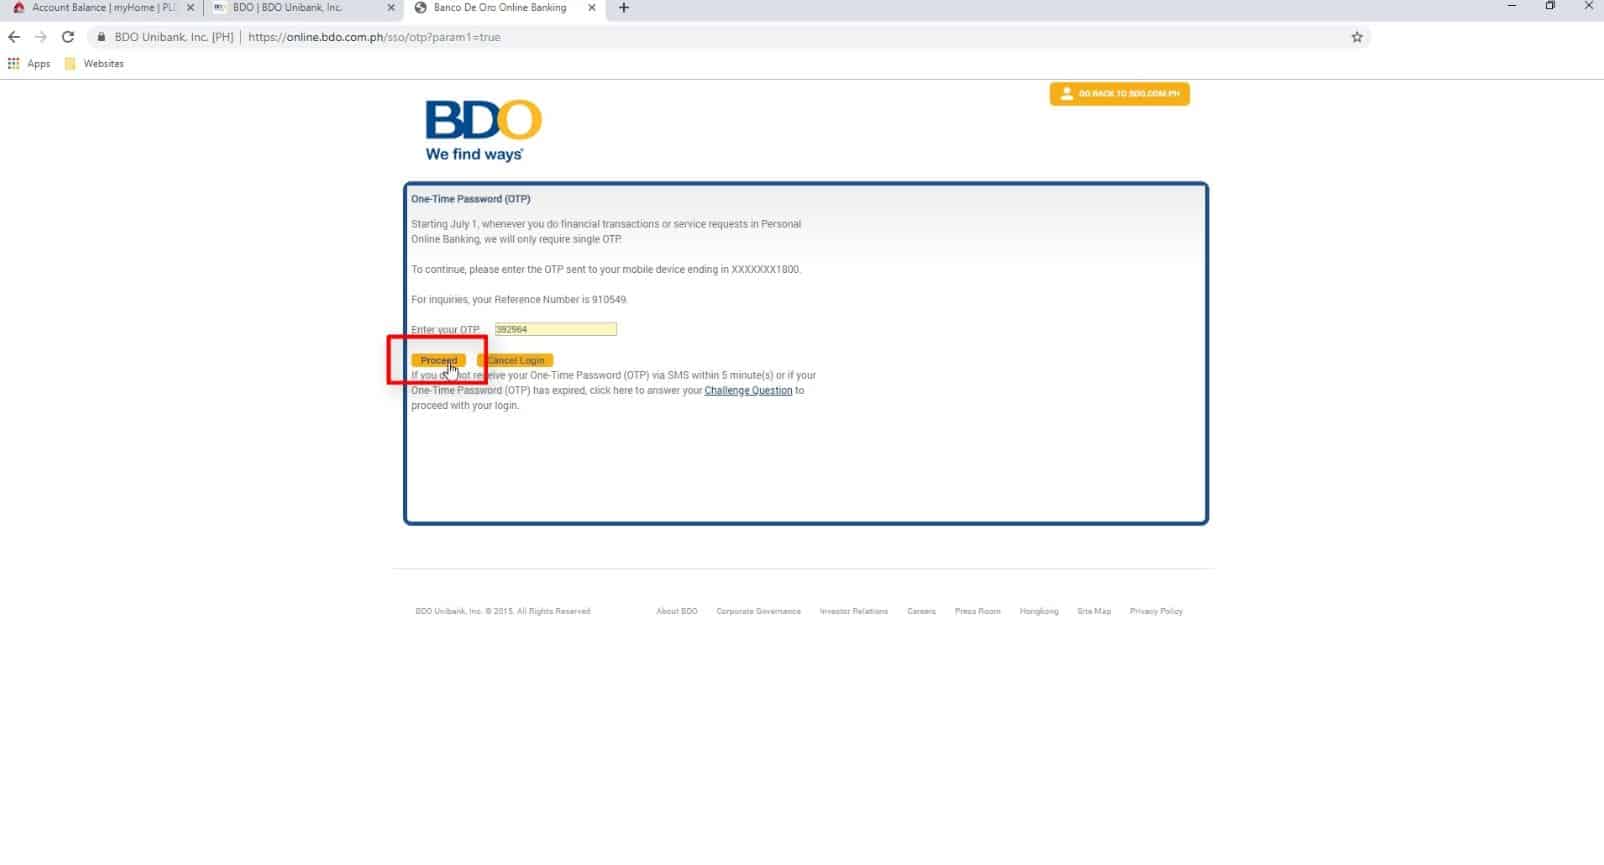
There is an alternative way if you are unable to provide the OTP.
You can answer your nominated Challenge Question.
Unfortunately, this option will already be removed by July 2019.
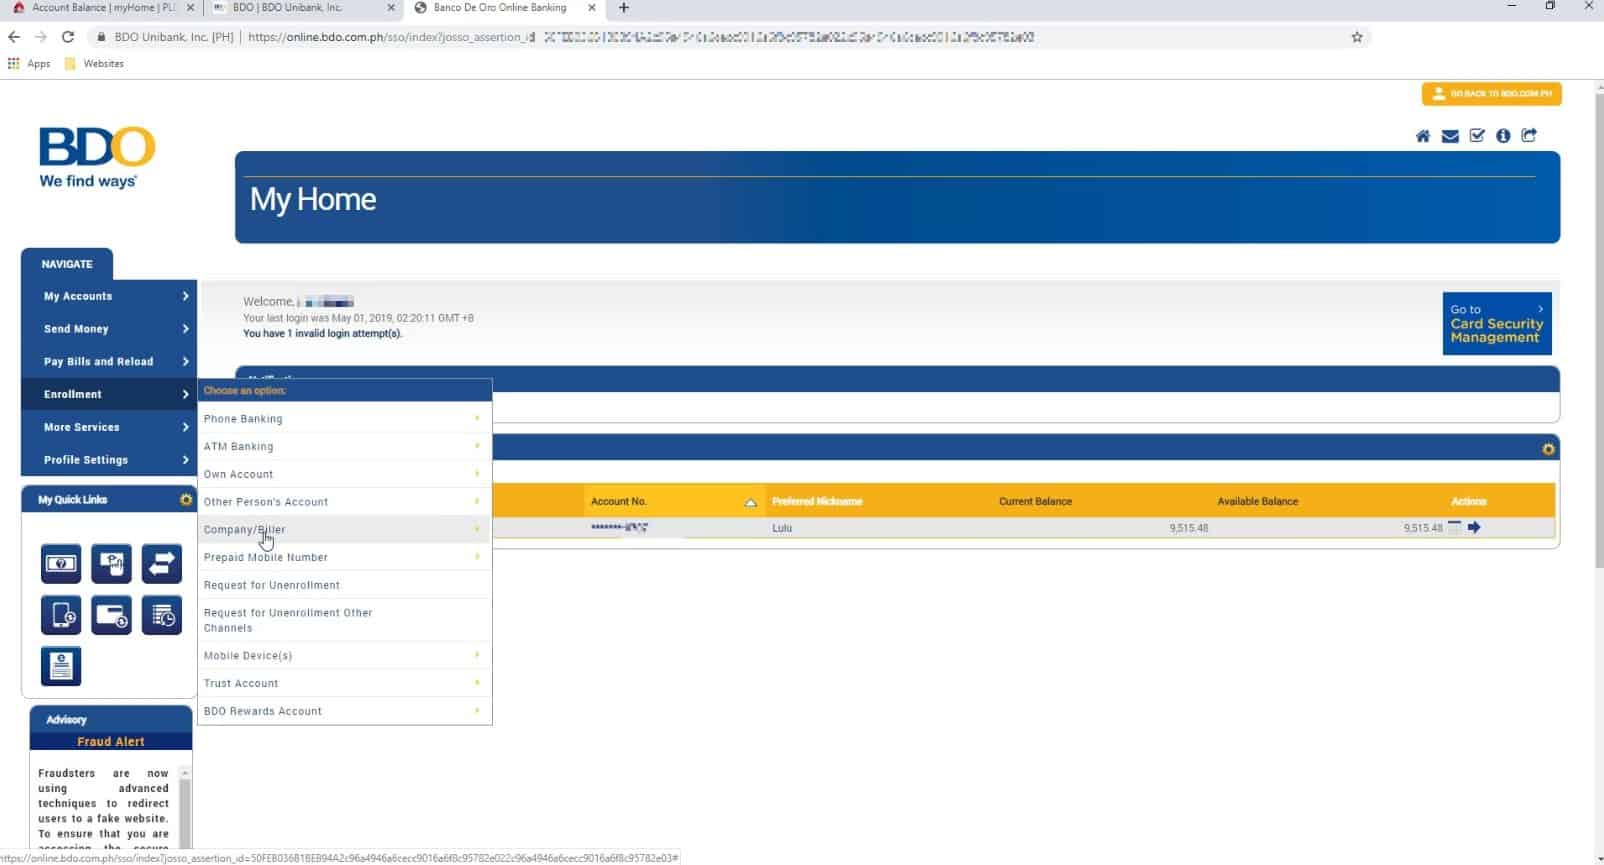
Step 2: Select Enroll from the Enrollment (Company / Biller) menu options.
On the navigation menu on the left side, go to Enrollment.
Then, choose Company / Biller.
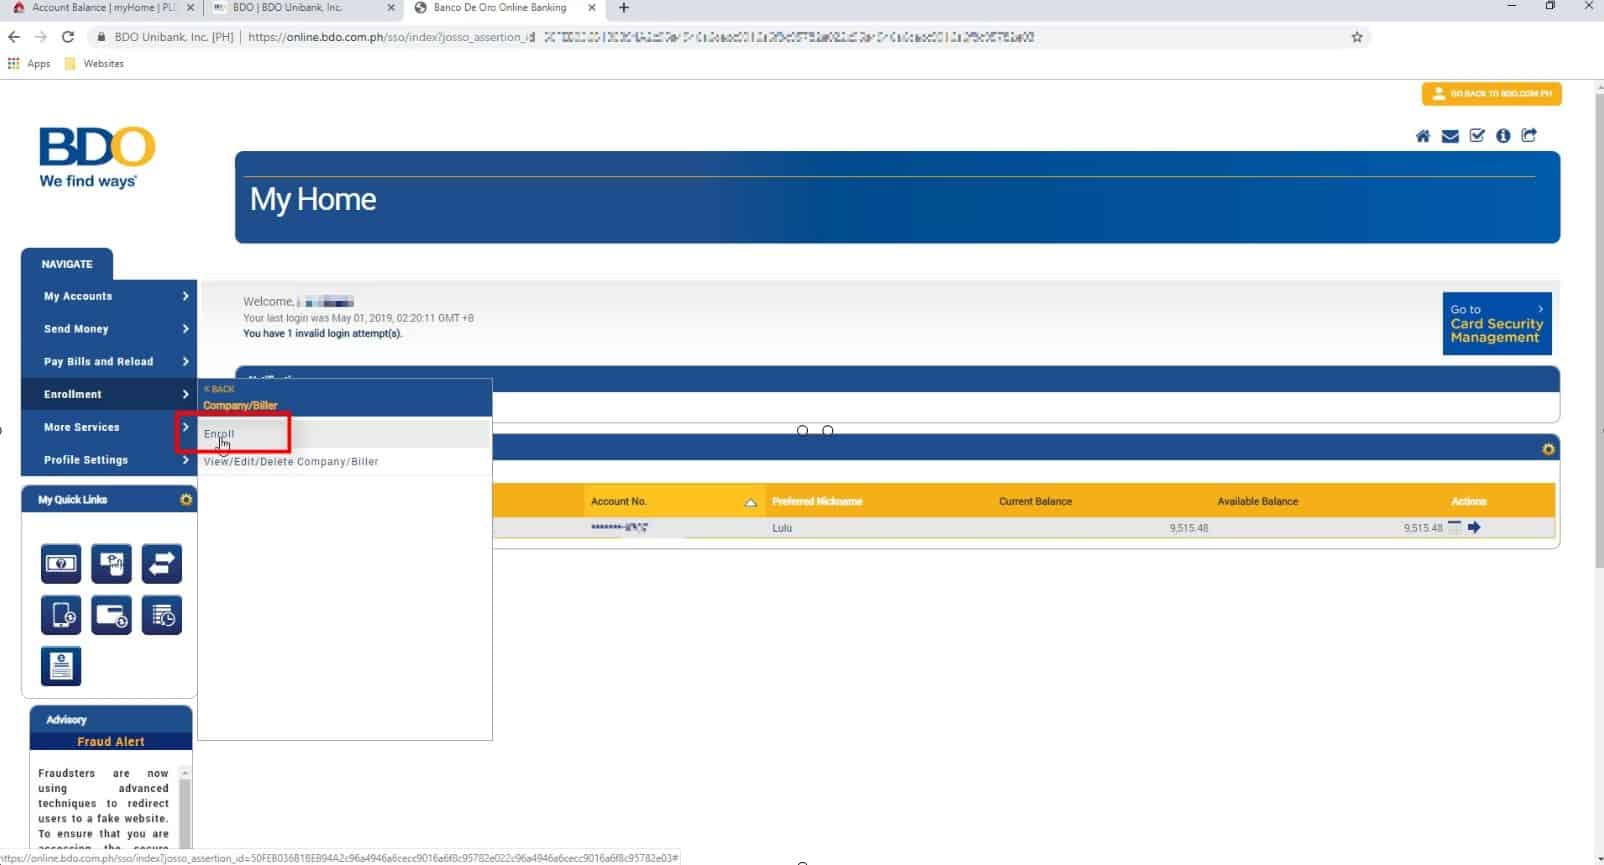
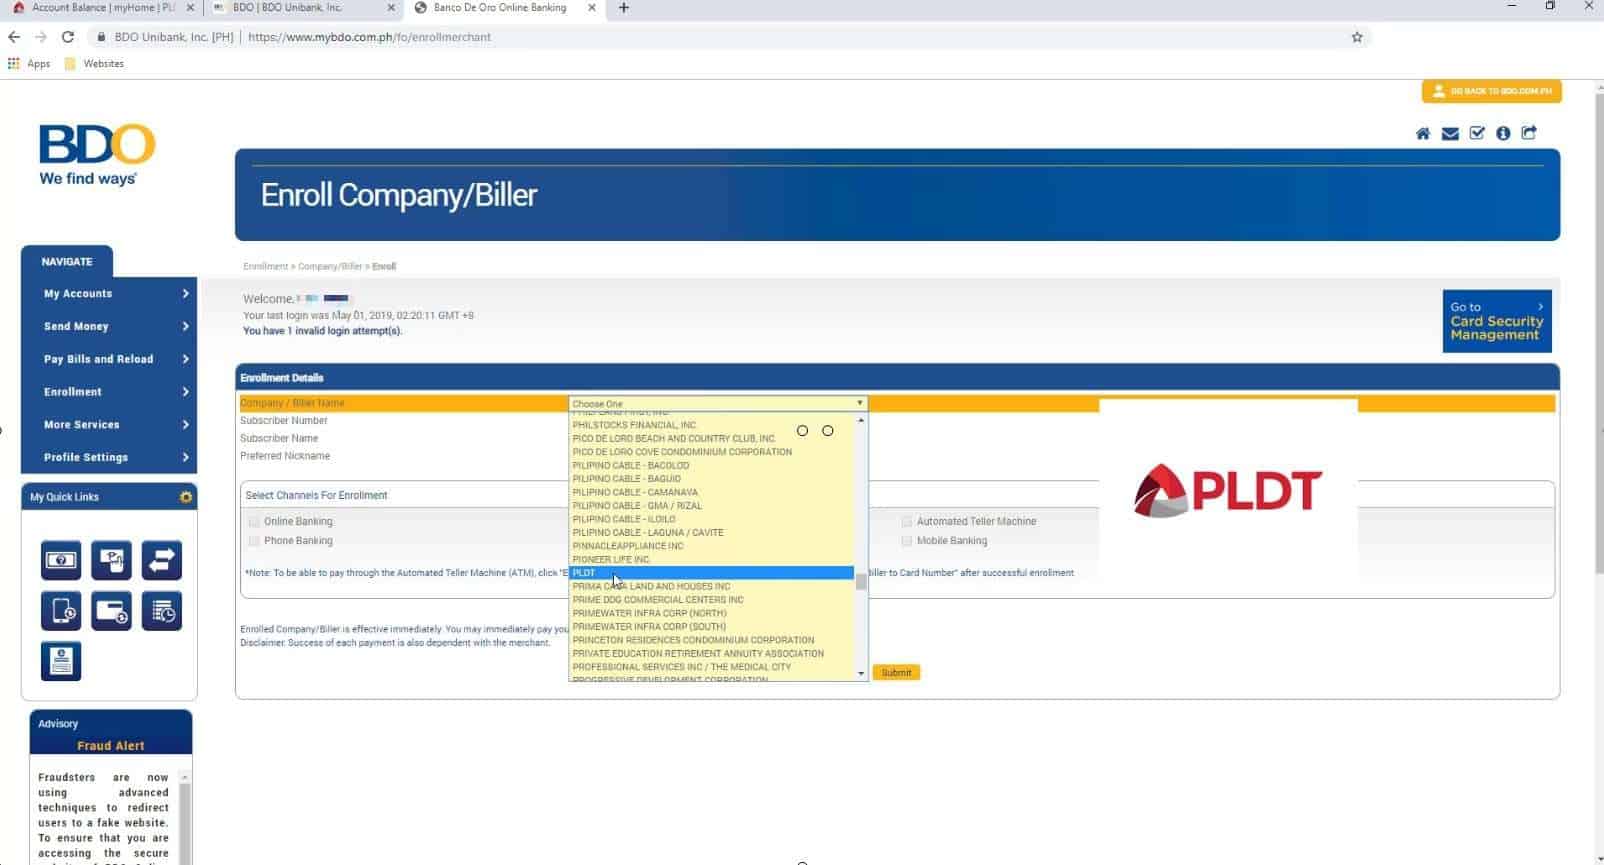
Step 3: Completely fill up the Enroll Company / Biller registration form.
For the Company / Biller name, choose PLDT from the drop down option.
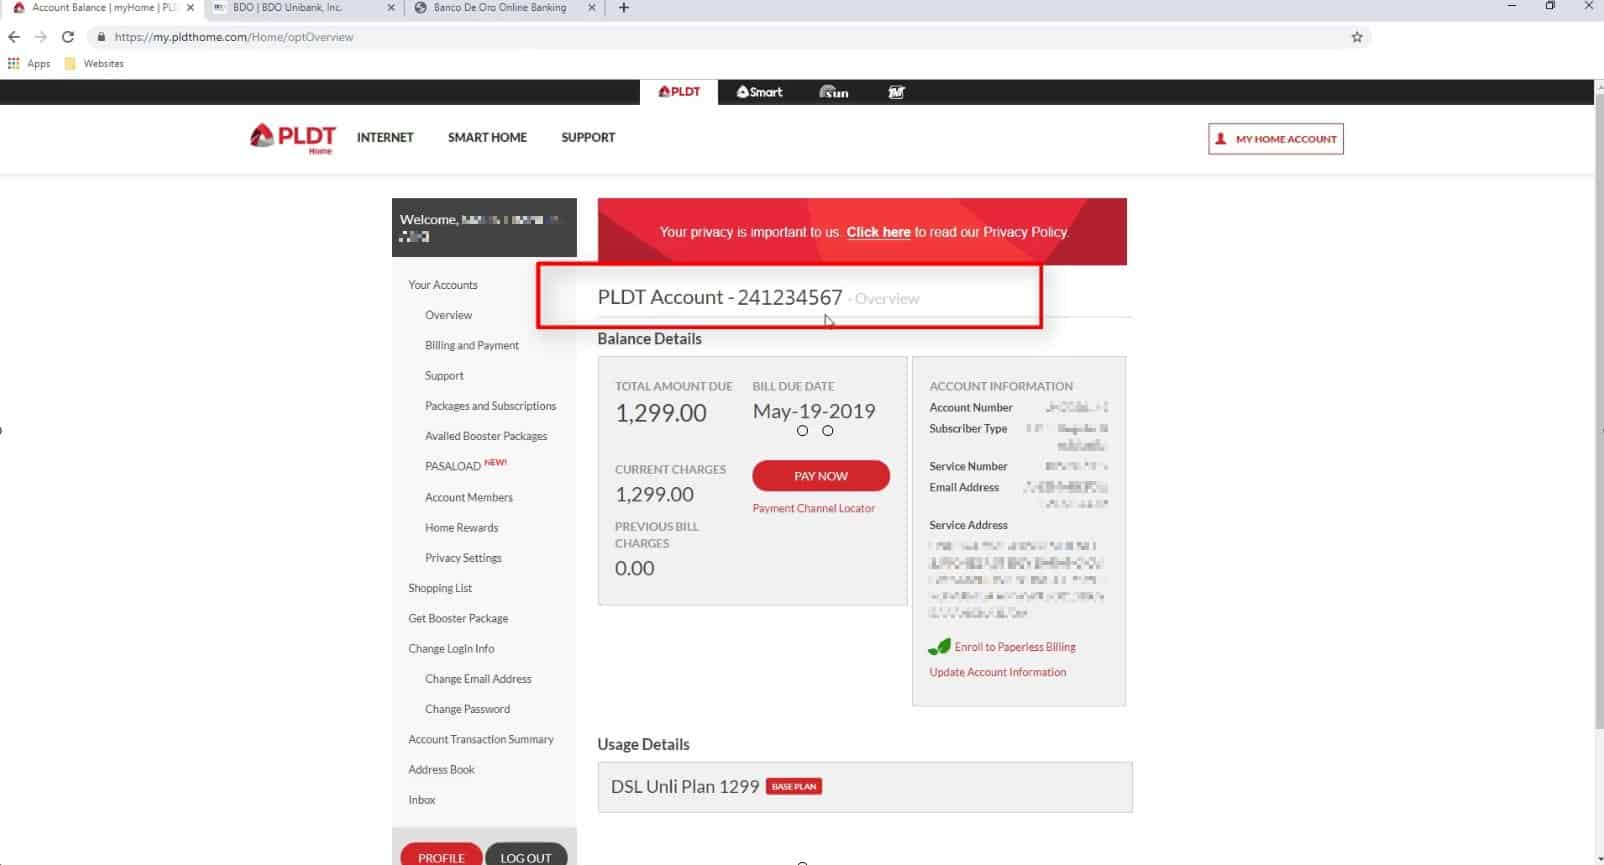
You will be able to locate this on your PLDT bill or you can login to your online account and that PLDT account number will be there (see image below).
You can also add a preferred nickname for the PLDT account on your BDO online.
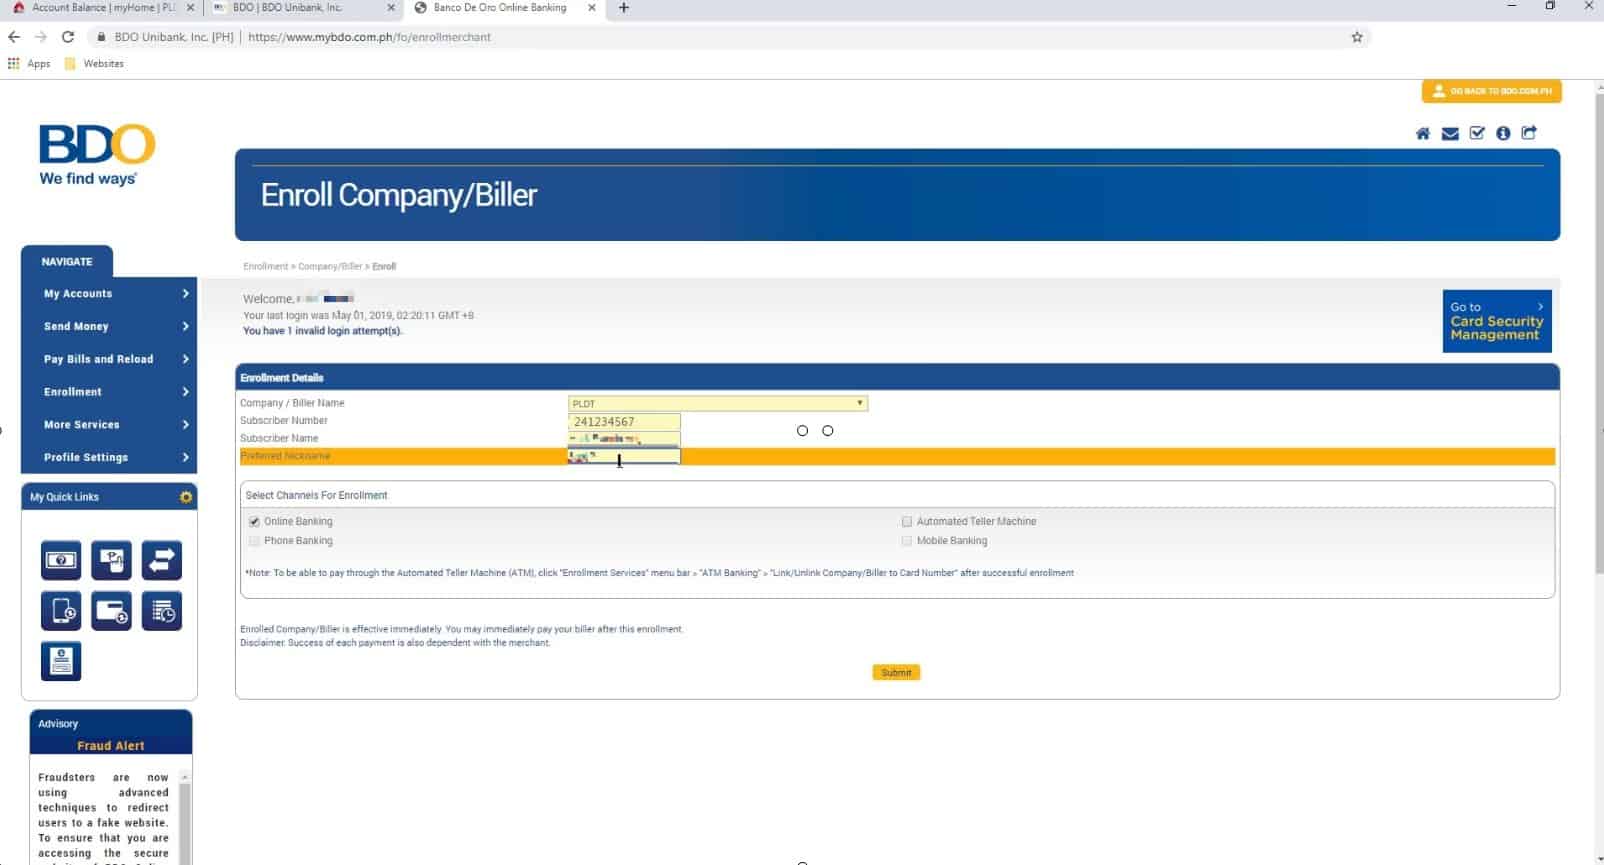
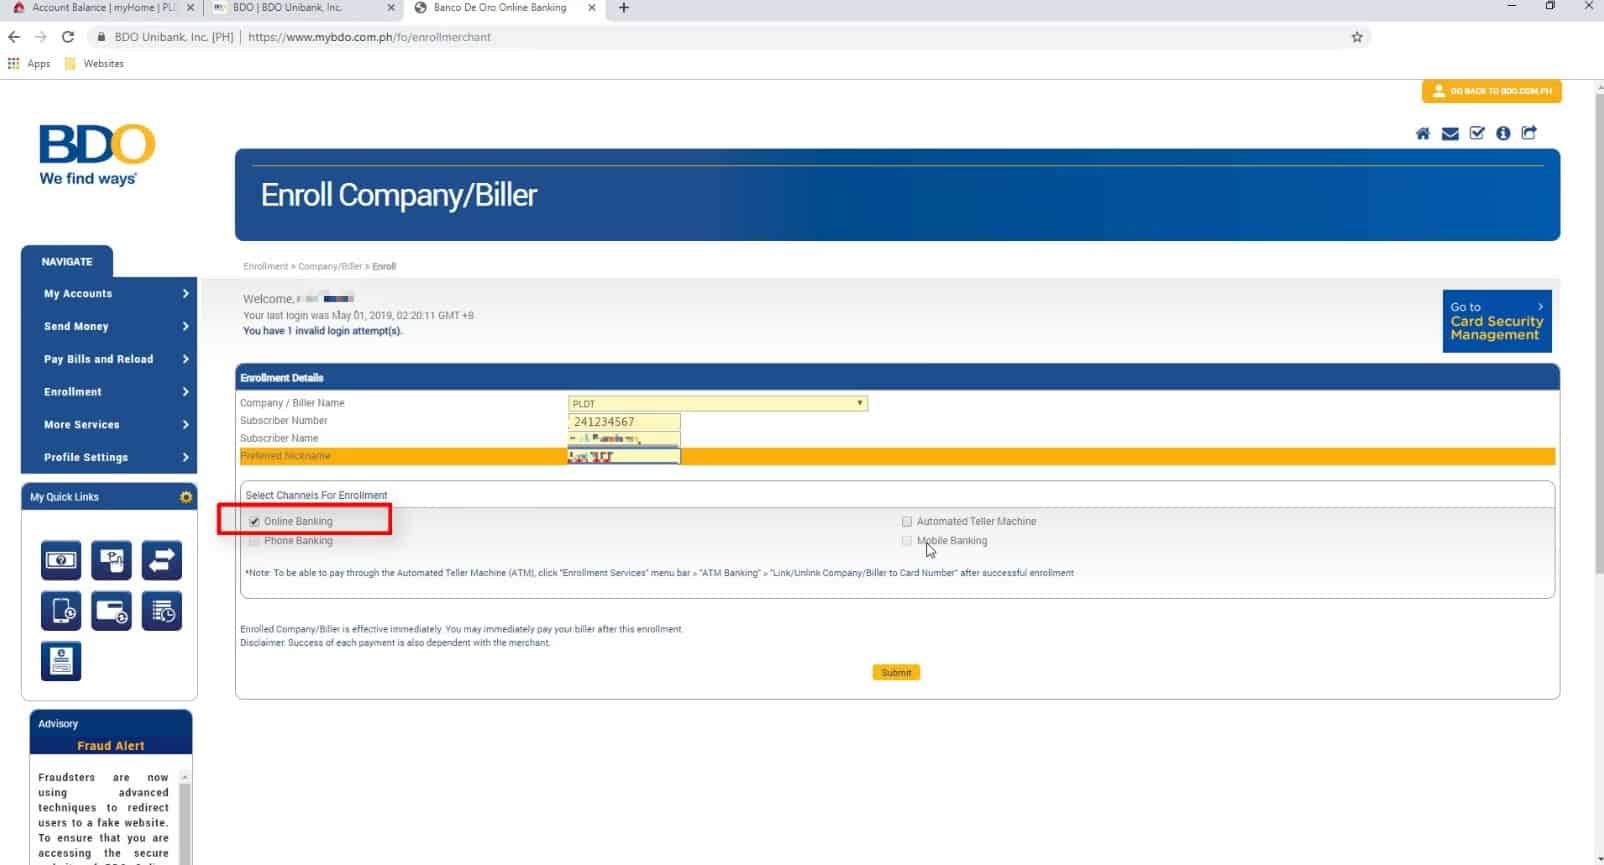
For this guide, we will choose online banking.
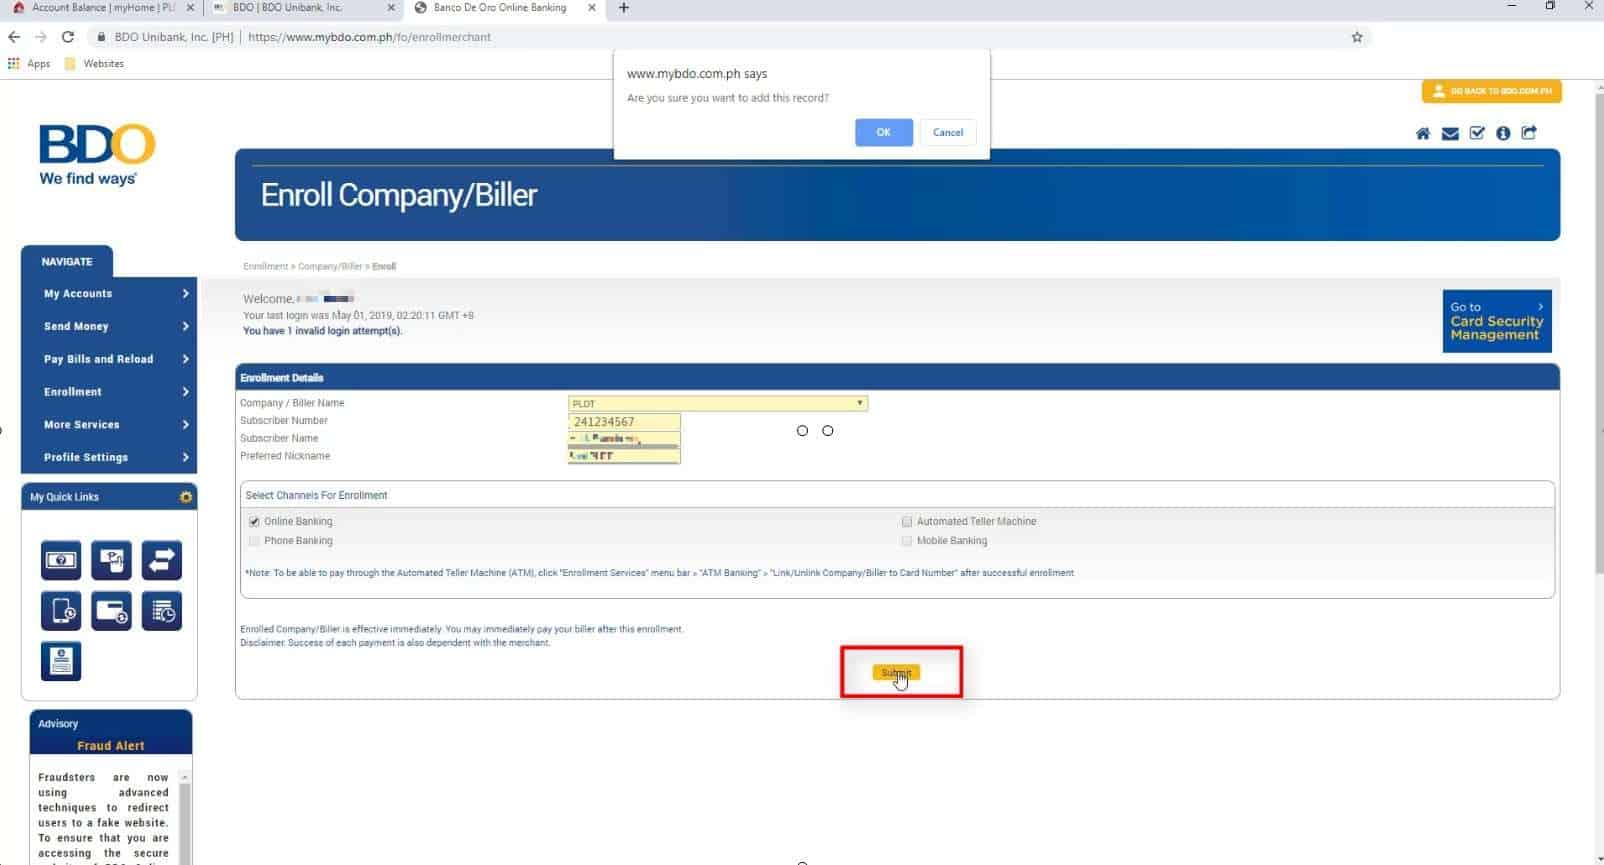
You will also be prompted to confirm if you are sure to add this record to your BDO account.
Click on the OK button.
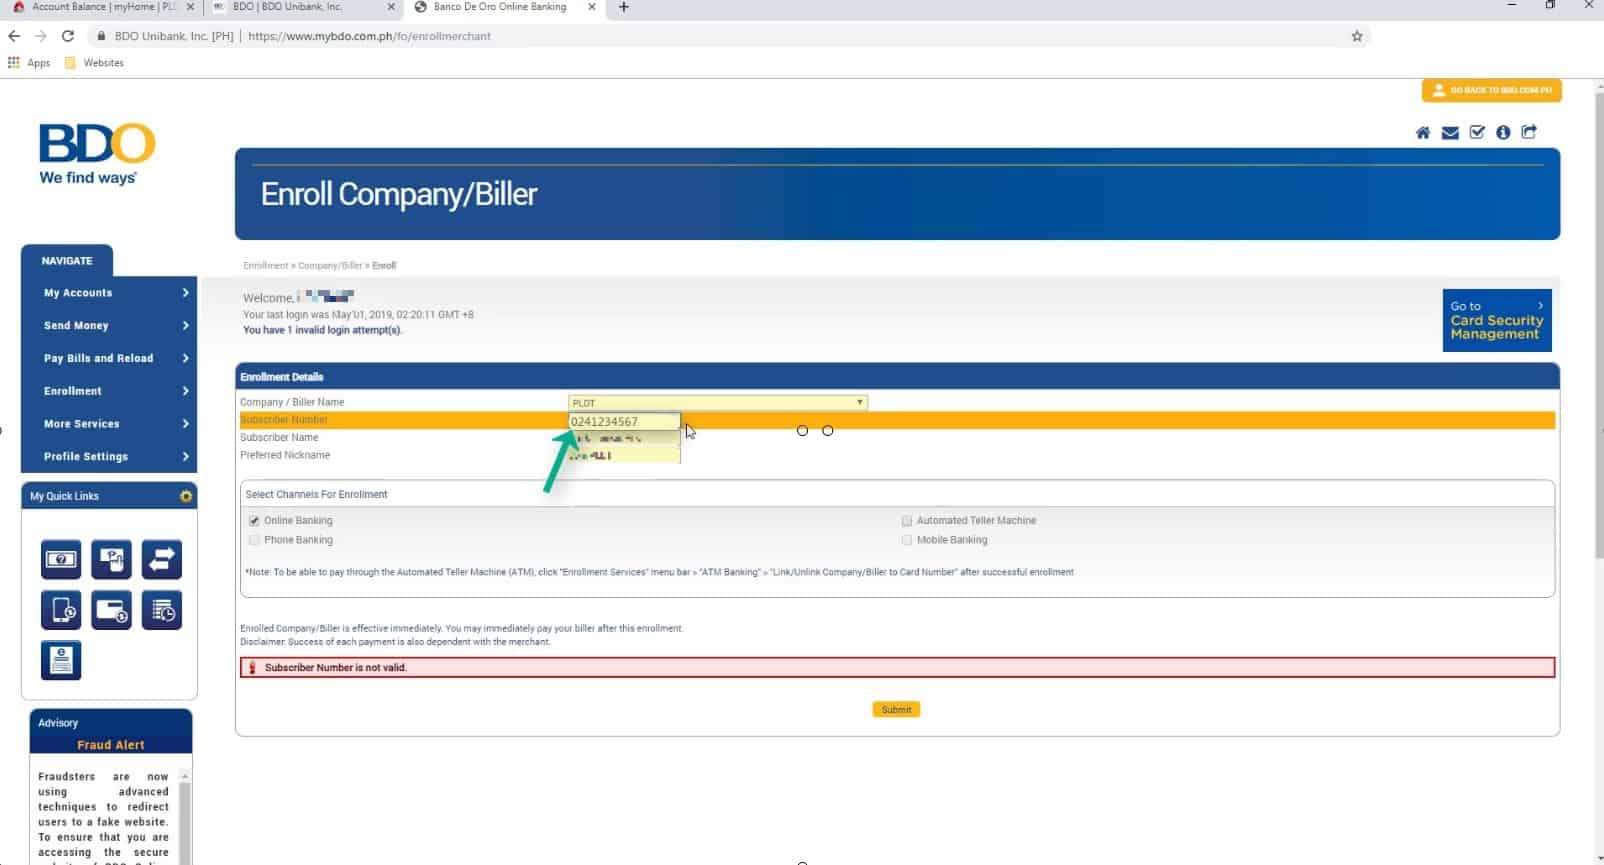
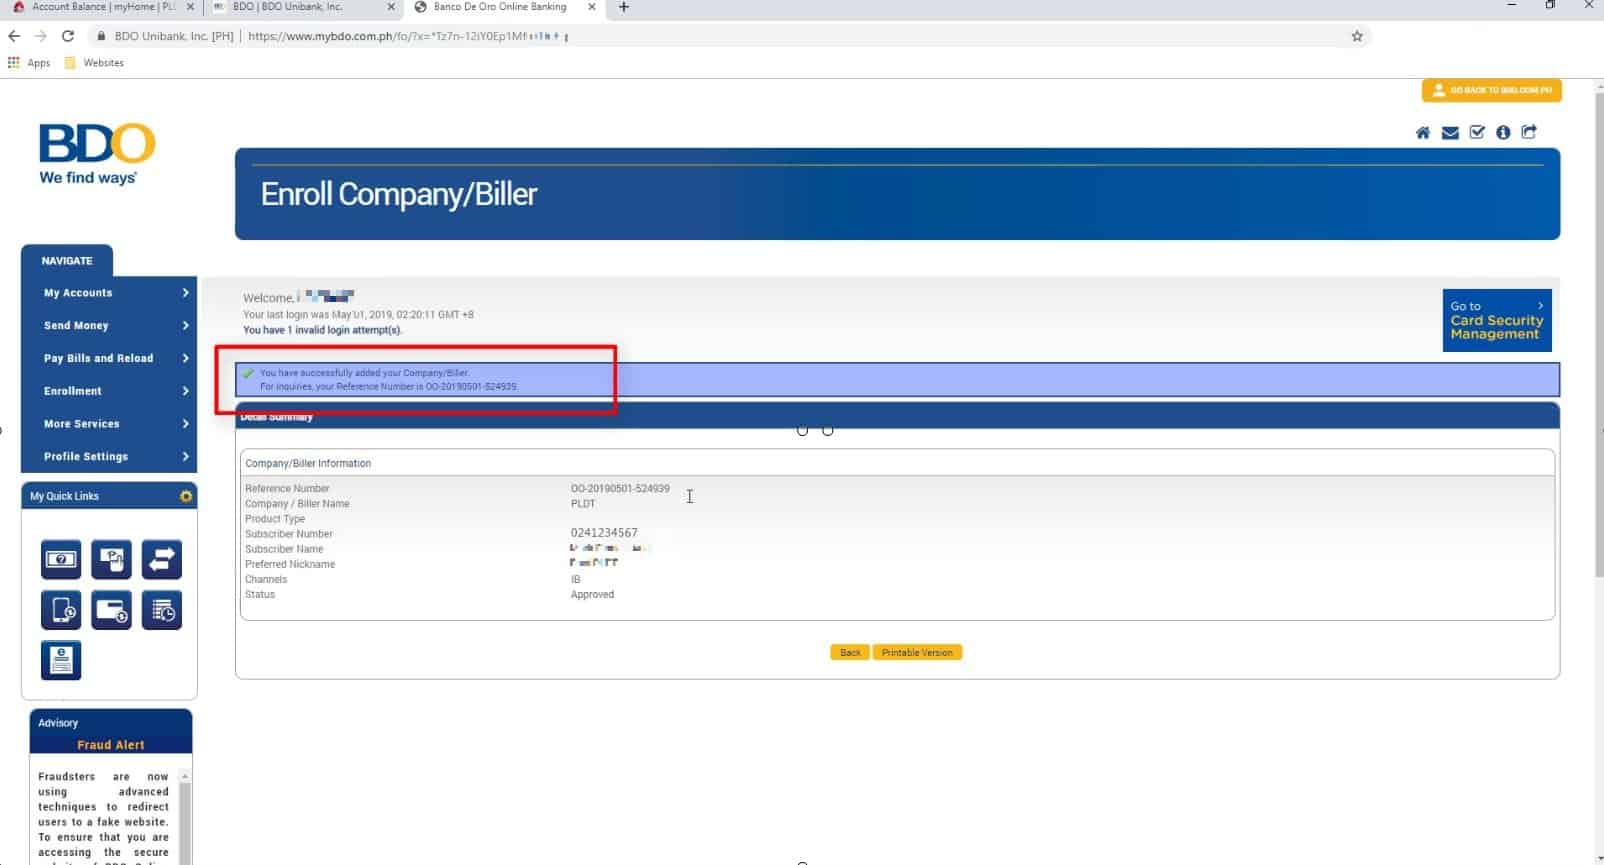
After researching, we found out that it needs to have a leading zero at the subscriber number has to be ten digits.
Take note of this!
You have an option here to print or save your enrollment transaction details for future reference.
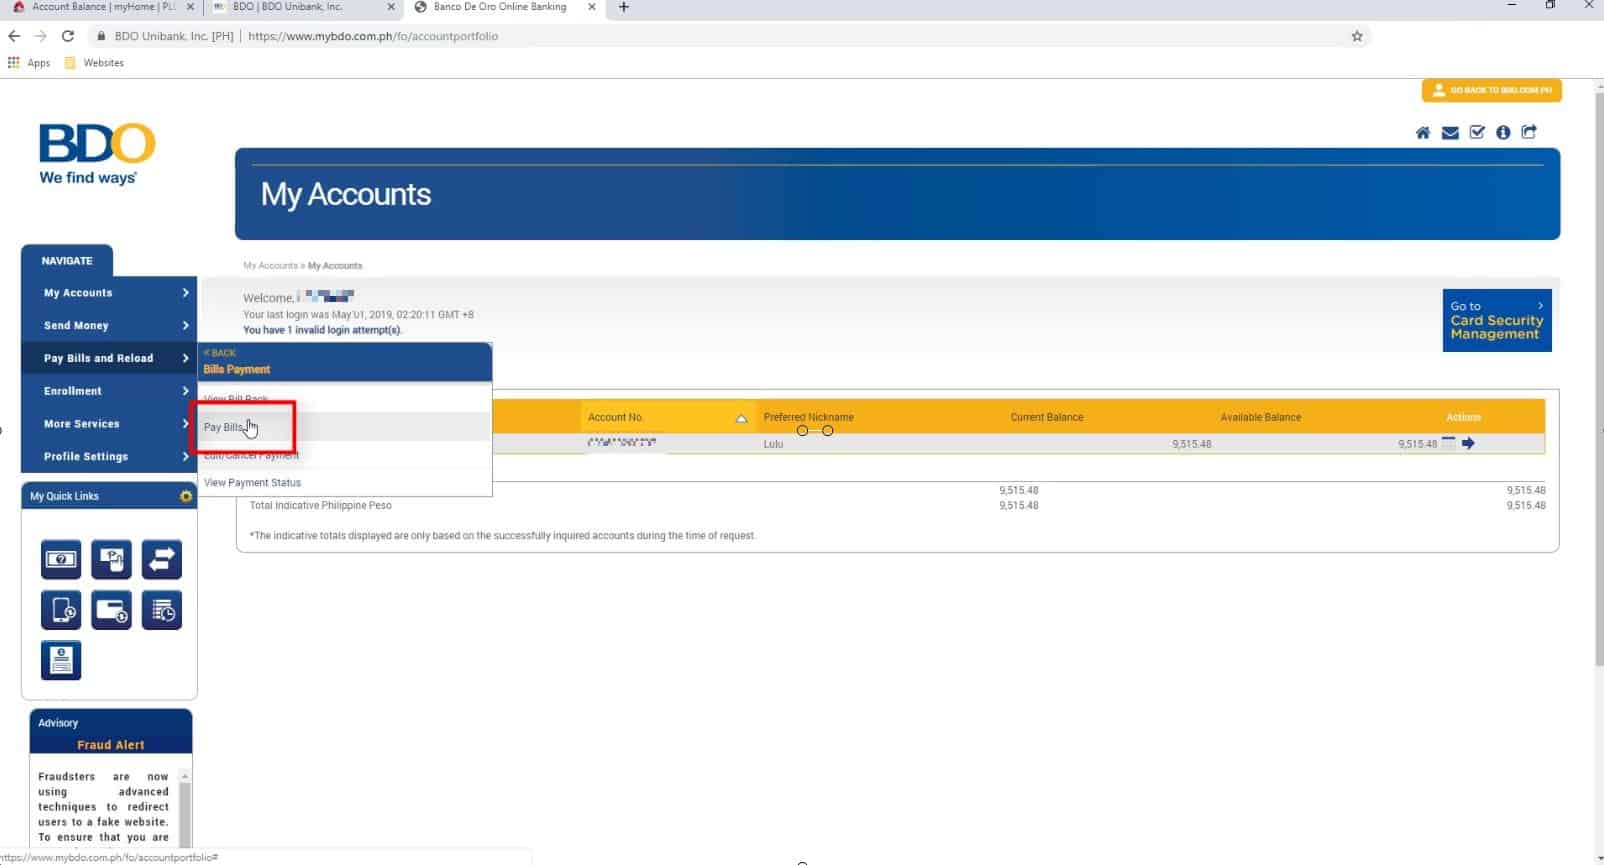
Step 4: Choose Pay Bills from the Pay Bills and Reload (Bills Payment) menu option.
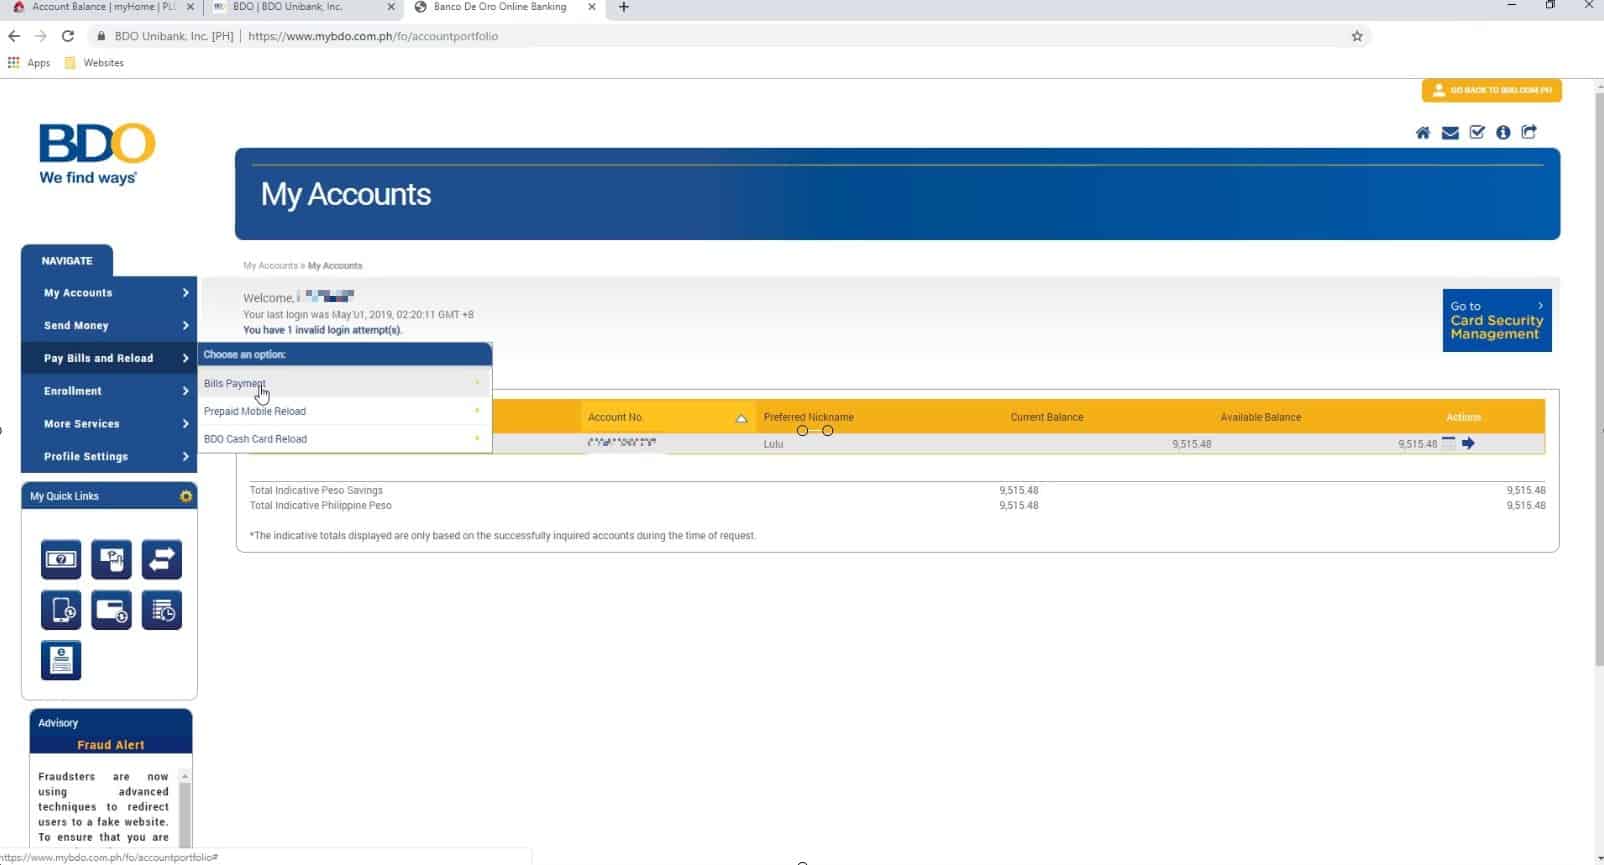
On the left hand side menu, got to Pay Bills and Reload and choose Bills Payment.
Step 5: Fill up the Pay Bills online form.
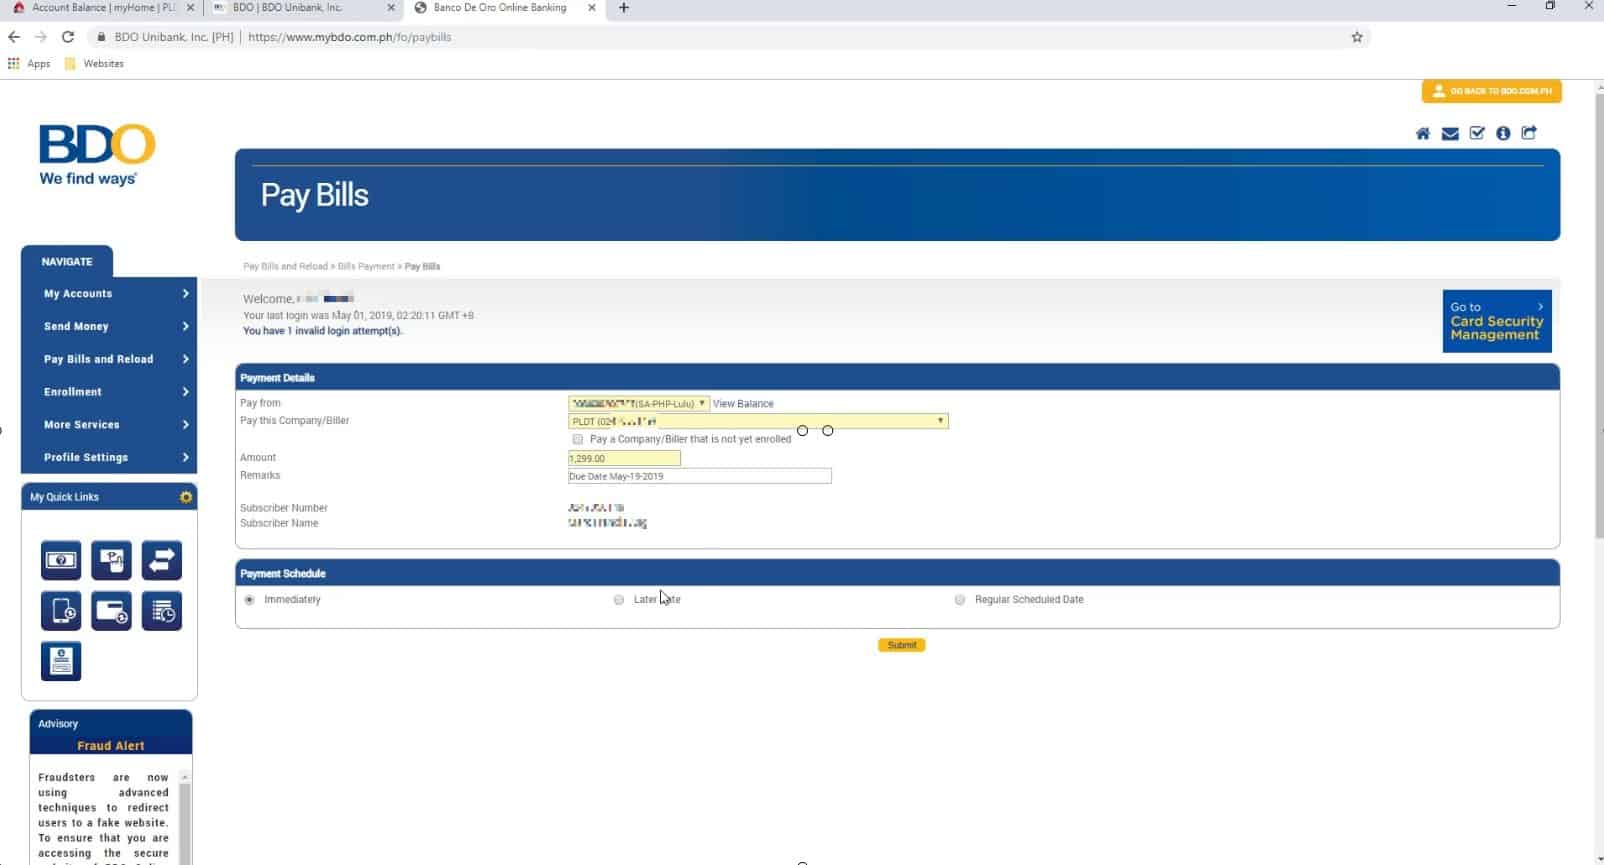
You now need to completely fill up the payment details form.
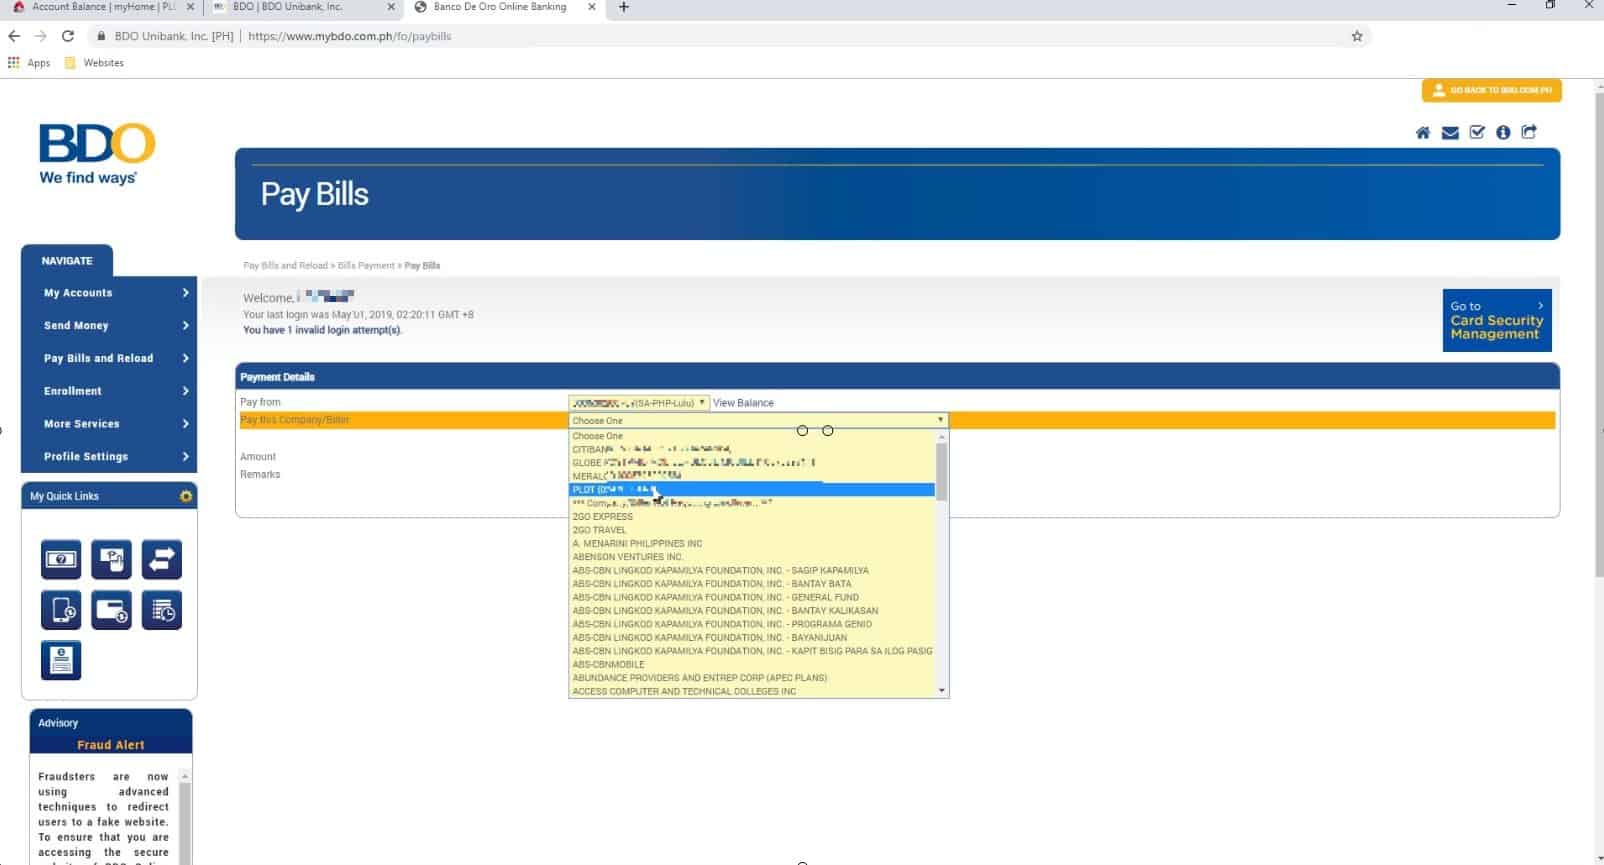
If you have multiple BDO accounts, choose the source account to fund the PLDT online payment that you will be doing.
In our case, we only have one BDO account.
The next field is for the Company / Biller that you will be paying to.
You should be able to see your newly enrolled PLDT account on the drop down menu option.
You can also add remarks here for easier payment tracking if you need to check your transaction in the future.
For the payment schedule, we will be choosing immediately.
Click on the Submit button when done.
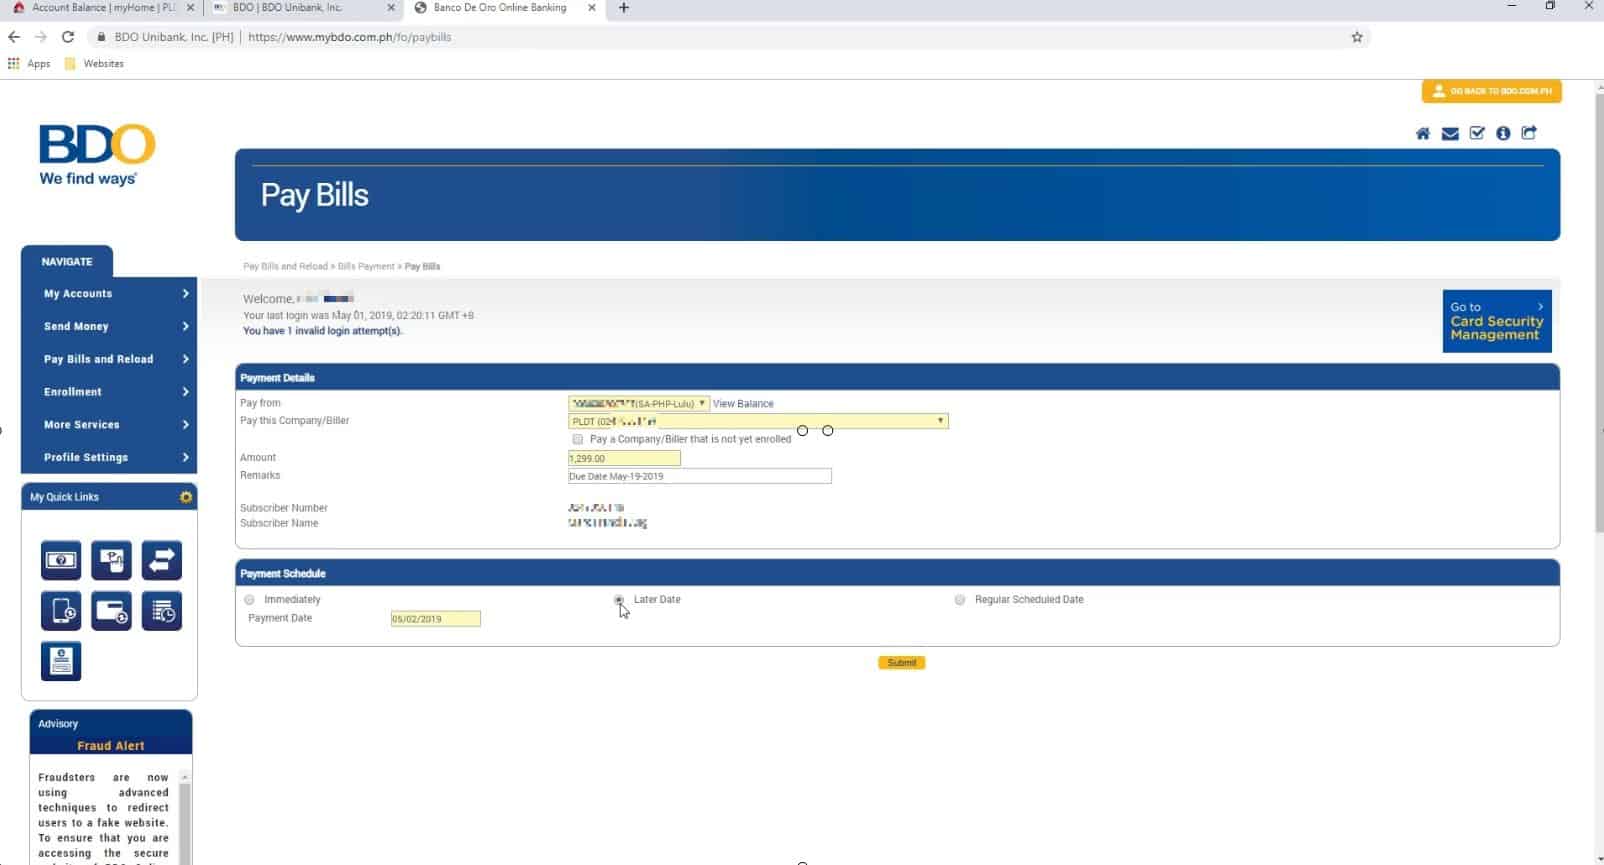
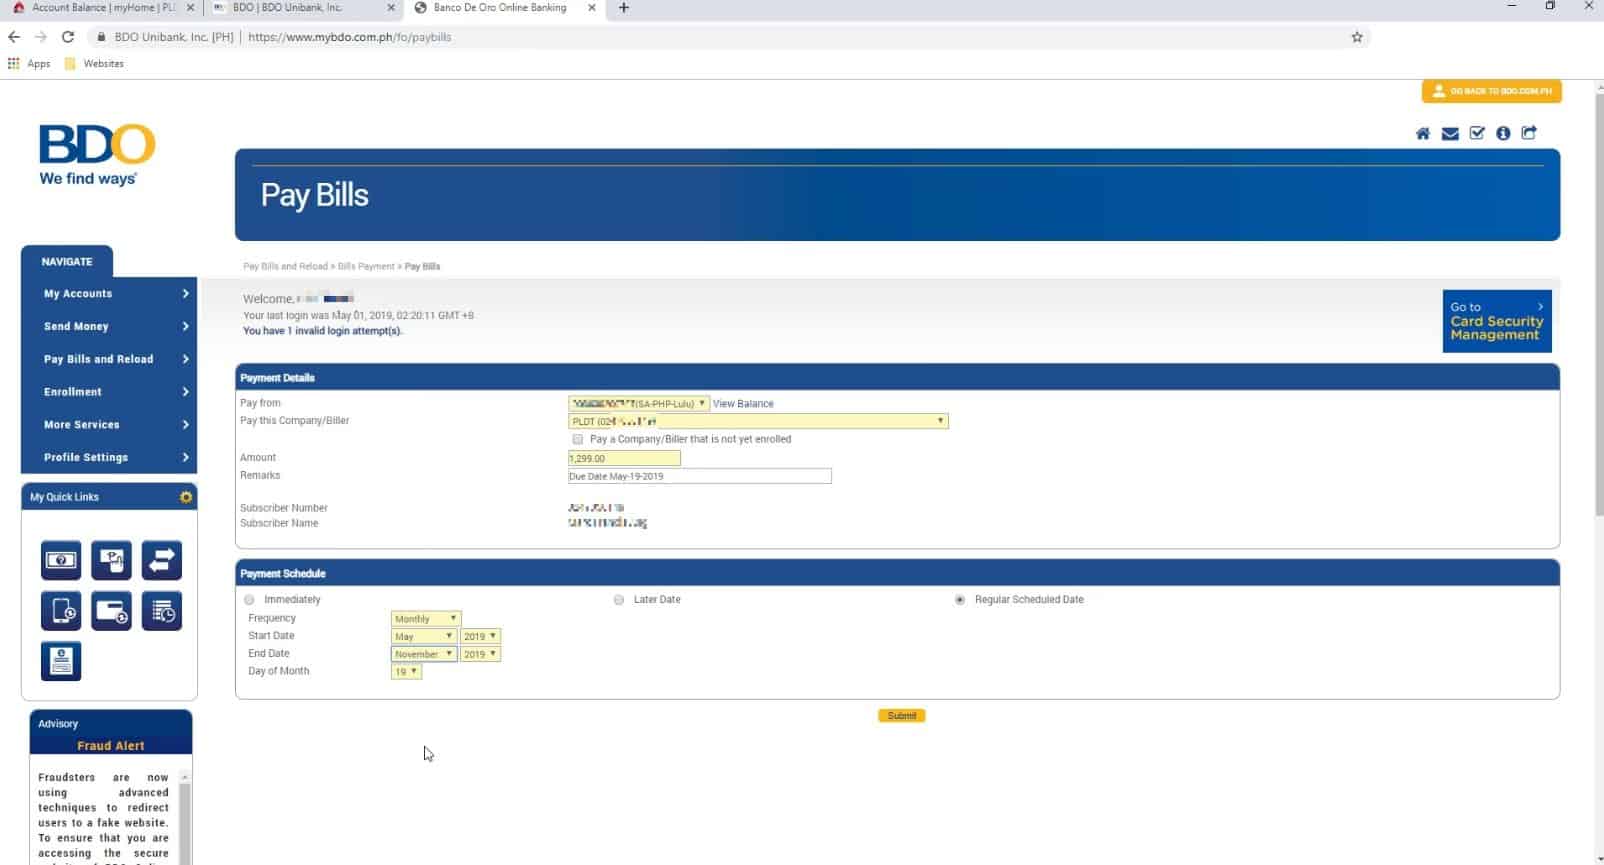
The image below shows the Later Date option.
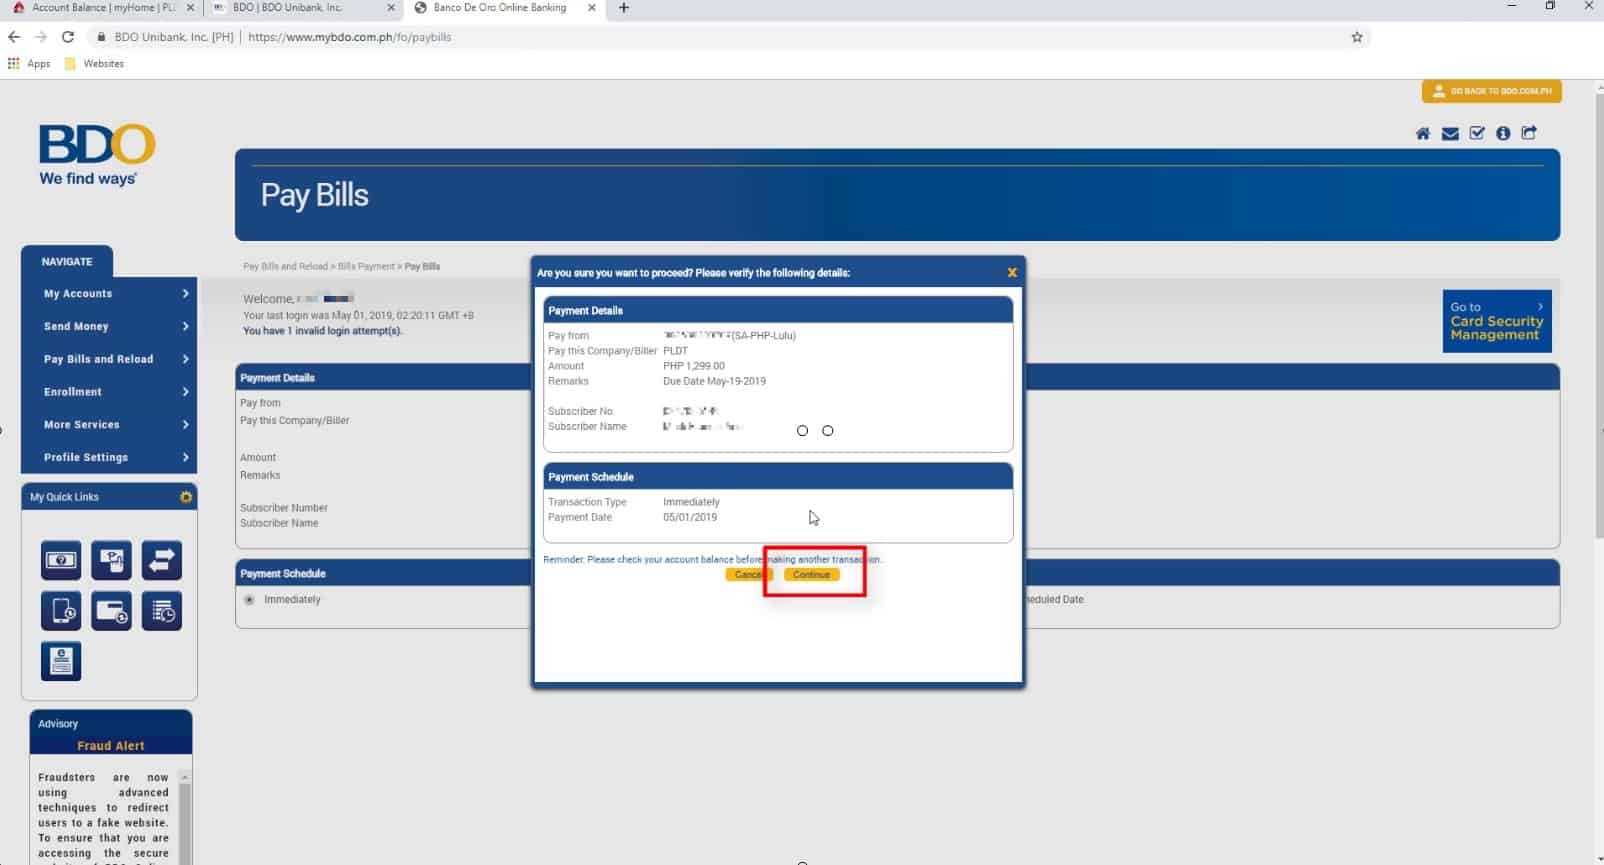
Here you will have a chance to correct the details if needed just by clicking on the back button.
If everything looks okay, click on the Continue button.
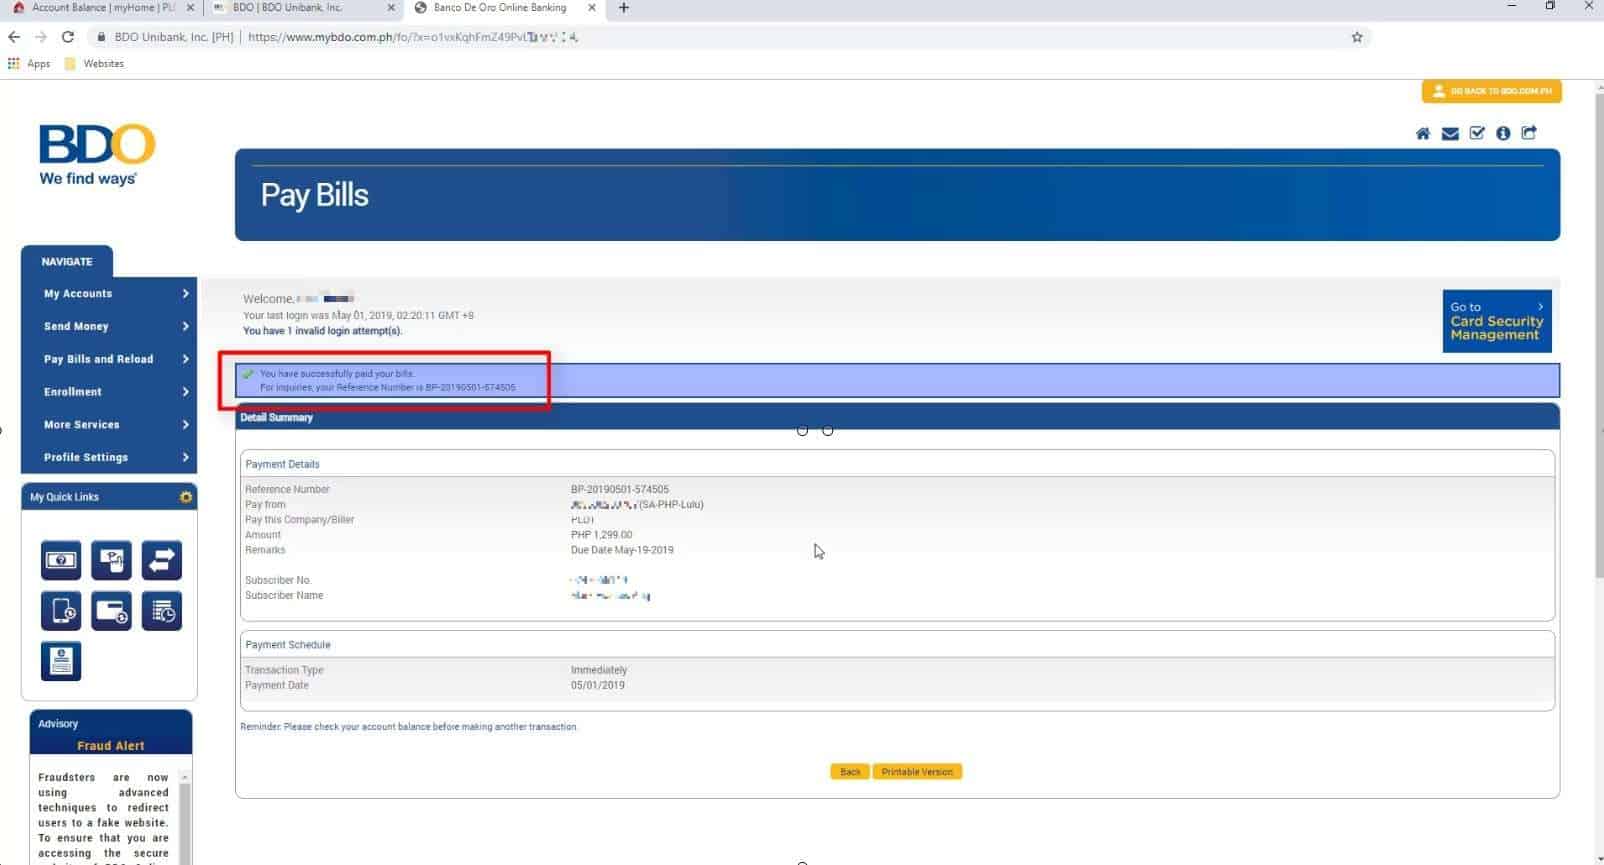
Step 6: You will receive a success notification and reference number on your screen.
If everything went well, you will see a success notification with reference number and the payment details summary on your screen.
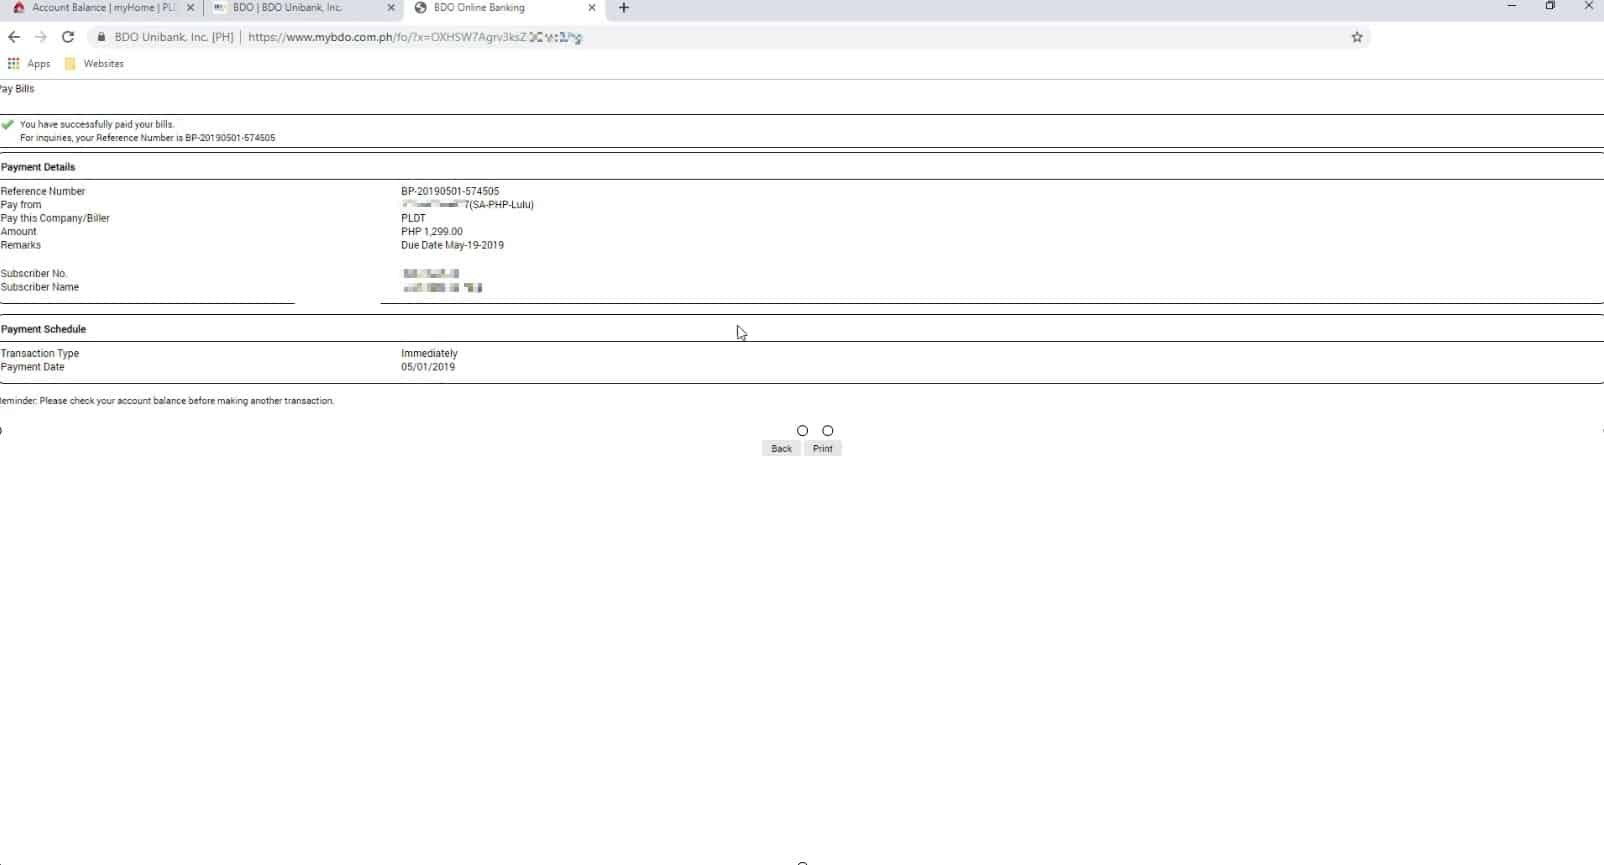
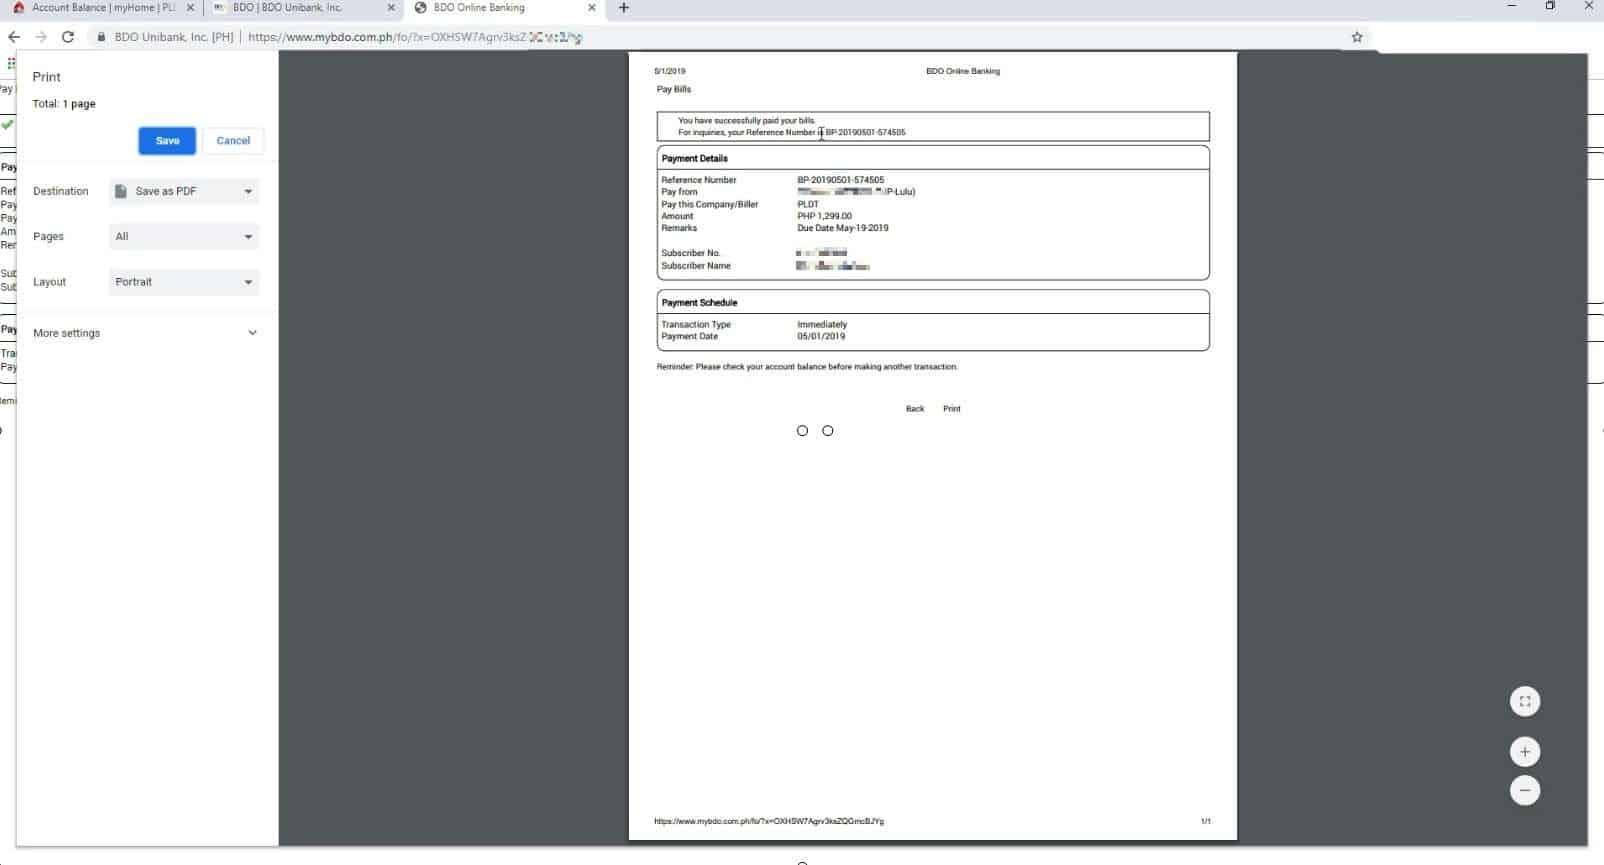
You have an option to print or save your payment transaction for future reference.
Share your experience below so that others will be guided as well. 🙂
Financial Transactions Made Easy!
More on our Youtube Channel.
Subscribe Now!

